22 Smart Closet System Ideas That Free Up Floor Space
Ever found one shoe by the closet door and had to dig through yesterday’s jeans for its mate? These closet system ideas put two easy-to-miss spots to work for you: the wall beside the door and the gap beneath your hanging shirts.
A narrow shelf can keep your everyday shoes together and leave the floor clear enough to sweep. A second rod can hold the trousers that usually end up draped over your laundry basket. Even the height of a backpack hook matters if you want your child to use it without help. As you look through these 22 setups, think about the last thing you had to move just to reach something else. That’s a good place to start, whether you’re organizing a small reach-in or a walk-in you share.
Double Hanging Rods
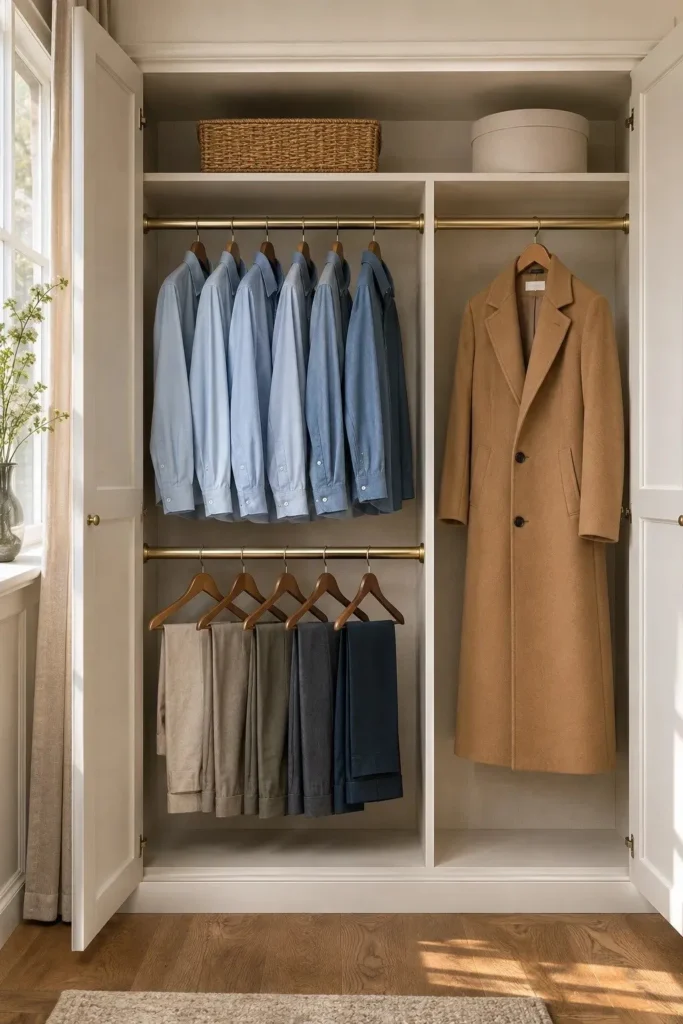
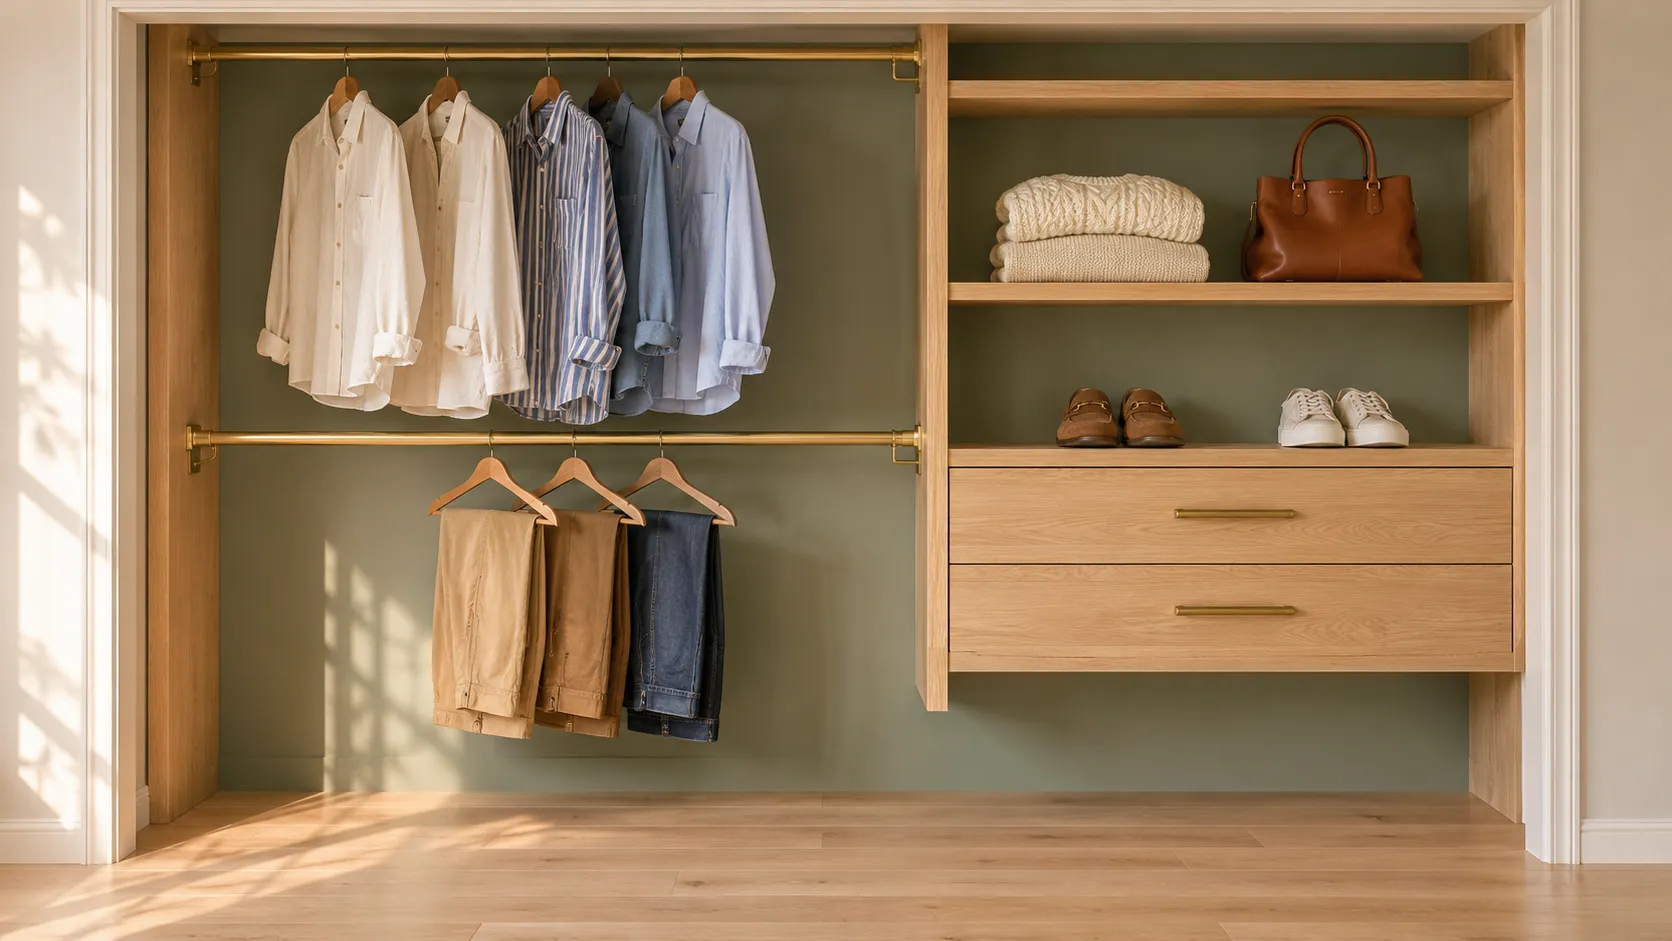
The gap beneath a row of shirts can hold a whole second row of clothes. Fit a lower rod under the section where your shortest tops hang. Before choosing its height, hang your longest shirt on the upper rod and hold a hanger with folded trousers below it.
Leave enough space between the rows to lift each hanger off its rod without catching a sleeve. Keep one end of the closet at full height for dresses and coats. Once your jeans and trousers have their own row, you can retire the basket that held them on the floor.
Floating Shoe Shelves

- Let your longest shoe set the shelf depth. Trace its outline on cardboard so you can test the fit before buying shelves.
- Hold the cardboard against the side wall and slide the nearest clothes along their rod. Leave room for sleeves to pass the shelf edge.
- Set your tallest ankle boots on a shelf before marking the one above it. Leave enough space to lift a boot out by its heel.
- Mount the lowest shelf high enough for your vacuum head to pass underneath. Check the fit with the vacuum you actually use.
Give your weekday shoes the shelf you can reach most comfortably. If two pairs of sneakers look alike from the front, turn one shoe in each pair heel out so you can see the back detail. That small adjustment makes it easier to grab the right pair on a rushed morning.
Closet Door Baskets

Quick Tip:
Will the door still close with a rolled tote in the basket? Hold a filled basket against the inside of the door and close it slowly to check clearance. For an over-the-door rack, also check that its top brackets fit under the frame.
Shallow baskets work well for the little things that end up in a tote on the closet floor. Give hats and scarves their own baskets, then reserve the one nearest the handle for folded shopping bags. You can grab a bag on your way out even if the door is only partly open.
Overhead Storage Shelf
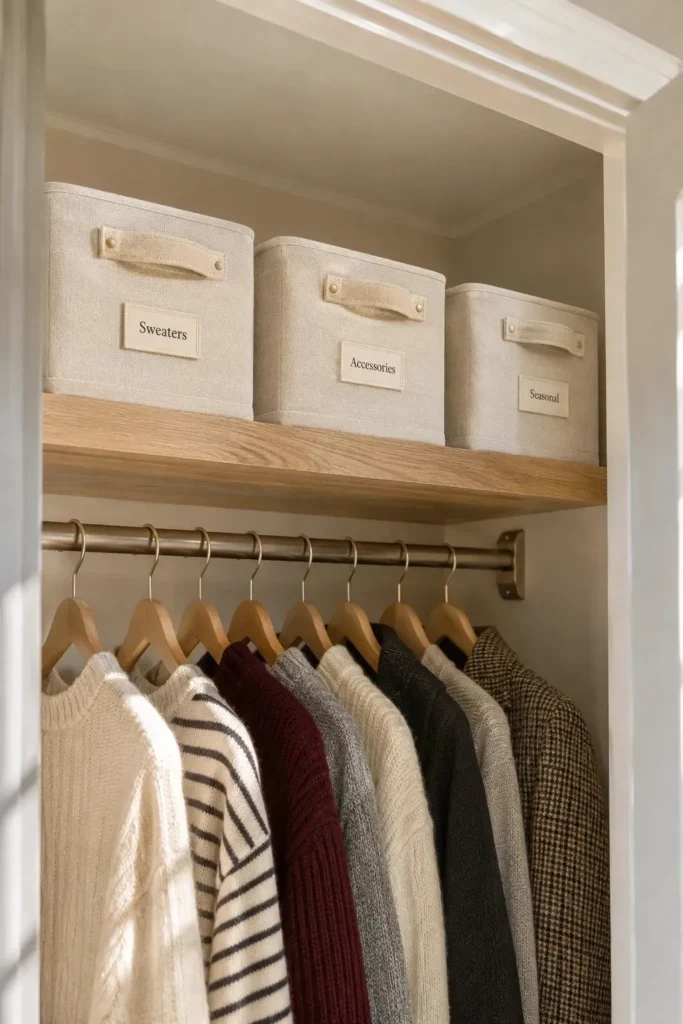
BEFORE: The guest quilt has its own spot on the closet floor. Every time you need the suitcase behind it, you have to lift the quilt out first.
AFTER: A shelf above the rod holds the quilt in a shallow zippered box, with spare bedding alongside it. The suitcase rolls straight out, and the box handles face forward so you can reach them.
Measure the gap between the proposed shelf and the top of the doorway before choosing boxes. A box can fit on the shelf and still be too tall to pull through the opening. Test the path with an empty carton first, then use that size for lightweight seasonal items.
Pullout Laundry Hamper
- Find the spot where yesterday’s clothes usually land. A hamper within reach of that spot is easier to use on a busy morning.
- Measure the cabinet opening and the space in front of it. With the closet door open, check that the frame can slide all the way out.
- Choose a pullout frame sized for the opening and install its runners according to the kit instructions. Test the slide with the bag in place.
- Pick a removable bag with handles so you can carry the laundry straight to the washer.
A pullout hamper earns its spot in a shared bedroom because one person can change without leaving a basket in the walkway. Before choosing the height, check how the bag comes off its frame. You need enough clearance beneath the shelf above to lift a full bag with both hands.
Divided Handbag Shelf
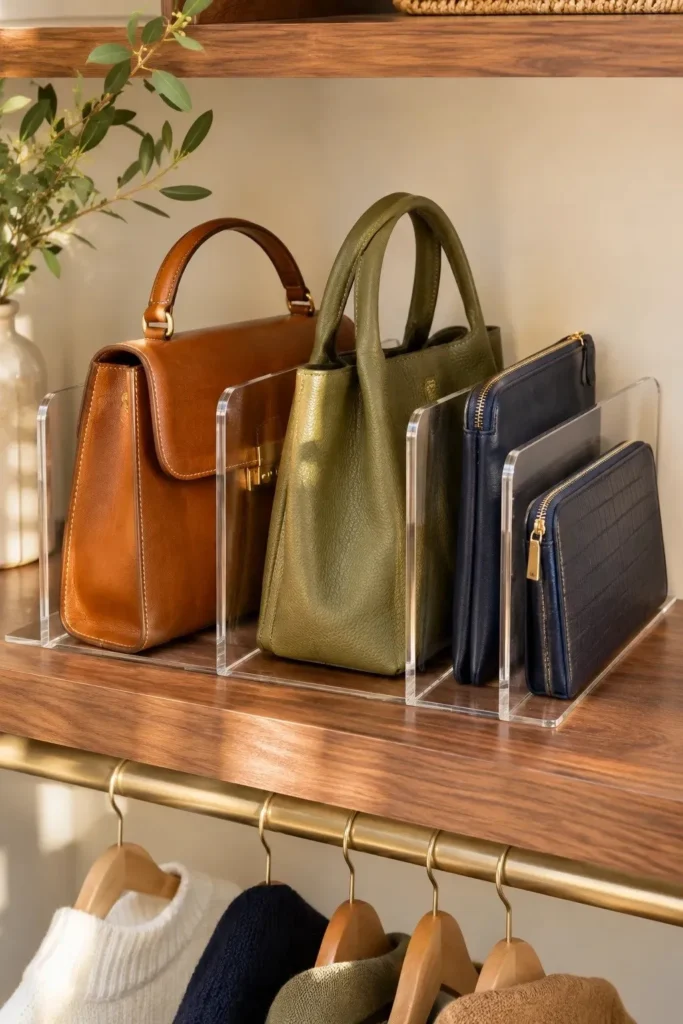
| Shelf detail | Fixed cubbies | Adjustable dividers |
|---|---|---|
| Bag width | Each opening needs to fit the bag you plan to store there. | Slide the dividers apart for a wide satchel or closer for a slim clutch. |
| Soft sides | The cubby walls support a tote if the opening is narrow enough. | Set the dividers just wider than the tote to keep it upright. |
| Shelf setup | A cubby insert needs room for its sides, top, and base. | Clip-on dividers use the existing shelf. Check that the clips fit its thickness. |
Stand your bags side by side on a table before choosing a layout. The space each one takes up with its handles relaxed is a better guide than its width when empty and flattened. Once the bags can stand independently, you can pull one out without the rest toppling onto the floor.
Backpack Hook Rail
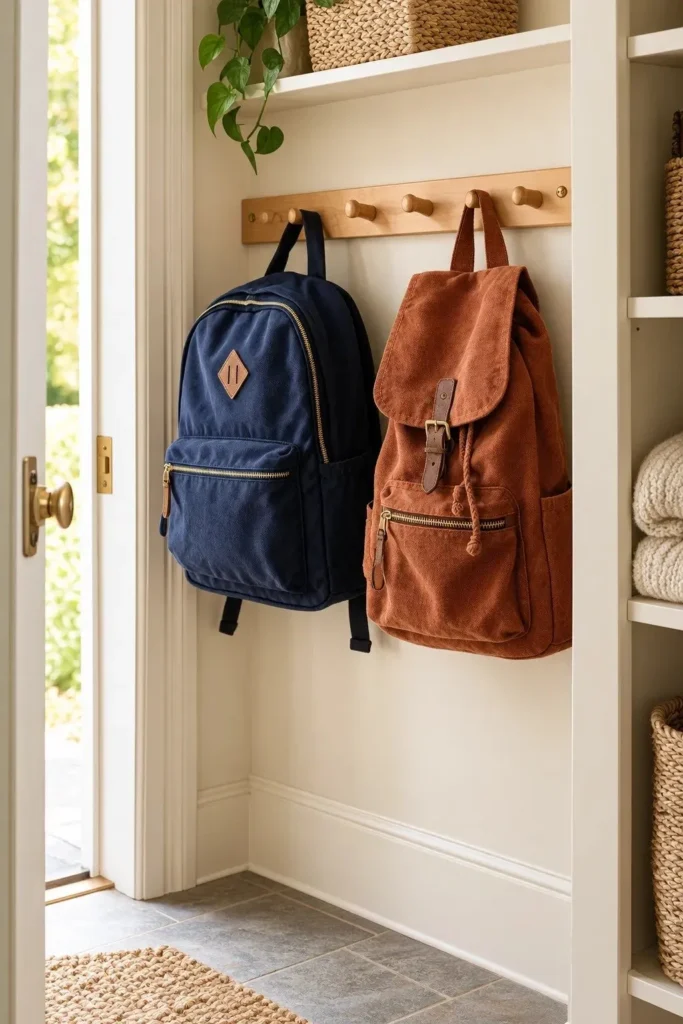
DO
- Give the backpack that lands in the doorway every afternoon its own hook.
- Have the shortest person who uses the rail reach up with their bag before you mark the height.
- Space the hooks with the backpacks full so one bag can come down without pulling its neighbor along.
DON’T
- Don’t choose hooks so thick that the bags’ top loops barely fit.
- Don’t place the rail where a full backpack will block the closet door.
- Don’t assume a decorative rail can hold schoolbooks. Check its weight rating and mounting instructions.
A short rail on the side wall works especially well for families whose bags all look alike. Give each person the same peg every day, with younger children closest to the opening. They can hang up a backpack without moving anyone else’s coat, and the doorway stays clear for the next person.
Hanging Sweater Cubbies
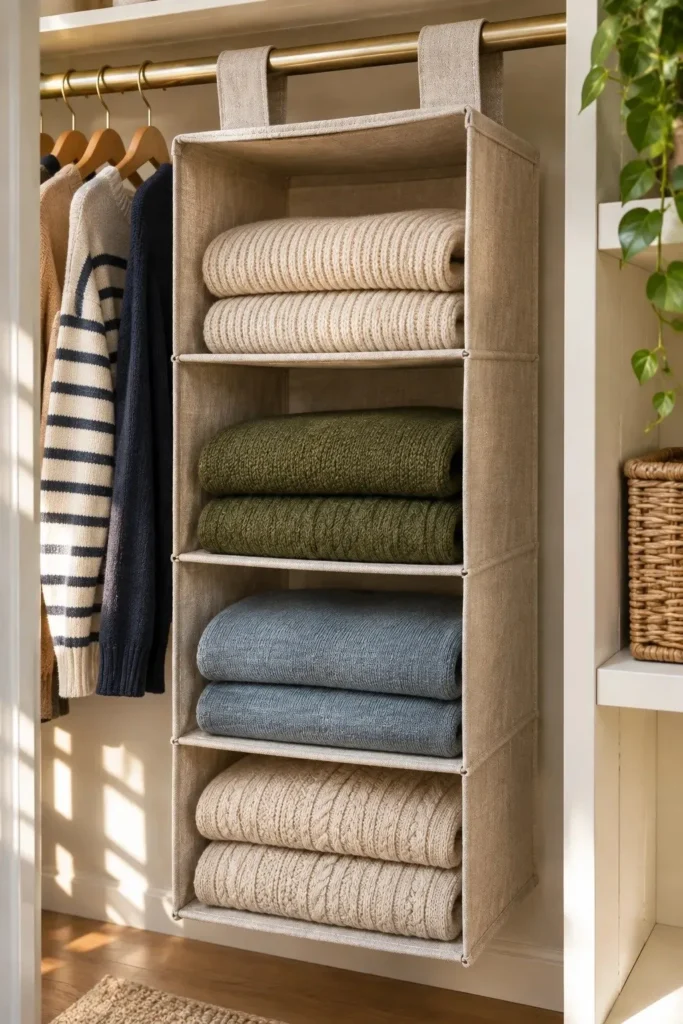
Best for: Bulky sweaters that topple when you pull one from the bottom of a stack.
Placement: A short stretch of rod beside your hanging clothes.
Fit check: Measure your widest folded sweater before choosing the cubby width.
Setup: Fasten the organizer around the rod and check its weight limit before filling it.
One or two sweaters per cubby makes the knits easier to see and keeps the lower one within reach. If your sweaters currently live in a floor basket, fold them before you shop and count how many cubbies you need. Leave a little room above each stack for your hand.
Closet Return Shelves
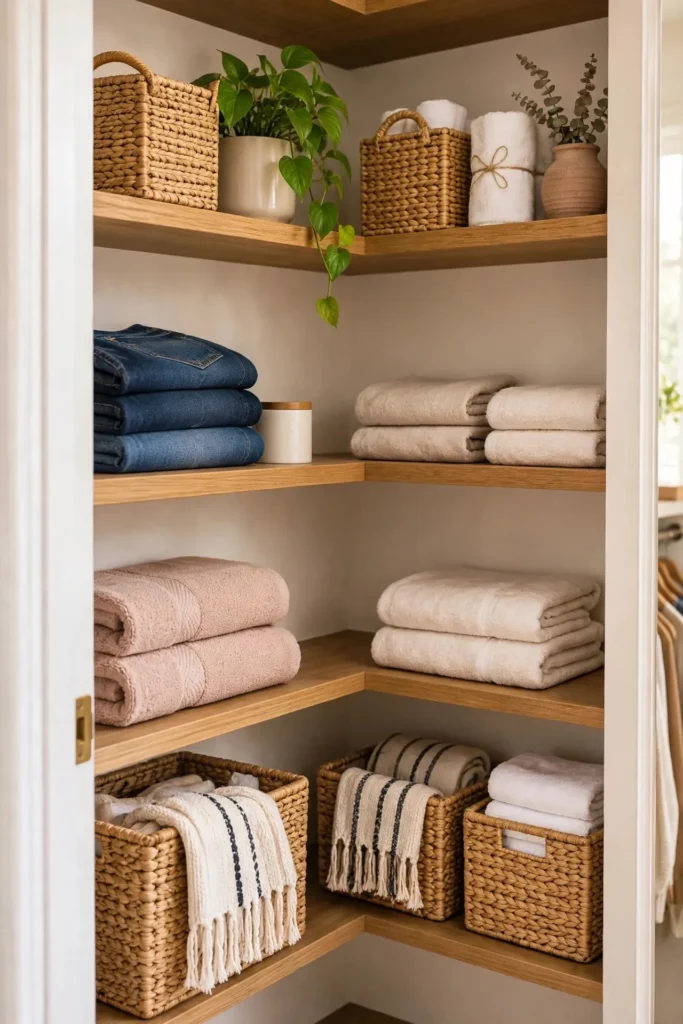
Some of the most useful closet system ideas start with the strip of wall hidden just beyond the doorframe. In a reach-in closet, this recessed space is called the return. A few shallow shelves there can take a stack of jeans off the floor while leaving the main rod open for shirts.
Tape a cardboard shelf outline to the side wall and hang your widest jacket beside it. Slide the jacket along the rod to see whether its sleeve catches the proposed edge. Then reach around the doorframe with a folded pair of jeans to check that you can put them away comfortably.
Floating Drawer Tower
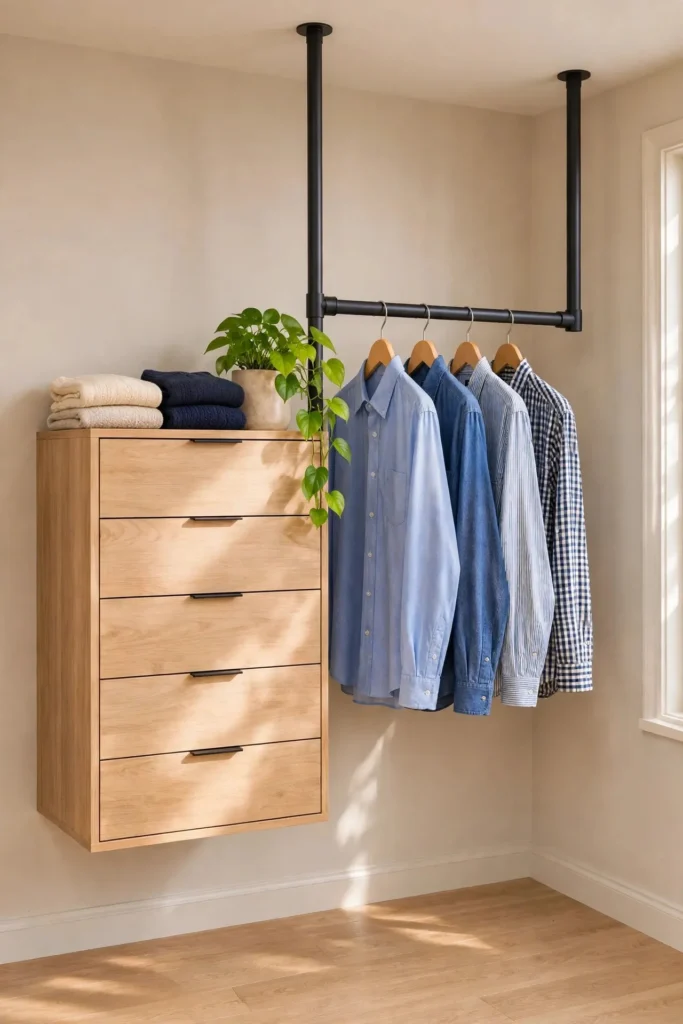
- Give socks and tees a drawer of their own if you’re always digging through a bin on the floor to find them.
- Open the closet door as far as it normally goes, then measure the clear opening. Each drawer needs room to slide past the door and its trim.
- Choose shallow drawers for small items so you can see what’s inside at a glance.
- Use a drawer unit designed for wall mounting. Follow its instructions for the supports and fasteners your wall requires.
Before fixing the tower in place, hang your longest shirt above it and open the top drawer. The hem should stay clear as the drawer slides past. Leave enough space below the bottom drawer for your vacuum head, especially if dust tends to gather along the back wall.
Hanging Boot Rail
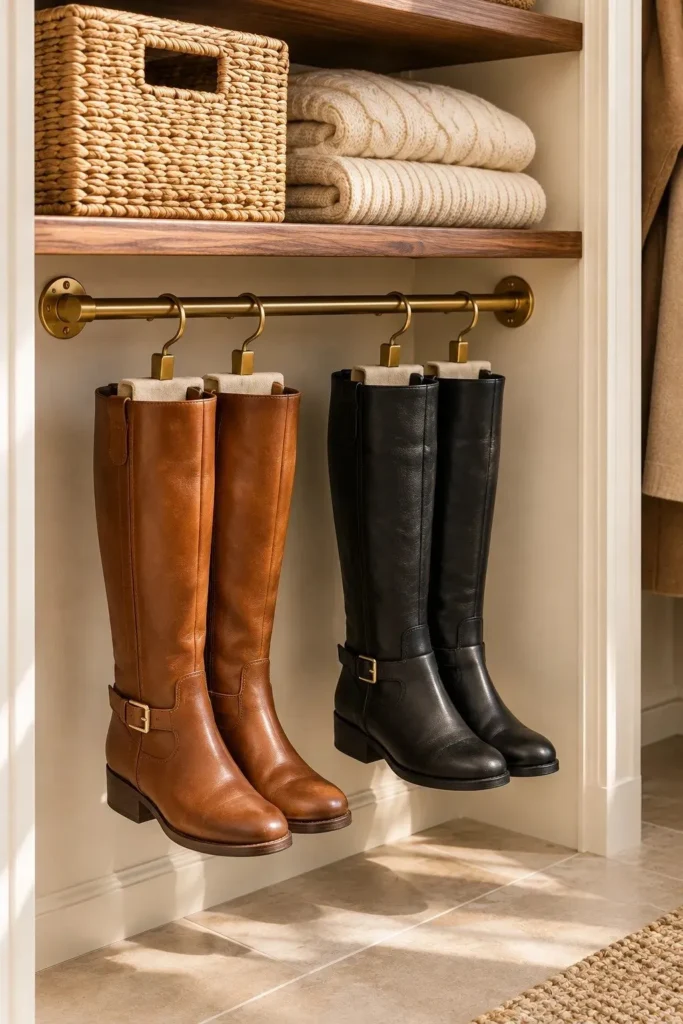
Quick Tip:
Let your tallest pair of boots set the rail height. Put them on the hanger you plan to use, then lift it into position and mark where the rail should sit while both soles clear the floor.
A short rail gives tall boots a place to hang without their shafts folding over each other. Choose hangers suited to the material, since tight clips can leave dents in soft leather. Space the pairs far enough apart that you can lift one hanger without pulling its neighbor off the rail.
Foldaway Ironing Board

BEFORE: The folded ironing board leans across the baseboard, right in front of the laundry basket. Pulling out the basket means catching the board with one hand before it slides sideways.
AFTER: A cabinet on the closet wall holds the board upright between uses. For a quick collar touch-up, you can lower it into position and reach both sides from the same spot.
Mark the board’s open length on the floor with painter’s tape before choosing the cabinet location. Stand beside the outline as if you were ironing a shirt, then check the door swing and the distance to the outlet. The cord should reach without stretching across the spot where you stand.
Slide-Out Pants Rack

- Pick up the pair you always pull from the bottom of the jeans pile. Fold it over a hanger and measure from fold to hem to find the clearance you need beneath the rack.
- Measure the underside of the shelf and the space in front of it. Check that the rack can extend past the closet door without hitting the handle.
- Choose a shelf-mounted rack with open-ended bars. Follow the mounting instructions for your shelf material, with the open ends facing the side you’ll reach from.
- Hang one pair per bar, with the waistband and hems balanced across it. Slide the loaded rack in and out to check that nothing drags.
The payoff shows up when you want the navy trousers sitting between two pairs of jeans. Pull the rack forward and lift just that pair from its bar. If your old pants stack lived in a basket on the floor, you can take the basket out of the closet altogether.
Luggage Storage Bay
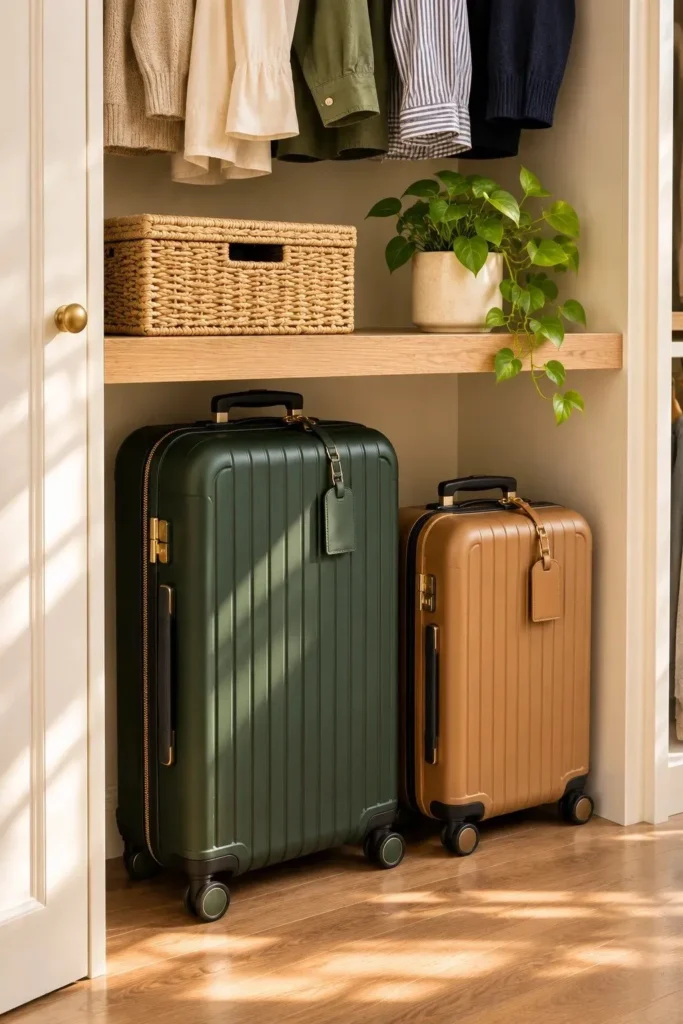
| Storage detail | Suitcases nested together | Suitcases side by side |
|---|---|---|
| Floor space | Two cases can share the footprint of one. | Each case needs its own wheel space beneath the shelf. |
| Access | Open the larger case to retrieve the smaller one. | Roll either case out by its handle. |
| Best fit | A larger case and a smaller one you use occasionally. | A frequent traveler’s carry-on beside a larger checked bag. |
Set your suitcases on their wheels before deciding where the shelf belongs. Measure to the top of the tallest case, including its fixed handle, and leave room for your fingers above it. That small gap lets you pull the case forward without scraping your knuckles against the shelf.
Wall-Mounted Broom Grippers
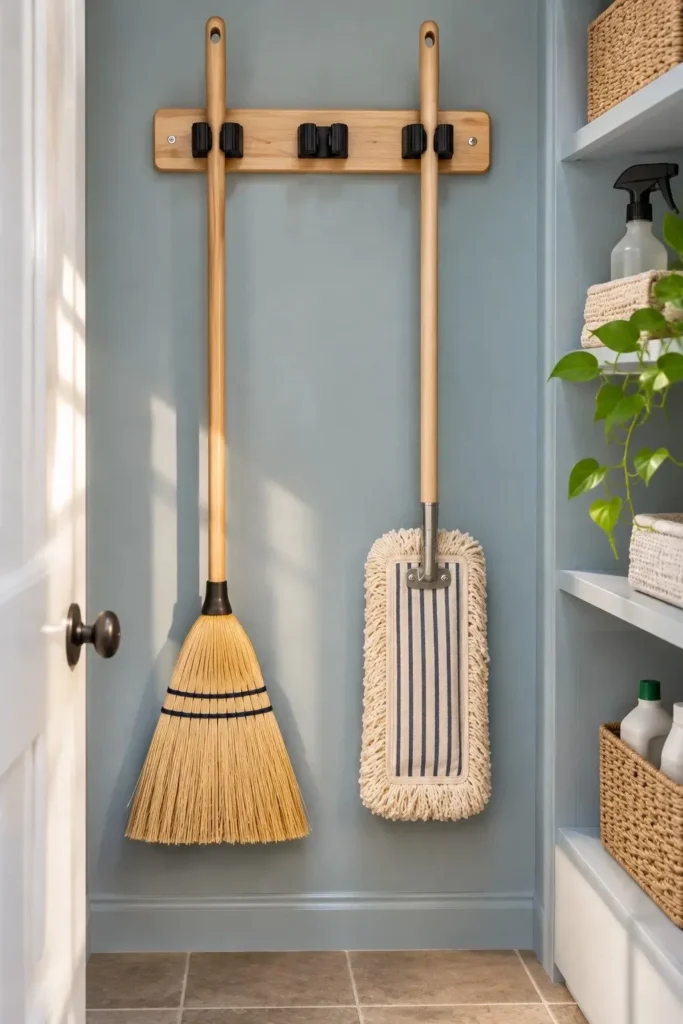
DO
- Give the broom its own gripper so pulling it out doesn’t bring the mop down with it.
- Test each handle in a gripper before mounting the rail. A thick padded handle may fit better farther down its shaft.
- Hold the widest broom head against the wall to check spacing before marking the next tool’s spot.
DON’T
- Don’t mount the rail so high that you have to stretch to release a handle.
- Don’t let broom bristles carry the weight of the broom against the floor.
- Don’t hang a damp mop against the closet wall. Let it dry first.
In a narrow utility closet, the best spot is often the side wall closest to the doorway. You can reach in for the broom while the vacuum stays parked at the back. Angle a wide broom head along the wall so its bristles clear the door as it closes.
Pullout Valet Rod
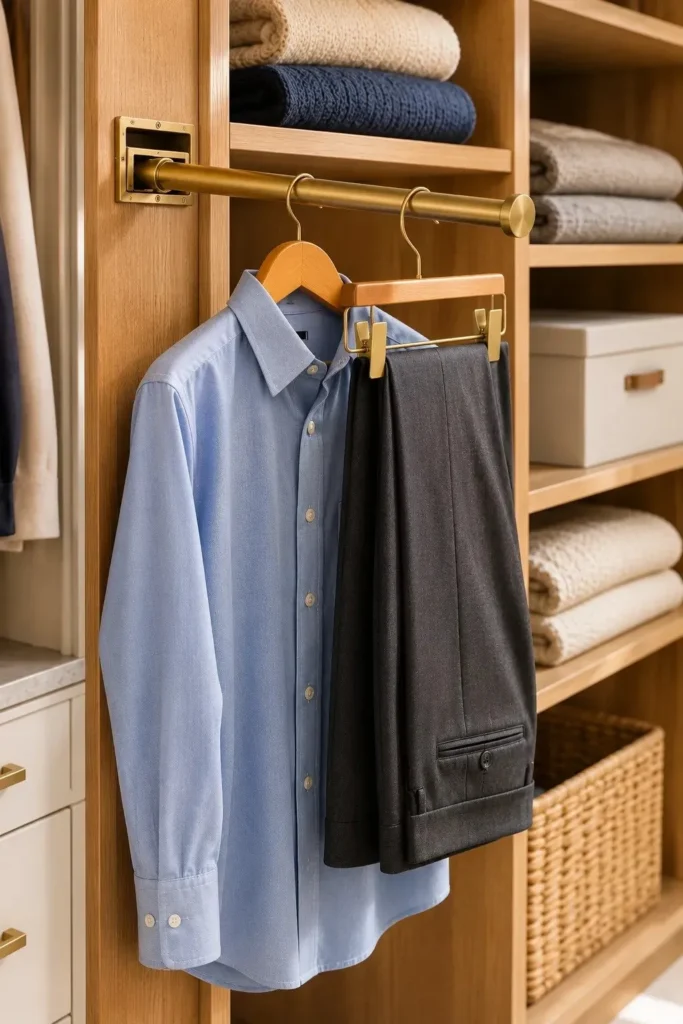
Best for: Tomorrow’s outfit that usually spends the night on top of the shoe basket.
Placement: The front edge of a solid closet side panel.
Fit check: Extend a tape measure to the rod’s full length and check the door swing.
Capacity: Follow the hardware’s load rating, especially if you plan to hang a heavy coat.
Hang the shirt and trousers on separate hangers so you can take either piece down without disturbing the other. If you’re packing for a trip, use the rod to check one outfit at a time before it goes into the suitcase. Slide it back once the hangers come off.
Upright Gift Wrap Rack
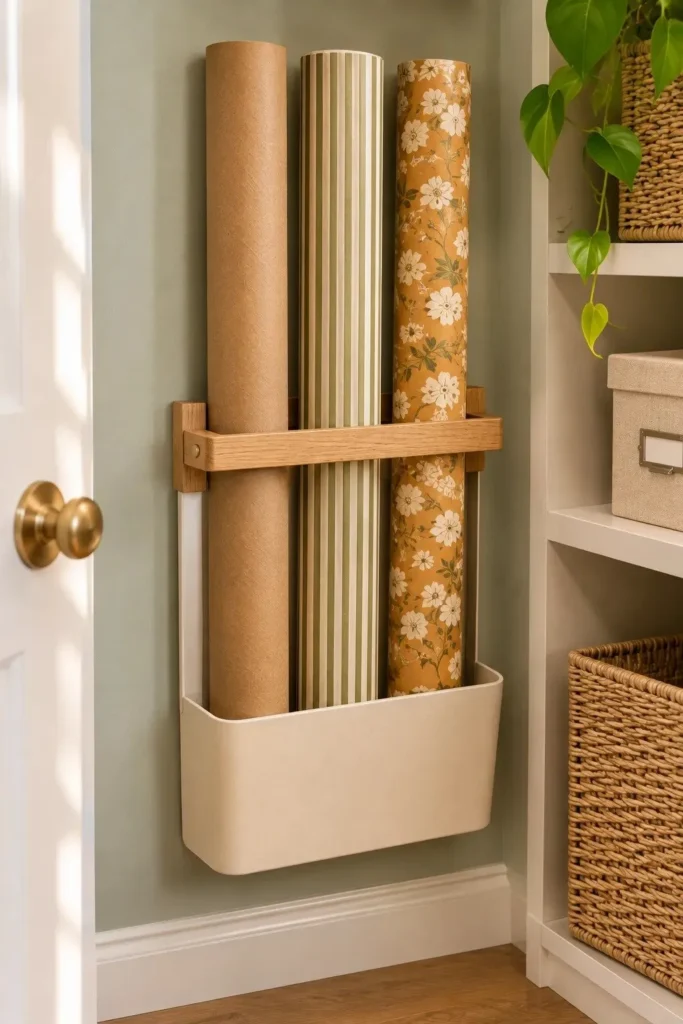
A half-used roll of wrapping paper has a habit of tipping across the closet just as you shut the door. Stand the rolls in a shallow wall-mounted bin with a solid base. Add a retaining rail higher up so the longer rolls stay upright when you pull one out.
Before fixing the rail in place, test its height with your shortest roll. The top should peek above the rail far enough to grasp. Leave one slot empty so there’s room to tilt a roll toward you, especially if a shelf overhead limits how far you can lift it.
Wall-Track Closet System
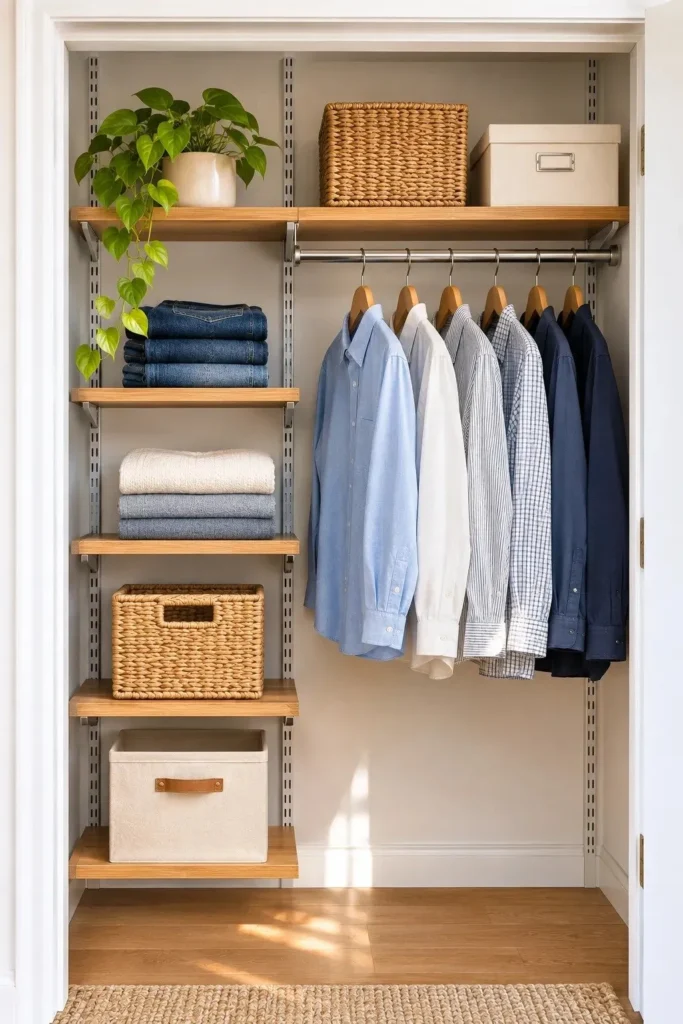
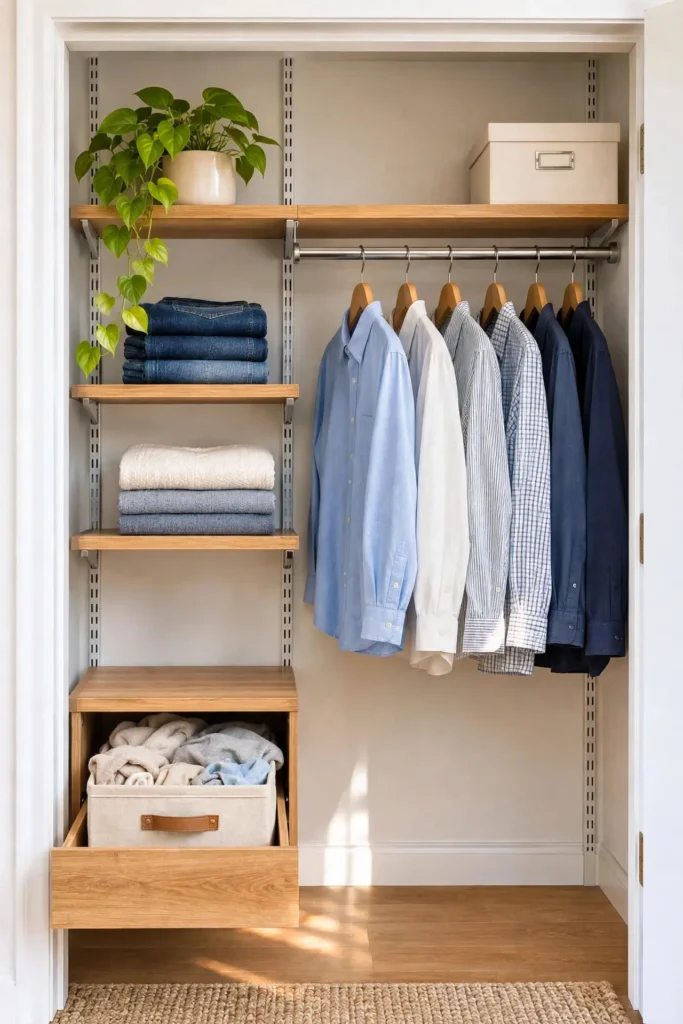
- Start with the pile taking up the most floor space. If it’s folded clothes, plan a shelf bay wide enough for two stacks side by side.
- Mark the proposed shelf and rod positions with painter’s tape. Hold a hanger against the marks to check where shirt hems will fall.
- Choose track spacing and fasteners that match the system’s mounting instructions and your wall construction.
- Set the lowest shelf at a height that lets you reach the back without kneeling. Keep everyday stacks near the front.
The advantage of slotted tracks shows up when your storage needs change. A shelf that held sweatshirts all winter can move down a few slots to make room for taller stacks of bath towels. Before shifting the brackets, empty the shelf and mark the same slot on both tracks.
Under-Shelf Wire Basket

Quick Tip:
Test the gap beneath your shelf with a folded stack of pillowcases before choosing a basket. Leave enough room above the stack to slide your hand in and lift out the top pair without snagging it on the wire.
Small linens tend to disappear under bath towels, which is how a separate bin for pillowcases ends up on the floor. An open-front basket gives them their own spot within reach. Check the shelf thickness before buying, since the basket arms need to fit over its front edge.
Mirrored Accessory Cabinet
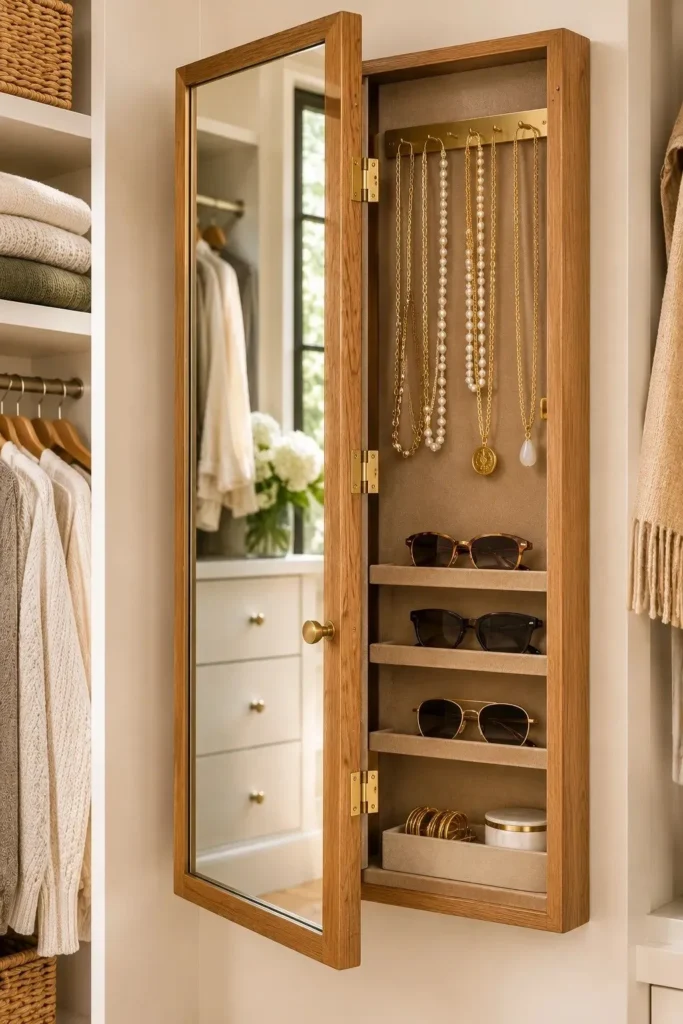
BEFORE: A full-length mirror leans against the closet wall. Its feet sit several inches out from the baseboard, and yesterday’s jeans have slipped into the gap behind it.
AFTER: A shallow mirrored cabinet hangs on that same wall, leaving the floor beneath it clear. Open the mirror to choose a necklace or sunglasses, then close it to check how they look with your outfit.
Use painter’s tape to mark the cabinet outline before choosing its height. Stand where you normally get dressed and check that you’ll be able to see your shoes in the mirror. Then trace the door’s swing so you know whether you can stand comfortably beside it while choosing jewelry.
Sliding Closet Doors
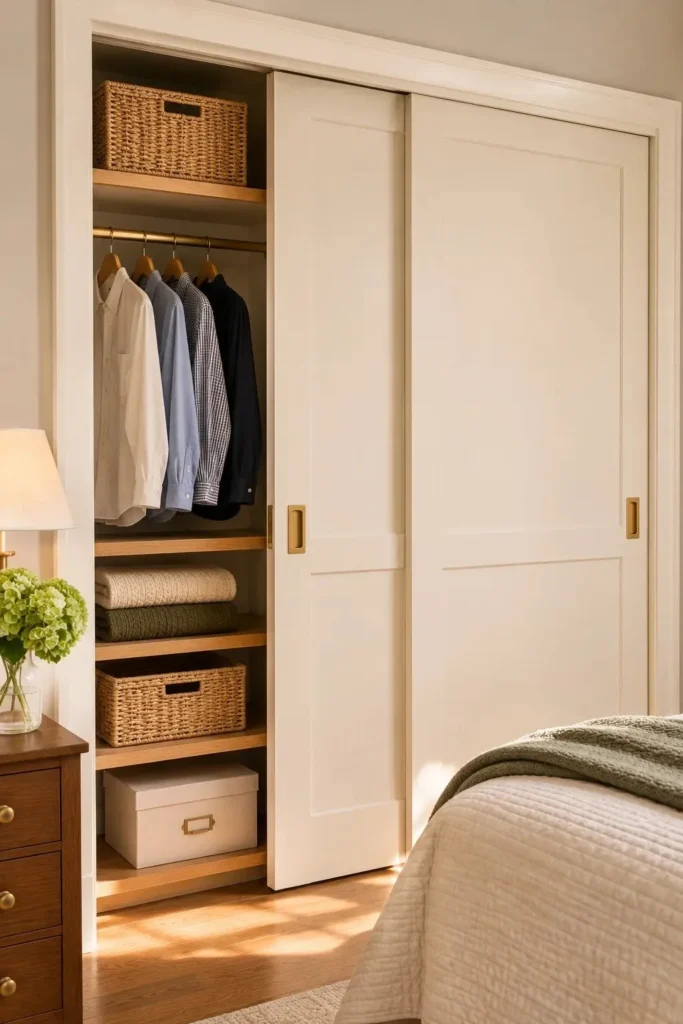
- Open your current closet door and notice where you have to step aside. In a tight bedroom, two sliding panels can free that strip of floor between the closet and the bed.
- Measure the finished opening at the top, middle, and bottom. Use the door kit’s sizing guide to choose panels with the correct overlap.
- Tape out the accessible opening on each side. Check that drawers and pullout baskets can extend fully while the other half of the closet is covered.
- Fit the track and floor guide according to the kit instructions. Choose recessed pulls so the panels can pass each other without catching.
Plan the inside layout around whichever half you open most often. Keep weekday clothes behind that panel and occasional pieces on the other side. If you share the closet, giving each person one side also saves you from sliding both doors back and forth to put away a single outfit.
Tension Pole Wardrobe
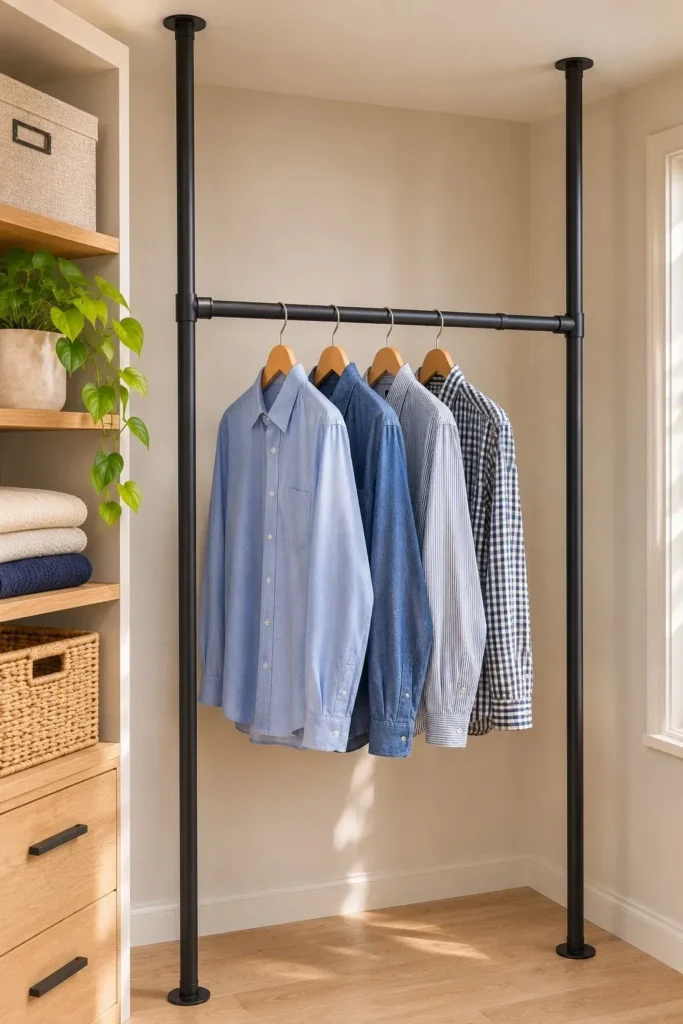
| Closet detail | Freestanding garment rack | Tension pole wardrobe |
|---|---|---|
| Floor space | Projecting feet can catch your toes when you reach for a shirt. | Two small pole bases leave the floor beneath the rail clear. |
| Best fit | A space where you want to move the whole rack occasionally. | A narrow alcove where you want clothes to stay in one place. |
| What to measure | Check the depth of the feet as well as the width of the rail. | Measure the ceiling height at both pole positions and check the kit’s adjustment range. |
Before choosing a tension pole kit, check that it suits your floor and ceiling surfaces. Then mark the proposed rail position with tape and hold your widest coat there on a hanger. Its shoulders should clear the back wall, and you should be able to stand comfortably in front of it.
Conclusion
A closet feels easier to use when putting something away takes as little effort as taking it out. Try one of these closet system ideas with the item that lands on your floor most often. Before you mount a shoe shelf, hold a piece of cardboard where it would sit. Set your sneakers on it and check that you can reach the pair and close the door.
Save this post on Pinterest so you have the layouts handy when you measure, and share it with someone who’s always hunting for a matching shoe. Give that first pair a home you can reach on a busy morning.