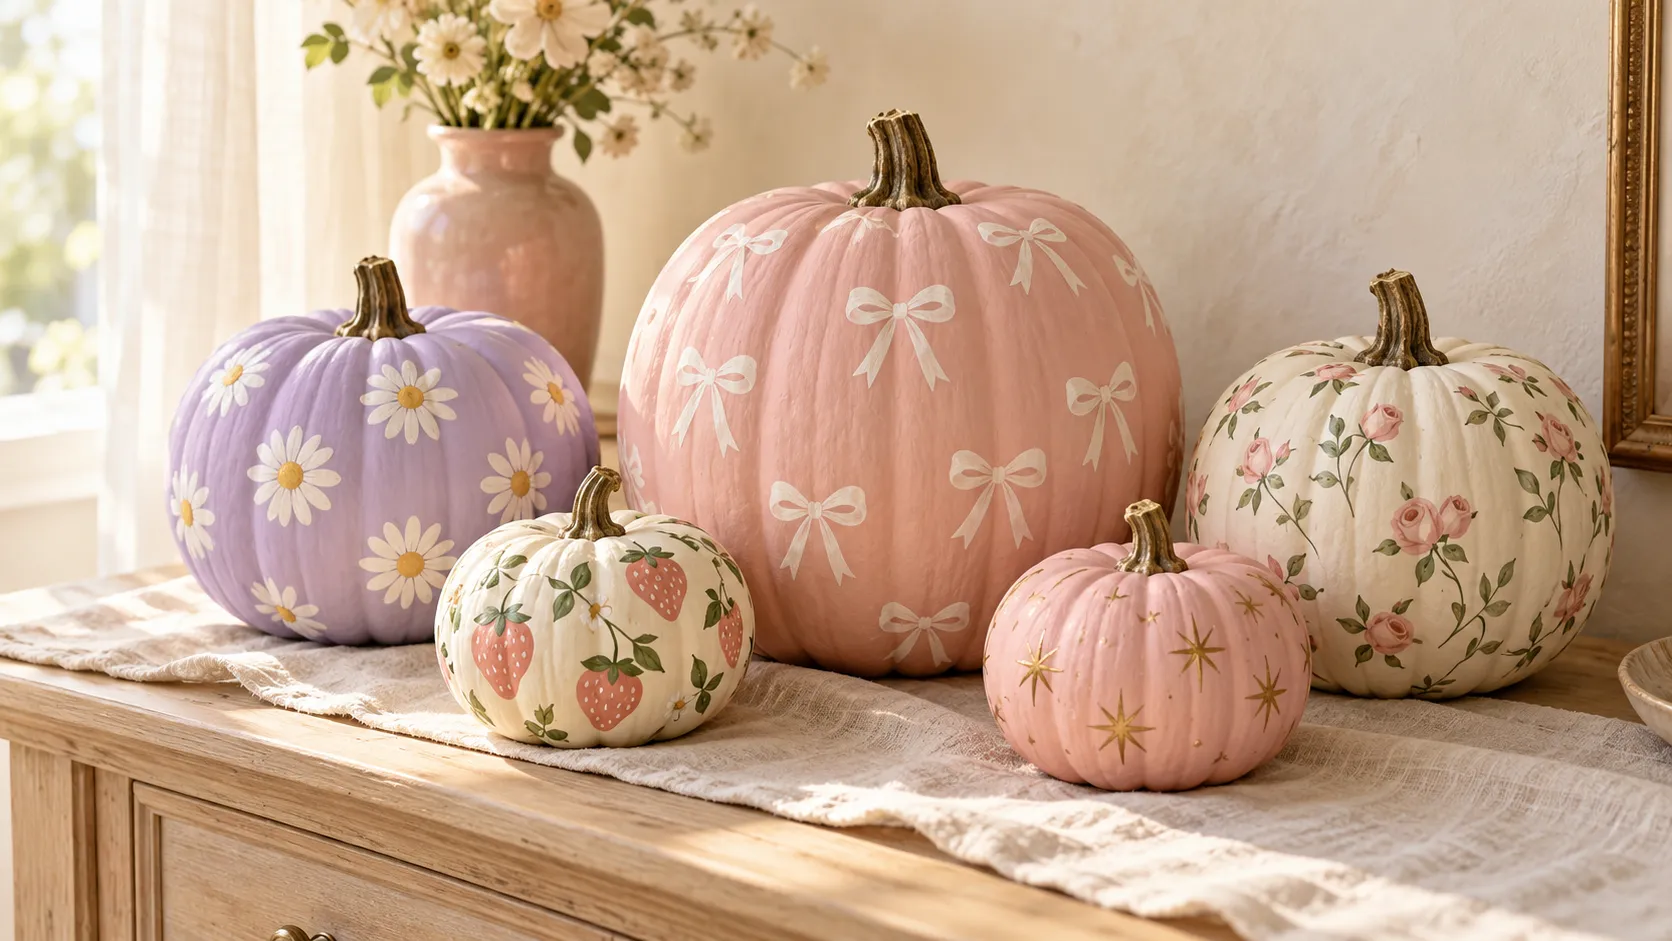
24 Dreamy Girly Pumpkin Painting Ideas to DIY at Home
A pumpkin covered in blush bows feels right at home beside your favorite pink vase. If your search for “painting pumpkins ideas diy girly” brought you here, these 24 designs give you a clear place to start.
Think blush gingham, delicate daisies, golden starbursts, and little strawberries that brighten a shelf without taking over the room. A few paint colors and a small brush are enough for many of these designs.
Blush Pink Bows

Tiny painted bows give a plain pumpkin the sweetness of ribbon without loose ends or glue. Start with a clean, dry surface and apply thin coats of blush acrylic paint. Once dry, lightly sketch three or four bows across the front, leaving breathing room between each one.
Use a fine round brush to paint the loops in ivory, then pull two curved tails beneath each knot. Rotate the pumpkin as you work so your wrist stays comfortable. A slightly uneven bow still feels charming; keep the knot small so the shape reads clearly from across the room.
Pastel Daisy Clusters
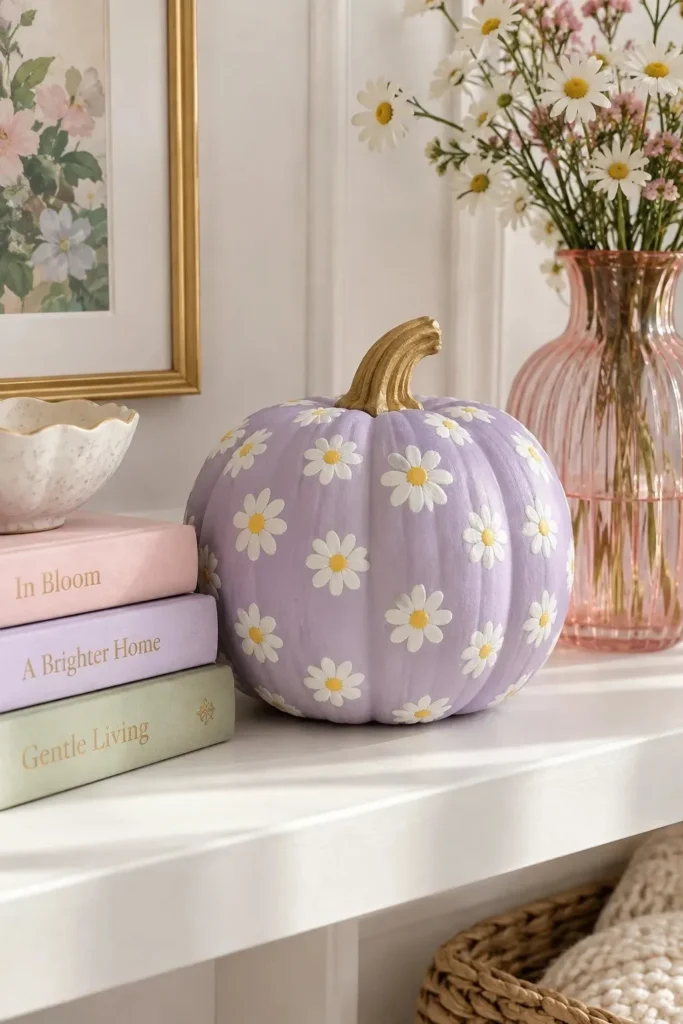
- A cluster of tiny daisies makes even a lopsided pumpkin feel playful. Cover the surface in pale lavender and let the base dry completely.
- Dip a small round brush in white acrylic paint and press five or six short petals around an empty center.
- Let the petals dry, then dot each center with buttery yellow paint using the rounded end of a brush handle.
- Group flowers in threes near the front, with a few singles around the sides. Leave lavender gaps so the pattern stays readable.
Choose smaller daisies for a mini pumpkin and wider petals for a larger one. The repeated flower shape creates a coordinated look without needing identical blooms. For a shelf display, pair your finished pumpkin with one plain pink pumpkin so the floral pattern has a quieter neighbor.
Pearl White Swirls

Quick Tip:
Let the light do half the decorating. Test pearlescent white paint over your dried ivory base first, since the shimmer may look faint straight on. Paint one loose swirl on each raised rib, then check the effect beside a window.
Keep the swirls broad and spaced apart so their curves remain visible. A small round brush gives you more control than a wide flat brush. Place the finished pumpkin where light reaches it from the side, and skip a matte topcoat that could dull the pearly finish.
Strawberry Pink Gingham
BEFORE:
A bright orange pumpkin can steal all the attention from a soft pink display. Its strong color may feel disconnected beside cream ceramics and pale wood.
AFTER:
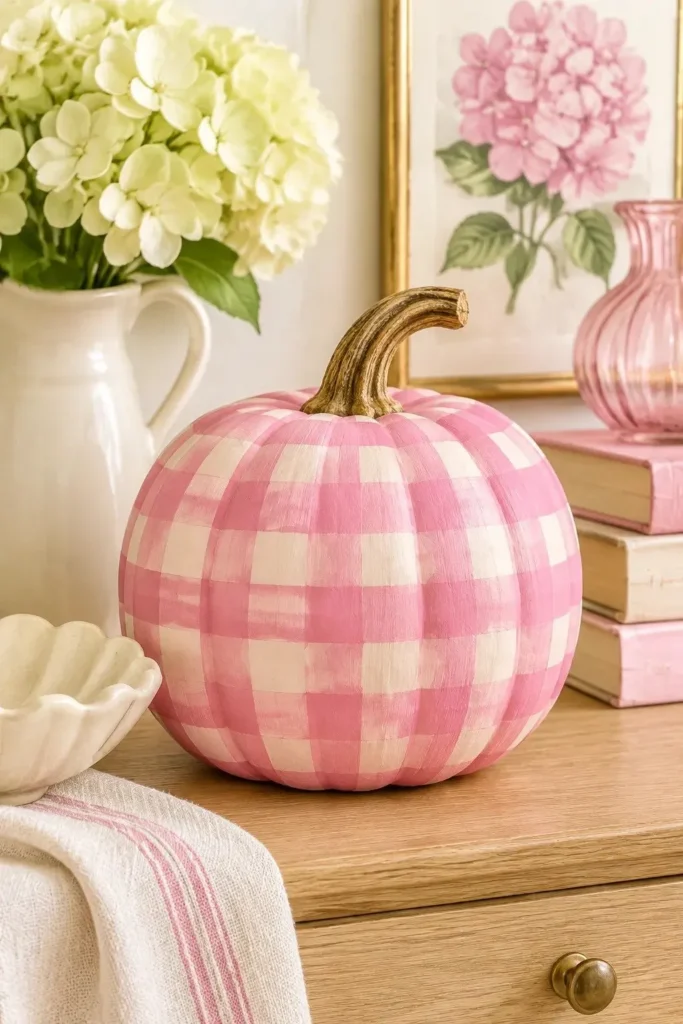
An ivory base with strawberry pink checks brings those softer colors together. Darker pink squares at the stripe intersections create the familiar gingham pattern.
Paint evenly spaced pink stripes vertically, using the pumpkin ribs as rough guides. Once dry, add horizontal bands of similar width, then deepen the crossing squares with a darker pink. Keep your brush lightly loaded to avoid drips in the grooves. Wider checks are easier to manage on deeply ridged pumpkins.
Tiny Cherry Pairs
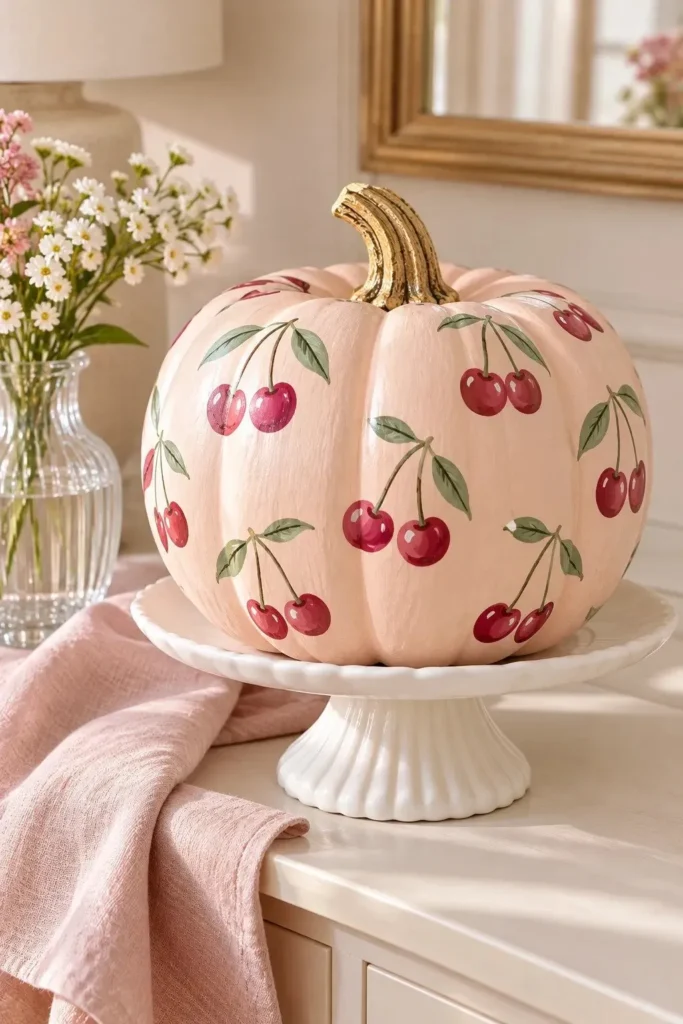
- Two little red dots are all you need to start a cherry pair. Prepare your pumpkin with pale peach paint and let the base dry completely.
- Paint pairs of raspberry red circles with a small round brush. Leave a narrow gap between each pair and enough space above for the stems.
- Draw two thin sage green stems that meet above the cherries. Add one small leaf beside the joining point.
- Once the red paint dries, place a tiny white highlight near the upper edge of each cherry. Keep these marks small so they suggest shine without covering the fruit.
Scatter the pairs loosely instead of arranging them in strict rows. That spacing makes small differences in size feel intentional. Turn the pumpkin between motifs and leave the bottom mostly plain, where details are harder to see. This design suits a kitchen shelf or breakfast table.
Rose Gold Hearts

| Detail | Hand-Painted Hearts | Stenciled Hearts |
| Finished look | Soft, uneven hearts give the pumpkin handmade charm. | Crisp, matching hearts create a tidy repeating pattern. |
| Tools | Fine round brush and a pencil for light outlines. | Small flexible heart stencil and a makeup sponge. |
| Painting method | Join two small teardrop shapes at their pointed ends. | Hold the stencil flush and dab with a lightly loaded sponge. |
| Suitable surface | Curved pumpkins with room to position individual hearts. | Smooth faux pumpkins or broad areas between shallow grooves. |
Choose a dusty pink base so the rose gold hearts catch light without harsh contrast. Let the base dry fully before painting or stenciling. Metallic coverage varies, so add another thin coat if needed. With a stencil, excess paint can seep under the edges and blur the shape.
Lavender Crescent Moons
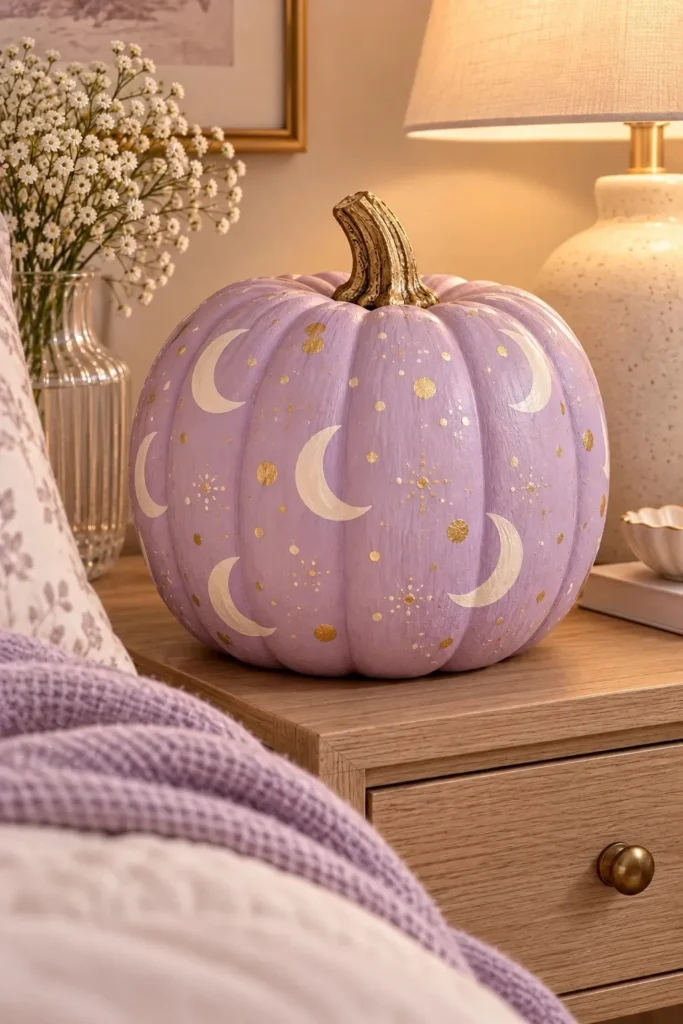
DO:
- Give a lavender pumpkin a little night-sky sparkle with ivory crescents and tiny gold dots.
- Sketch each crescent as two curved lines that meet at both pointed ends.
- Paint the moons with a fine round brush after the lavender base dries.
- Space the moons unevenly and leave the busiest cluster facing forward.
DON’T:
- Fill every gap with stars or dots.
- Draw large moons across deep grooves, where the shape becomes harder to control.
- Add metallic details over wet ivory paint.
A narrow crescent needs less detail than a full moon with facial features, which keeps this design manageable for beginners. Practice the shape on scrap paper first. Beside a cream lampshade or pale wood frame, the lavender and gold palette creates a gentle celestial accent for a bedside table.
Pink Ombre Fade

Result: A soft peach-to-pink fade makes the pumpkin’s curves the main feature.
Skill Level: Beginner, with a little patience for blending.
Tools: Acrylic paints, makeup sponges, and a reusable mixing palette.
Best For: Smooth faux pumpkins with shallow grooves.
Apply a pale peach base and let it dry. Sponge light pink around the lower half, then deepen the color near the bottom. Tap upward with a clean sponge to soften each boundary before the paint dries. Build the color gradually; a heavily loaded sponge leaves distracting blobs.
Lilac Butterfly Silhouettes
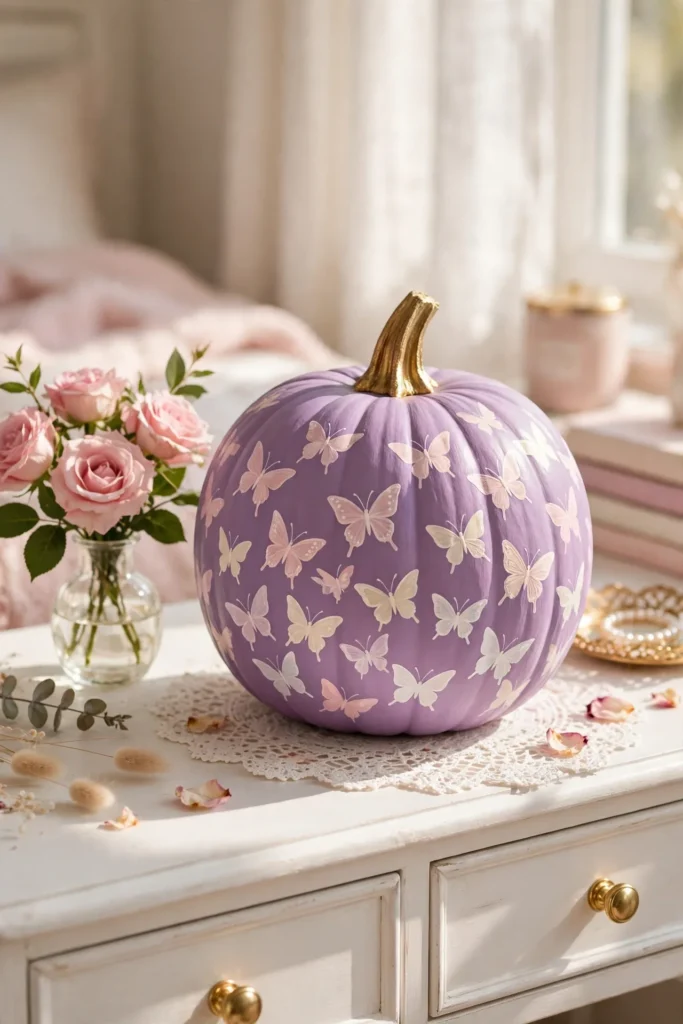
Butterflies do not need detailed wings to feel delicate. On a dry ivory base, sketch a short vertical body with two rounded upper wings and two smaller lower wings. Fill each silhouette with lilac acrylic paint, working from the center outward so the wing edges stay easy to follow.
Angle a few butterflies upward and keep others nearly horizontal to suggest movement. Two sizes are enough for variety without making the pattern busy. Leave the antennae off smaller shapes if they become fiddly. For a coordinated pair, repeat the motif on a lilac pumpkin with ivory wings.
Scalloped Pastel Bands

- Soft scallops give painted stripes the look of a ruffled hem. Begin with an ivory base and let it dry.
- Lightly sketch three horizontal bands around the lower half, leaving the upper portion plain.
- Draw small connected semicircles along the top edge of each band. Keep them broad enough to paint with a small round brush.
- Fill the bands with blush, peach, and pale lilac, letting each color dry before painting an adjoining section.
- Turn the pumpkin as you work and adjust the final scallop at the back if the spacing does not meet evenly.
Keep the bands similar in height so the colors look balanced. On a small pumpkin, two bands may leave more room for clear scallops than three. A white cake stand raises the painted lower half into view, making this pattern especially useful for a kitchen counter or open shelf.
Pink Marble Veining

Quick Tip:
A few wandering veins look more convincing than a web of matching lines. Paint one broken diagonal vein, then add only two or three thinner branches. Use a barely damp brush to soften selected edges while the paint is still wet.
Start with a fully dried blush base, then use dusty rose and muted mauve for the veining. Roll a fine brush gently between your fingers as you pull the line to vary its thickness. Leave generous blank areas; the quiet background helps each irregular detail resemble natural stone.
Blush Color Blocks

BEFORE:
Too many tiny motifs can make a small pumpkin look crowded. After searching for “painting pumpkins ideas diy girly,” you might have several favorite colors but no clear way to combine them.
AFTER:
Two generous blocks of blush and cream give those colors room to stand out. A diagonal boundary creates a simple graphic design that stays readable across the room.
Paint the pumpkin cream and let it dry completely. Lightly pencil a diagonal line around the middle, then fill the lower section with blush using a small flat brush. Follow the pencil mark slowly through each groove. Display it beside patterned decor when the arrangement needs a calmer element.
Rosebud Vine Trails

- Little spiral roses bring a garden feel to a plain pumpkin. Start with a warm ivory base and let it dry completely.
- Paint loose blush circles in a trailing curve across the front. Vary their sizes slightly and leave space between flowers.
- Once dry, add two or three short dusty rose curves inside each circle. Keep some blush showing around the darker marks.
- Connect the roses with a fine sage green vine, then add tapered leaves in pairs. Let the vine bend around the flowers instead of running straight through them.
Place the largest rose near the lower front and make the flowers smaller as the trail curves upward. That change in scale gives the design a clear direction. Stop the vine before it reaches the stem, leaving a little empty space to keep the arrangement from feeling crowded.
Pastel Polka Dots
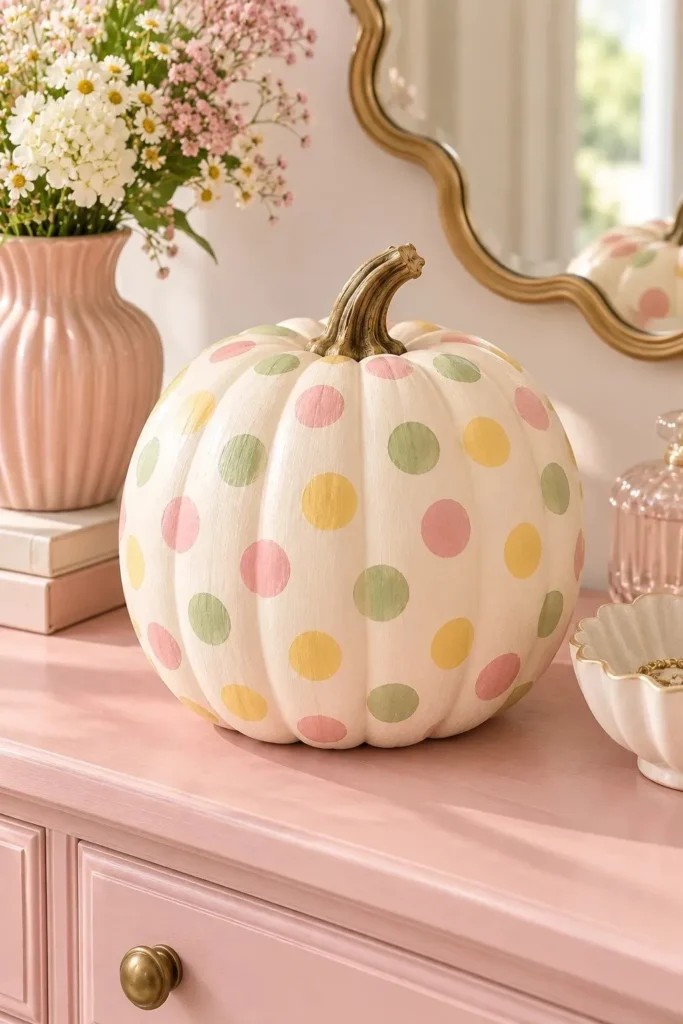
| Detail | Sponge Pouncer | Rounded Brush Handle |
| Pattern | Go bold with large, widely spaced dots. | Create a delicate pattern with tiny pastel dots. |
| Technique | Press a small round sponge pouncer straight down, then lift. | Dip the rounded handle end in paint and touch it to the surface. |
| Paint amount | Blot the sponge on scrap paper before each impression. | Use a small bead of paint without a hanging drip. |
| Placement | Position dots on broad areas between the grooves. | Fit smaller dots into narrower spaces around the pumpkin. |
Limit the palette to three pastel colors over a dry cream base. Start with widely spaced dots, then fill obvious gaps only after stepping back to check the pattern. Test your tool on scrap paper between colors. Too much paint creates raised blobs that take longer to dry.
Pink Leopard Spots
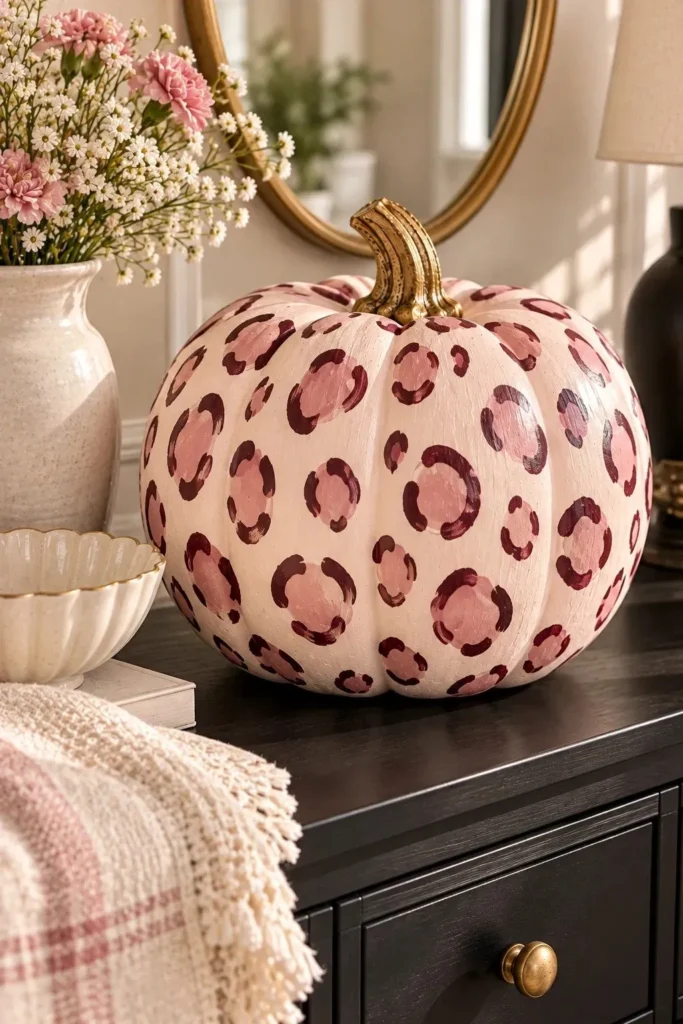
DO:
- Let a few wobbly spots become the charm of your leopard print.
- Paint irregular dusty rose patches over a fully dried blush base.
- Add two or three broken burgundy curves around each dry patch.
- Scatter a few small burgundy marks between the larger shapes.
DON’T:
- Outline every spot with a complete ring.
- Pack the spots tightly enough to hide the blush background.
- Repeat exactly the same shape and direction across the surface.
Muted burgundy outlines tie the darker details to the pink base. The broken borders matter more than precise brushwork, so this pattern tolerates small slips. Pair the finished pumpkin with plain cream decor and give it some space; nearby stripes or florals can make the display feel too busy.
Blush Terrazzo Flecks

Result: Tiny painted chips give a plain pumpkin the look of pink terrazzo.
Skill Level: Beginner, with no matching shapes required.
Tools: Small flat brush, fine round brush, and acrylic paints.
Best For: Smooth pumpkins with broad areas for scattered details.
Paint an ivory base and let it dry. Add small triangles, uneven rectangles, and short slivers in your three chosen colors. Rotate your brush between marks so the shapes point in different directions. Leave visible ivory around each fleck; crowded marks can merge into a pattern that feels muddy.
Pastel Rainbow Arches

With just three soft colors, a painted rainbow can suit even a quiet, neutral shelf. Paint the pumpkin cream, let it dry, then sketch three nested arches on its broadest face. Keep a narrow cream gap between each band so the colors stay distinct across the curved surface.
Fill the outer arch with dusty pink, the middle with peach, and the inner with pale lavender. Turn the pumpkin slightly as your brush follows each curve. Keep both ends of every arch level so the rainbow feels balanced, even when the pumpkin itself is a little uneven.
White Lace Medallions

- Borrow the delicacy of lace with a few simple painted shapes. Start with a dry dusty pink base.
- Lightly trace three small circles across the front, keeping each between the deepest grooves.
- Paint a white ring along each outline, then add small outward loops around its edge.
- Place a dot in the center and surround it with a smaller ring of dots. Use the rounded end of a fine brush handle for consistent marks.
- Let the white paint dry before filling thin patches. Pressing harder while it is wet can smear the small details.
Keep the medallions large enough to paint comfortably rather than squeezing tiny details onto every rib. A slightly irregular loop still reads as lace when the shapes repeat. For your first attempt, finish one medallion before drawing the others so you can judge the spacing on the actual pumpkin.
Cotton Candy Clouds
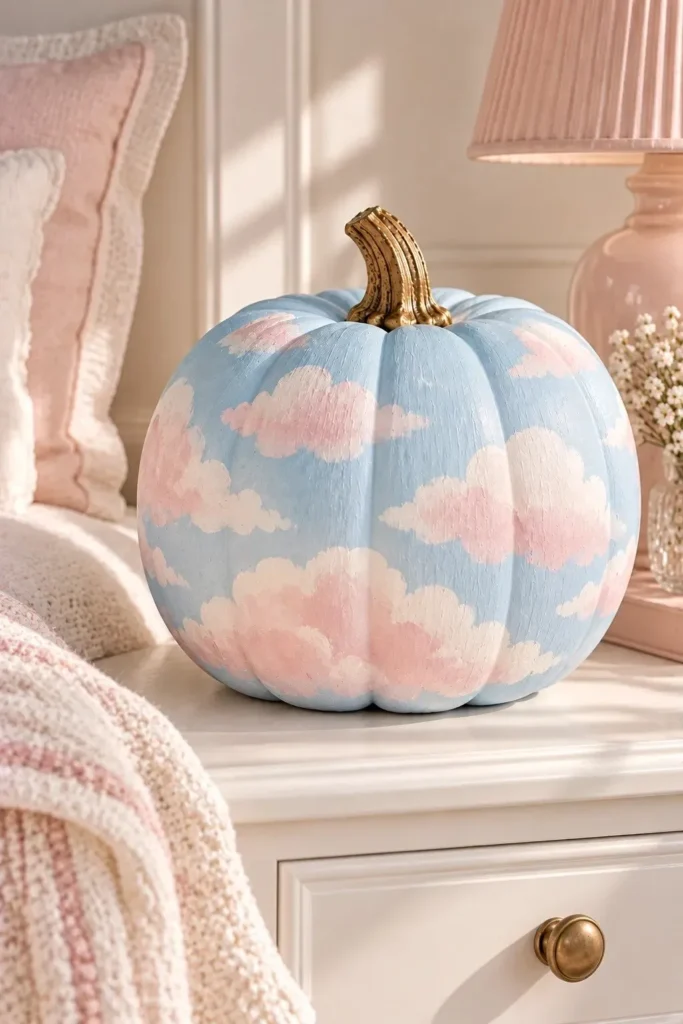
Quick Tip:
Clouds look softer when their edges are slightly uneven. Tap paint on with the corner of a nearly dry sponge, building three or four overlapping rounded shapes. Leave the lower edge flatter so each cluster reads as a cloud rather than a flower.
Start with a dry pale blue base and dab on blush clouds in two sizes. Once they dry, add a little ivory along their upper edges for a gentle highlight. Keep the clouds separated by generous blue gaps, especially near the stem where the painted shapes can feel crowded.
Scalloped Initial Frame
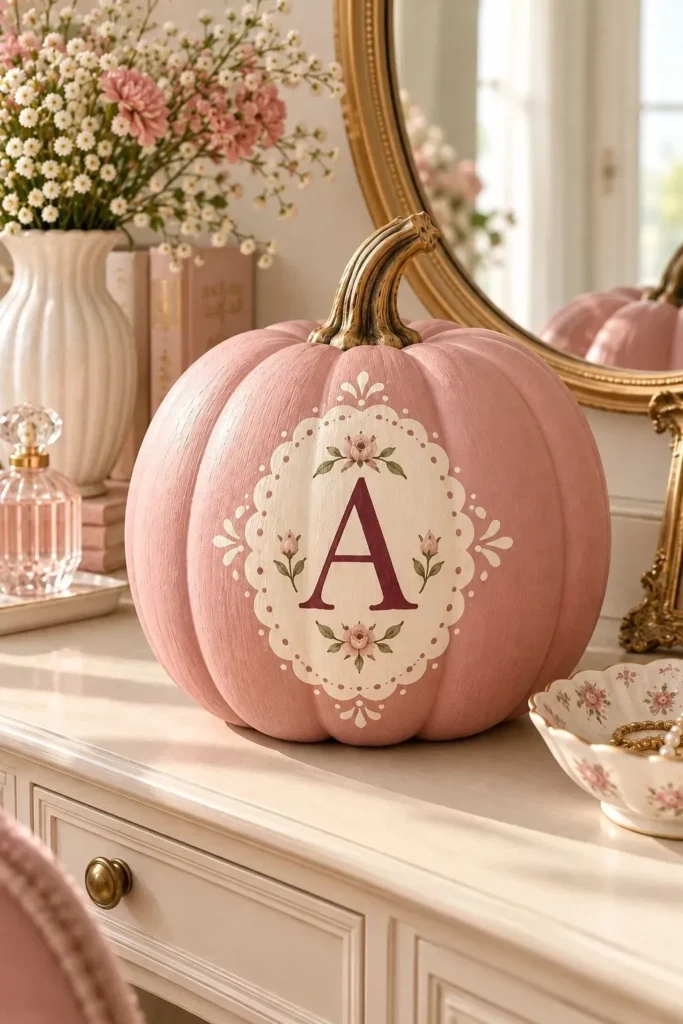
BEFORE:
A shelf of matching pink pumpkins can feel a little anonymous. You might have saved plenty of “painting pumpkins ideas diy girly” inspiration without finding a design that feels personal.
AFTER:
A single burgundy initial inside an ivory scalloped oval makes one pumpkin feel personal. The broad pink background gives the letter and its frame room to stand out.
Paint the pumpkin dusty pink and let it dry. Sketch an oval on the broadest front section, add rounded scallops, and fill it with ivory. Once dry, pencil your initial in the center before painting it burgundy. Choose a simple block letter if thin script feels difficult to control.
Tiny Strawberry Motifs
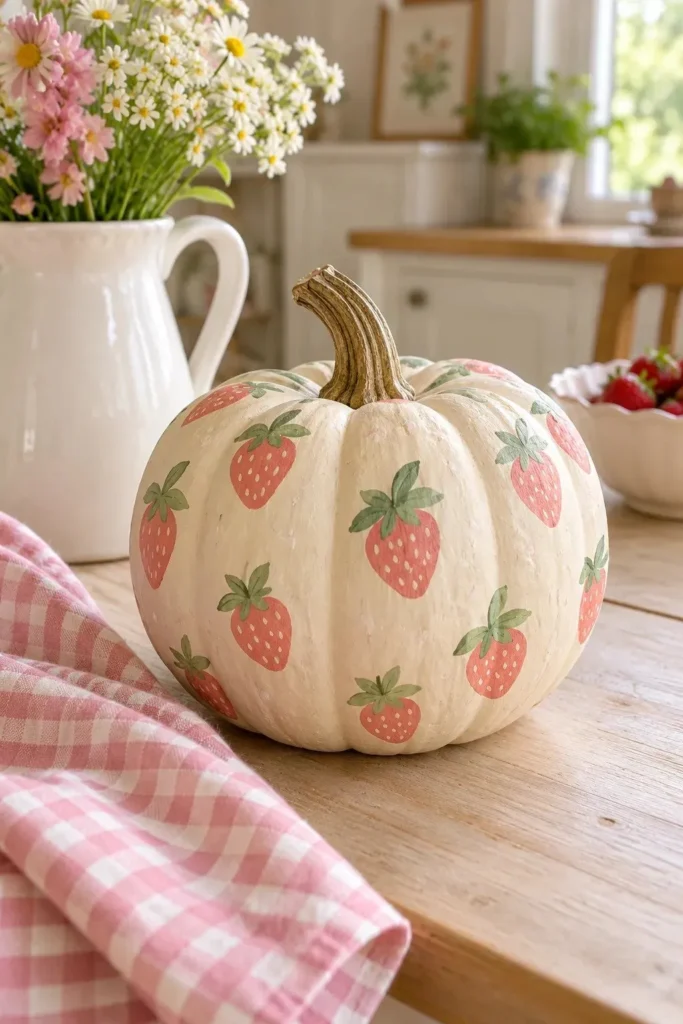
- Sweet little strawberries need only a rounded triangle and a leafy crown. Begin with a cream base and allow it to dry.
- Paint coral pink triangles with rounded corners, leaving their wider ends at the top. Tilt a few to keep the arrangement relaxed.
- Once the fruit shapes dry, add three or four short sage green leaves fanning out from each top.
- Use a fine brush to add a few tiny ivory seed marks to each berry. Keep the marks short and leave space between them.
On a medium pumpkin, berries about an inch tall leave room for clearly visible seeds. Place a few near the sides so the pattern continues when the pumpkin turns. A coral napkin or small pink bowl nearby can repeat the fruit color without competing with the painted details.
Gilded Fern Fronds
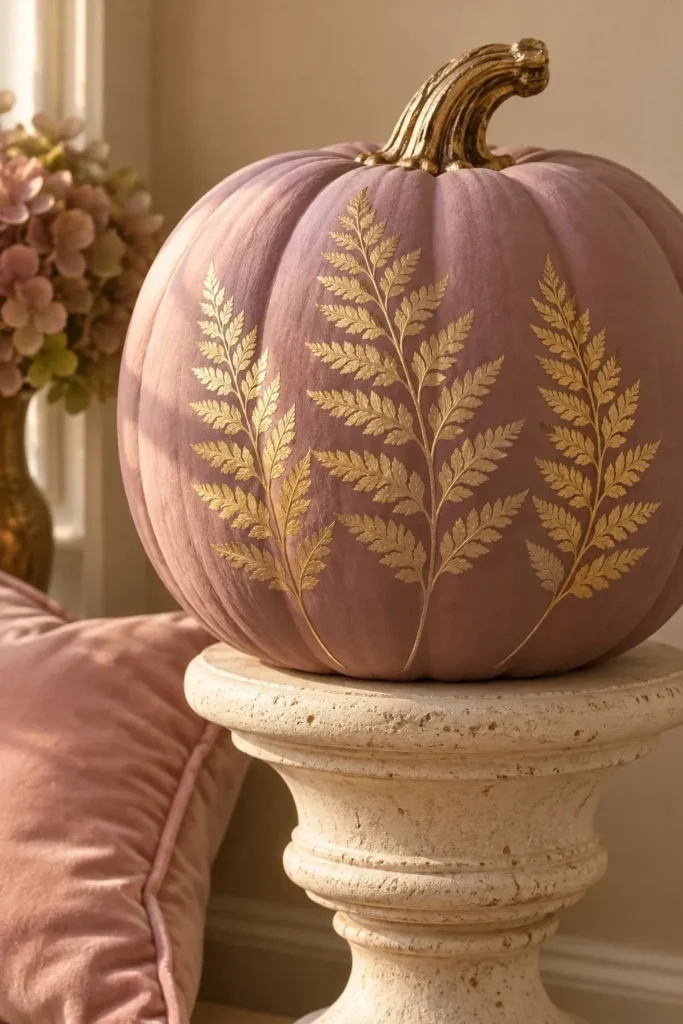
| Detail | Freehand Fronds | Stenciled Fronds |
| Finished look | Slender gold fronds catch the light like delicate embroidery. | Repeated fronds give the pattern a tidy, consistent shape. |
| Tools | Fine liner brush and a small round brush. | Small flexible fern stencil and a dense makeup sponge. |
| Painting method | Draw one curved stem, then add short diagonal leaves on both sides. | Hold each stencil section flush and dab with a lightly loaded sponge. |
| Placement | Position each stem along a gently curving pumpkin rib. | Choose broad, smooth areas where the stencil sits flat. |
Choose a dusty mauve base and let it dry completely. Arrange three fronds at different heights across the front, leaving space between them. For freehand fronds, shorten each leaf stroke as you approach the tip. That gradual taper gives the painted fern a recognizable shape without intricate detail.
Pastel Quilt Patches

DO:
- Paint a tiny quilt on your pumpkin, starting with a dry ivory base.
- Sketch broad irregular rectangles, leaving narrow ivory gaps between them.
- Alternate dusty pink, butter yellow, and pale lavender across neighboring patches.
- Add short ivory stitch marks just inside each patch after its paint dries.
DON’T:
- Divide a small pumpkin into patches too tiny to paint comfortably.
- Add stitching while the colored patches are still wet.
- Squeeze several miniature patterns into every patch.
Follow some of the pumpkin’s natural ribs when placing your patch boundaries. This helps the painted shapes sit comfortably on the curved surface. Keep the stitch marks similar in length, even when the patches vary. The repeated little dashes are what make the design read as a stitched quilt.
Golden Starbursts

Result: Gold starbursts make a blush pumpkin sparkle under lamplight.
Skill Level: Beginner, using simple intersecting lines.
Tools: Metallic gold acrylic paint, a fine liner brush, and a pencil.
Best For: Mantels, dressers, and softly lit evening displays.
Over a dry blush base, paint a thin gold cross, then add a shorter diagonal cross through its center. Repeat in three sizes, leaving plenty of pink visible. Keep the longest rays vertical for a balanced shape. A few tiny gold dots between starbursts finish the pattern without crowding it.
Conclusion
A single painted pumpkin can bring your favorite colors into a corner that needs a little attention. Start with the design that makes you want to pick up a brush, whether that means tiny bows or bold pastel patches.
Keep this “painting pumpkins ideas diy girly” collection saved on Pinterest so your next project is easy to find. Try one idea now, then paint a second pumpkin in coordinating colors. Share the article with a friend who enjoys simple seasonal crafts. Leave room for a few imperfect brushstrokes; they help make the finished piece yours. Choose your colors and get painting!
For even more designs beyond the girly palette, explore these painted pumpkin ideas for cozy fall decor.


One Comment