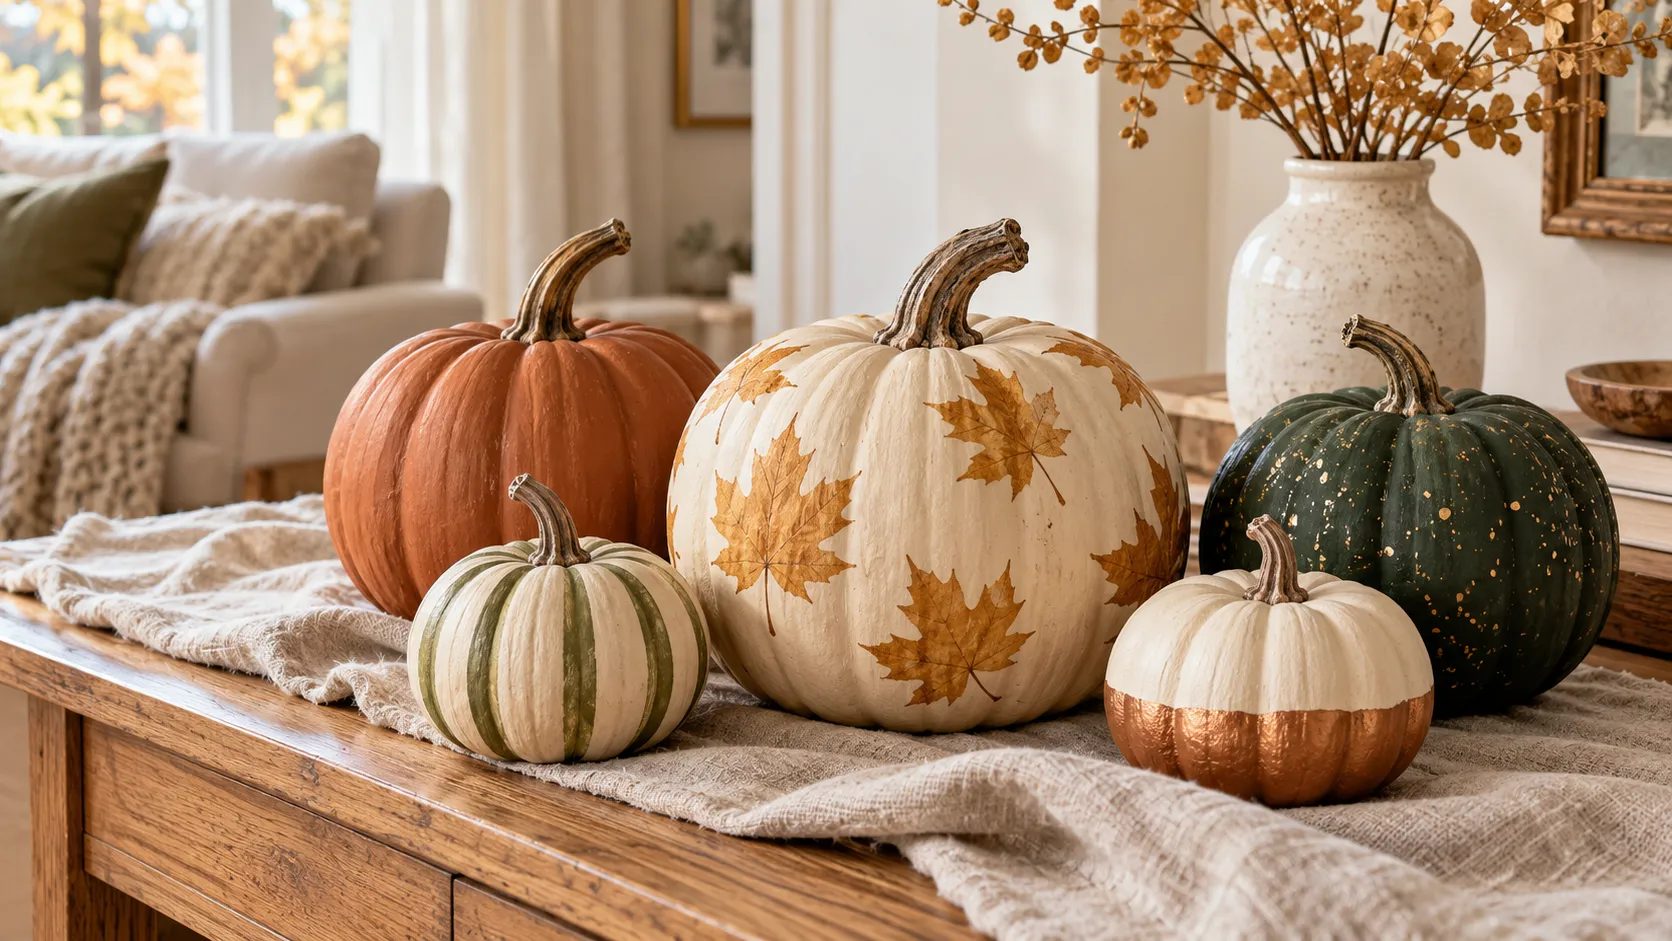
23 Clever Ways to Paint Pumpkins for Cozy Fall Decor
An ordinary pumpkin can take on the look of pottery, a knitted sweater, or a tiny autumn landscape. These 23 ideas show you how to paint pumpkins with colors and patterns that bring warmth to your home.
Whether you are decorating a narrow shelf, setting an autumn table, or refreshing your front step, there is a design to suit the spot. You will find simple dots, stencils, and painted details, with practical tips to help you choose colors and handle curved surfaces.
Start with one pumpkin and a small palette. Giving each coat time to dry makes fine details easier to control, especially when you are working around grooves. Choose a finish you love, then make it your own.
Matte Terracotta Pumpkins
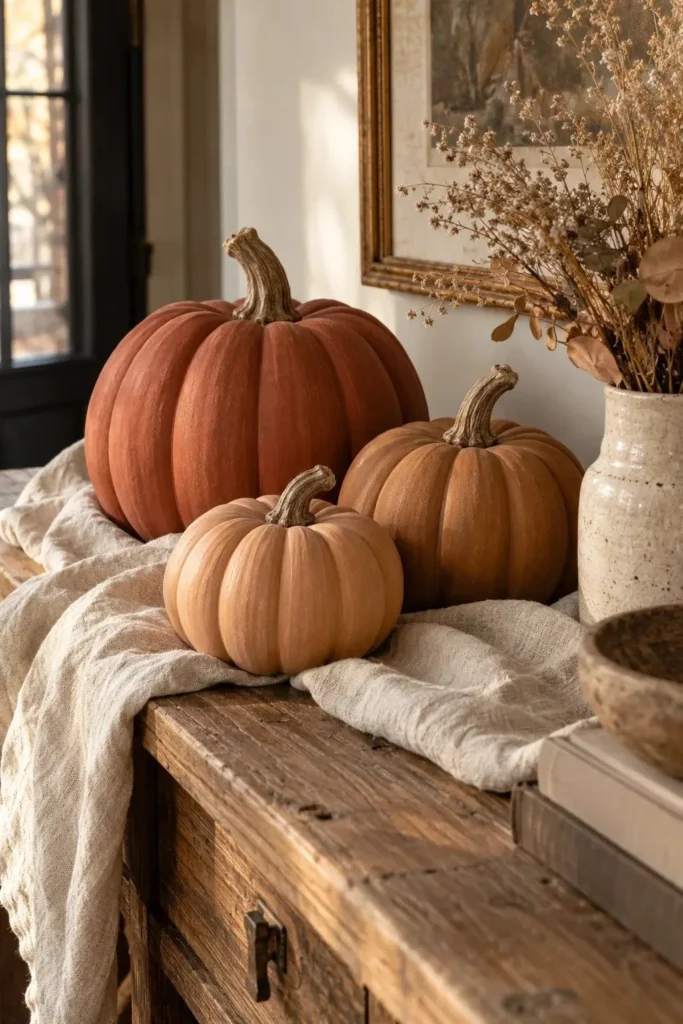
Warm terracotta makes even a bright orange craft pumpkin feel like a little piece of pottery. Start with a clean, dry faux pumpkin and apply matte acrylic paint labeled for its surface. Brush from stem to base, keeping each layer thin so the natural grooves remain visible.
To paint pumpkins in a balanced earthy palette, pair one clay red shade with softer cinnamon and peach tones. Let each coat dry according to the label before recoating. Arrange the finished pieces on a wooden tray with cream linen, leaving their stems unpainted for a natural contrast.
Cream and Sage Stripes

- Give simple stripes a softer fall look with sage green over a warm cream base.
- Paint the entire faux pumpkin cream and let it dry fully before adding the contrasting color.
- Follow every other groove with a narrow sage stripe, using a small flat brush and light pressure.
- Leave the raised cream sections wider than the green lines. Rest the pumpkin on a folded towel to steady it while working.
The pumpkin’s own ribs provide a useful guide, so the pattern does not need perfectly even spacing. Keep the same two colors across a small group and vary the stripe widths for interest. Set them beside a sage cushion or cream ceramic lamp to repeat colors already in the room.
Copper Dipped Pumpkins
Quick Tip:
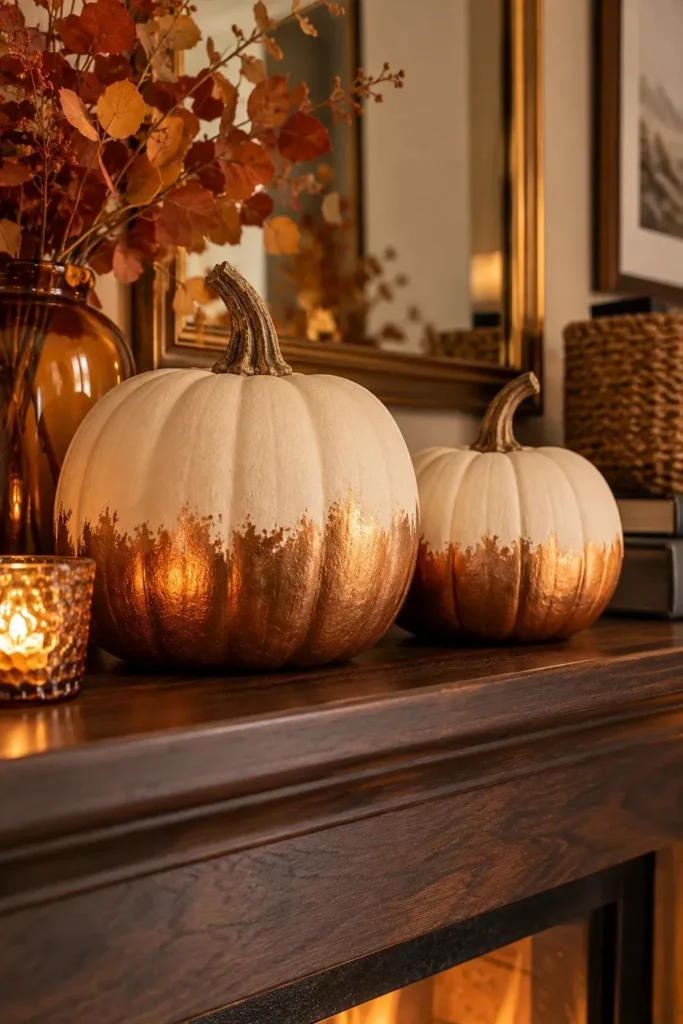
Want a metallic accent without covering the whole pumpkin? Follow a faint pencil guideline around the lower third, then brush on copper acrylic below it. Use several thin coats as directed on the label to avoid thick ridges.
Copper catches warm lamplight, giving a plain pumpkin a gentle glow beside wood and woven textures. Turn the pumpkin upside down in a padded bowl while painting its base, then let the finish dry completely before displaying it. Keep the surrounding accessories simple so the metallic band stands out.
For more styling inspiration, see our year round mantel decor ideas.
Ochre Leaf Stencils
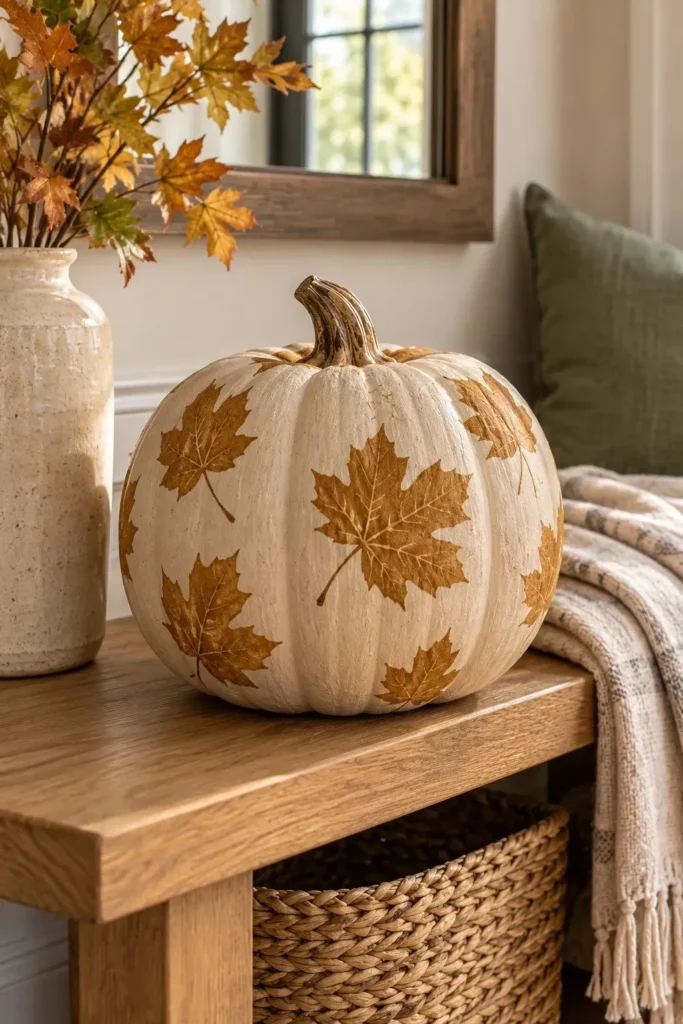
BEFORE: A bright orange pumpkin can dominate a quiet, neutral entryway. Beside pale wood and linen, its glossy finish may feel disconnected from the softer textures.
AFTER: An oatmeal base with ochre leaf shapes introduces autumn color in smaller doses. The simple silhouettes create a botanical pattern that complements woven baskets and natural wood.
Apply an oatmeal base coat and let it dry fully. Hold a flexible leaf stencil against one raised section, then dab ochre paint through it with a nearly dry sponge. Lift the stencil straight away from the surface, and repeat at different angles without crowding the stem.
Tiny Cream Daisies
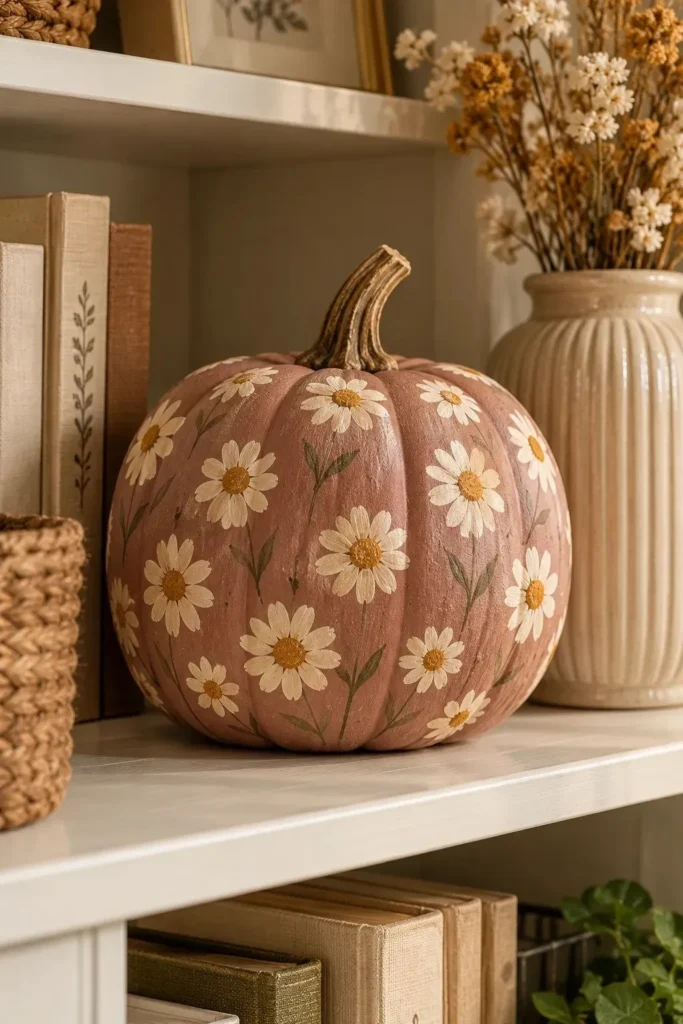
- Keep the flowers tiny for a delicate cottage look. Coat a small faux pumpkin in dusty mauve acrylic and let it dry.
- Mark flower centers lightly with a pencil, leaving about two inches between them.
- Use the rounded tip of a cotton swab to stamp six cream dots around each mark. Keep the dots close enough to form a small flower.
- Once the petals are dry, add one muted mustard dot at each center with a clean swab.
Loose flower spacing keeps the design readable from across the room. Leave a few open patches of mauve instead of filling every gap, especially near the stem. Display one floral pumpkin beside plain cream versions so the tiny petals stay noticeable without competing with several other patterns on the shelf.
Soft Gingham Pumpkins
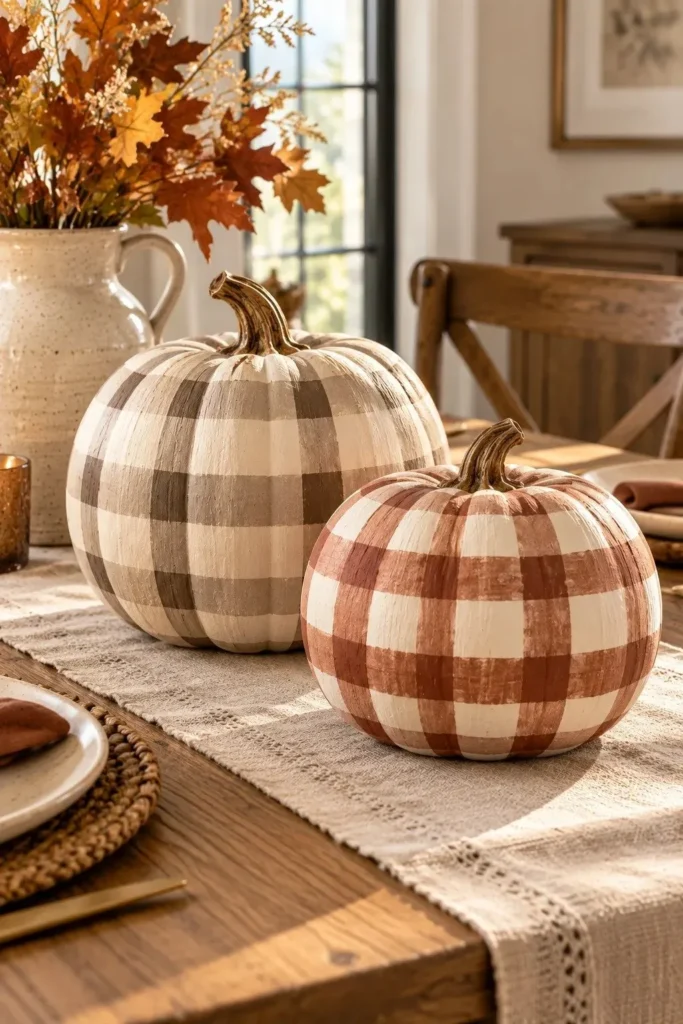
| Design Detail | Taupe Gingham | Rust Gingham |
| Base color | Warm cream | Warm cream |
| Stripe color | Pale taupe | Muted rust |
| Pattern contrast | Subtle, softly defined checks | More visible, warmer checks |
| Complementary materials | Pale oak and ivory linen | Walnut and natural wicker |
| Display setting | Neutral bedroom dresser | Autumn dining table |
Gingham gives a plain pumpkin the cozy familiarity of a checked blanket. Over a dry cream base, paint evenly spaced vertical stripes with acrylic mixed with glazing medium according to its label. Let them dry, then add matching horizontal stripes; the overlapping translucent layers create darker squares at each crossing.
Gold Speckled Pumpkins

DO
- Let a few gold flecks do the decorating by keeping most of the green base visible.
- Allow the forest green base coat to dry completely before applying metallic details.
- Lightly load an old toothbrush with gold craft paint, then test flicking its bristles with a craft stick over scrap paper.
- Rotate the pumpkin between light applications to distribute the speckles around its curves.
DON’T
- Don’t splatter paint above uncovered furniture or fabric.
- Don’t load the toothbrush so heavily that paint drips from its bristles.
- Don’t handle the painted surface while the gold flecks are wet.
The contrast works best when the gold stays delicate, like small points of light across the darker paint. Place the pumpkin on scrap paper inside a cardboard box before splattering to catch stray droplets. For a coordinated pair, repeat the colors but leave one pumpkin almost entirely plain.
Chalkboard Message Pumpkins
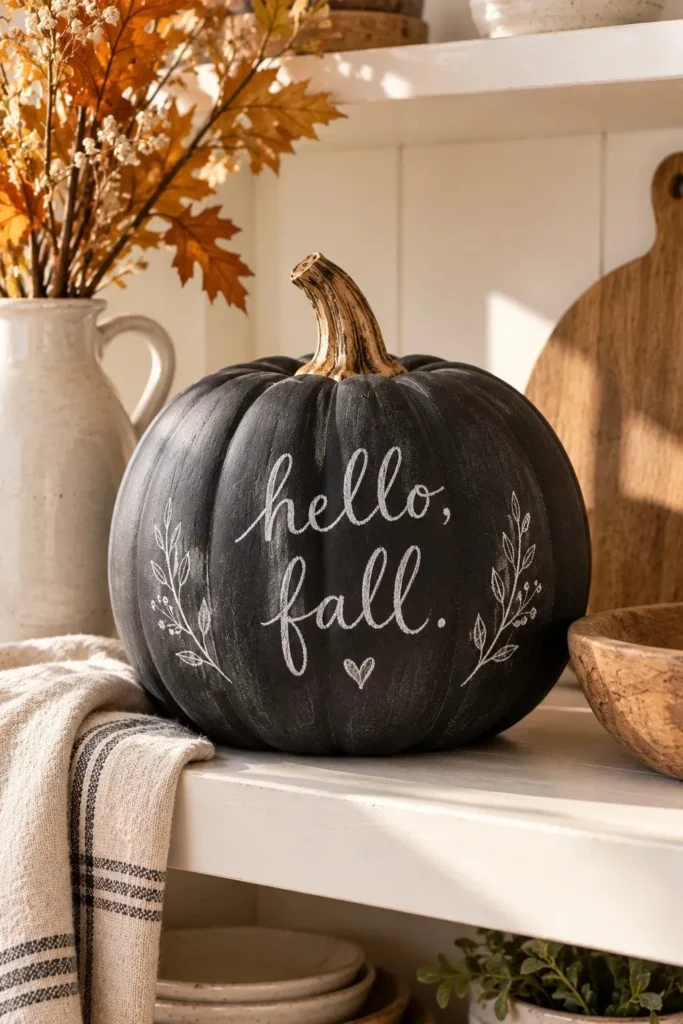
Result: A little pumpkin becomes a reusable welcome sign.
Materials: Smooth faux pumpkin, compatible chalkboard paint, and regular chalk.
Skill Level: Beginner.
Best For: Entryway consoles and kitchen shelves.
Choose a pumpkin with a broad, shallowly ribbed side so the lettering stays readable. Apply chalkboard paint according to its label, including any required primer, curing time, and chalk conditioning. Write a short greeting with regular chalk, then wipe and rewrite as needed. Chalk markers may leave permanent marks on some finishes.
Blush Ombre Pumpkins

A blush fade brings a softer edge to deep burgundy without losing that rich autumn color. On a prepared faux pumpkin, brush blush acrylic over the upper half and burgundy over the lower half. Work on one narrow section at a time so both colors stay workable.
Blend the meeting line with a clean, barely damp flat brush, using light strokes across the join. Wipe the brush frequently to keep the blush from turning muddy. Continue around the pumpkin, then display it beside ivory candles and pale linen, where the gradual color change remains easy to see.
Blue Porcelain Pumpkins
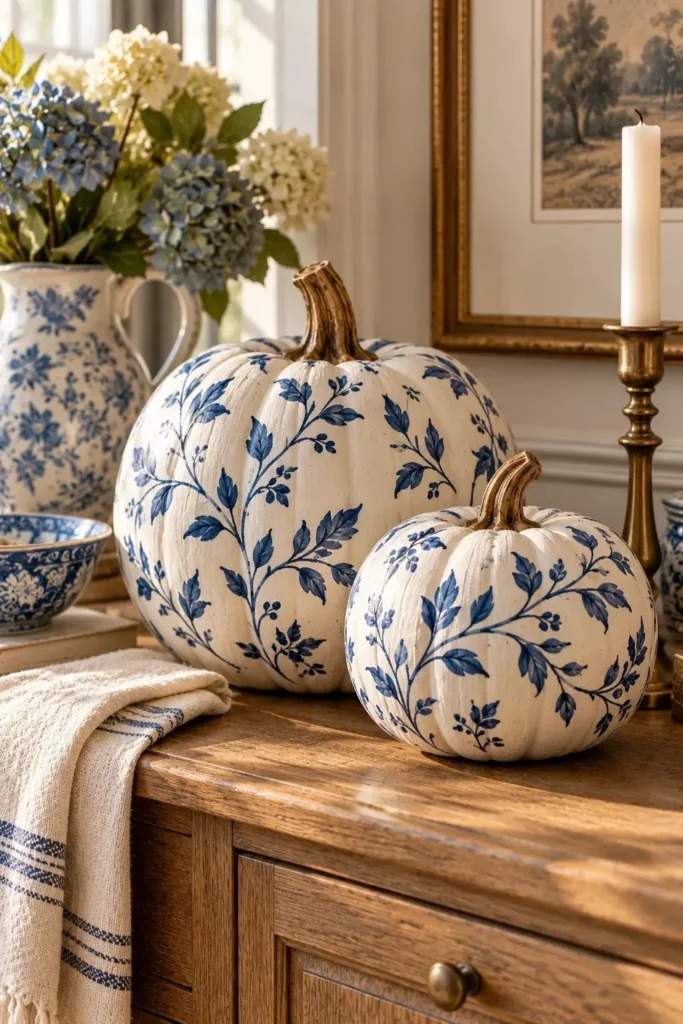
- Borrow the look of blue and white pottery with indigo motifs on a warm white base.
- Let the base coat dry, then sketch three gently curving vines around the pumpkin with a light pencil.
- Trace each stem with a fine round brush. Add small leaves by pressing the brush tip beside the stem and lifting toward a point.
- Keep the motifs separated by open white space, and repeat the same leaf shape throughout.
Uneven leaves suit the hand-painted look, so there is no need to correct every brush mark. Keep a damp cotton swab nearby for small mistakes while the blue paint is still wet. Pair the finished pumpkin with a blue patterned plate to connect the seasonal decoration to everyday pieces.
Raised Dot Pumpkins

Quick Tip:
How much pattern can one paint color create? On a fully dried ivory base, use dimensional craft paint suitable for your pumpkin’s surface to place small matching dots along alternating ribs. Practice on scrap cardboard first, holding the nozzle just above the surface.
Paint only the upward facing area during each session so wet dots do not slump as you turn the pumpkin. Let them dry for the full time listed on the bottle before rotating. An ivory base with matching raised dots creates a quiet, textured finish beside chunky knits and woven baskets.
Warm Stone Pumpkins
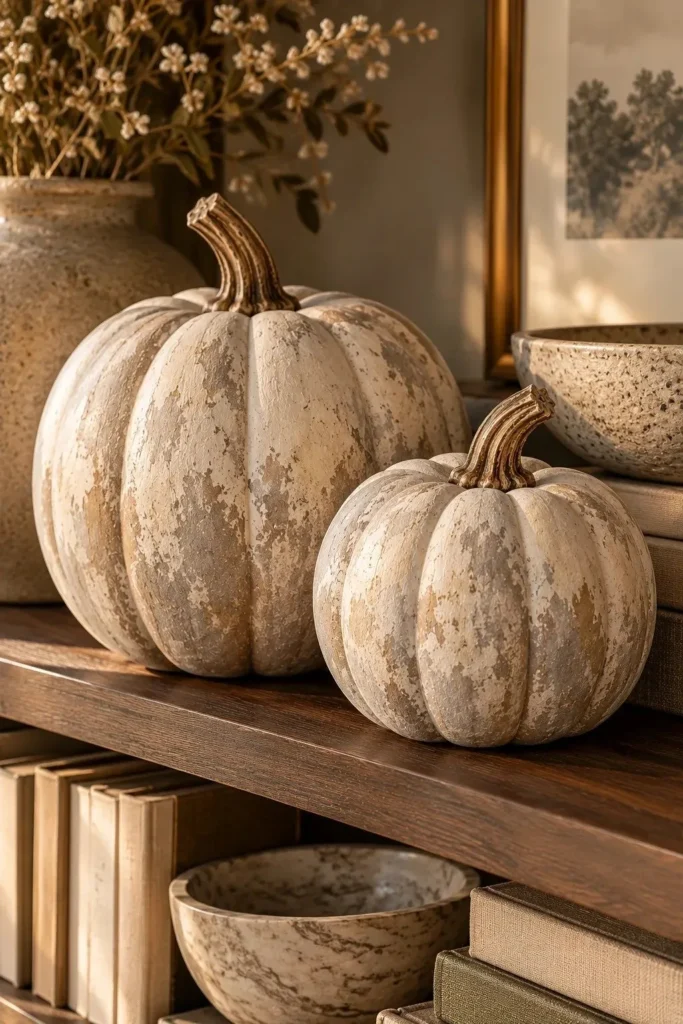
BEFORE: A shelf filled with small decorations can feel busy before the pumpkins even arrive. Bright seasonal accents may compete with colorful book spines and framed artwork.
AFTER: A warm stone finish introduces autumn shapes in a quieter palette. Soft gray and ivory mottling gives each pumpkin visual texture while keeping the display’s colors restrained.
Start with a dry warm gray base, then dab on ivory and pale taupe using a torn makeup sponge. Blot excess paint onto scrap paper before touching the pumpkin, and rotate the sponge to avoid repeated marks. Let patches of the base show through for a more convincing stone effect.
Scalloped Pumpkin Borders

- A scalloped collar adds pattern without covering the whole pumpkin. Apply a warm cream base coat and let it dry.
- Lightly sketch a curved guideline around the upper third with a pencil. Follow the pumpkin’s shoulder instead of trying to make the line perfectly level.
- Draw connected, downward-facing semicircles beneath the guideline, keeping their widths roughly equal.
- Fill the shapes with muted rust acrylic using a small round brush. Once dry, touch up uneven edges with the cream base color.
On a deeply ribbed pumpkin, smaller scallops are easier to fit between the grooves than wide ones. Start at the back so any adjustment where the border meets is less noticeable. Leave the lower half plain, giving the curved pattern enough space to stand out on a crowded console.
Quilt Patchwork Pumpkins

| Design Detail | Broad Patchwork Panels | Small Quilt Blocks |
| Layout | Vertical sections following the grooves | Mixed squares and rectangles |
| Palette | Three repeating muted colors | Four coordinated autumn shades |
| Painted stitching | Long dashed seams between sections | Short dashed seams around each block |
| Best surface | A deeply ribbed pumpkin | A smooth pumpkin with broad sides |
Why keep cozy quilt patterns on blankets alone? Sketch the sections lightly, fill each with opaque acrylic, and let neighboring patches dry before painting their shared edges. Add short ivory dashes with a fine paint pen compatible with the base coat to suggest stitched seams.
Layered Arch Pumpkins
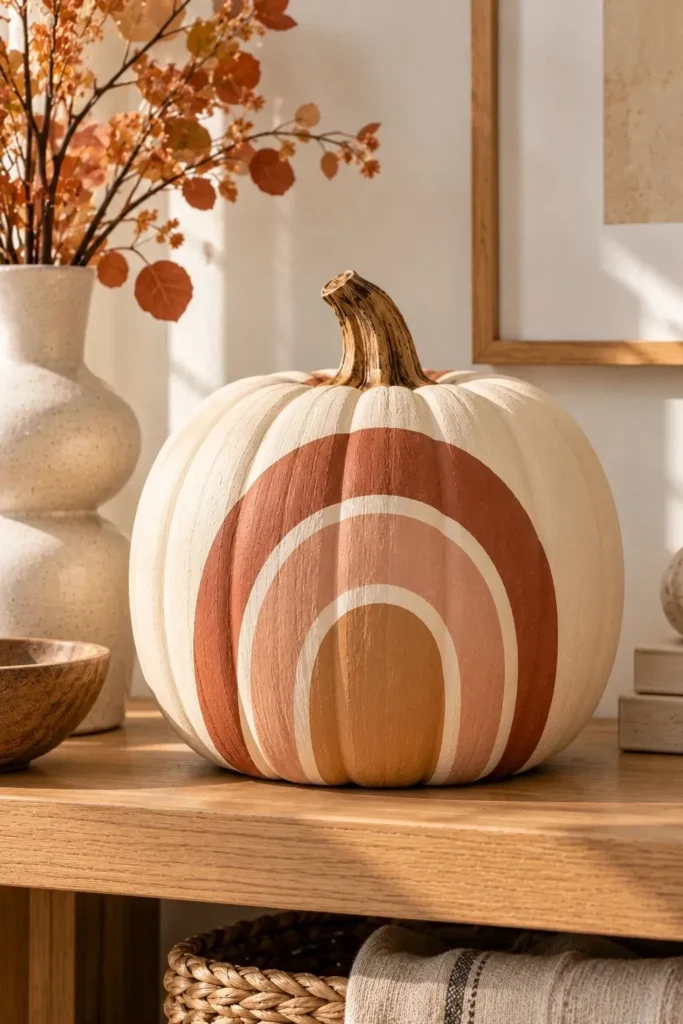
DO
- Keep one generous arch motif on the front so the design reads clearly from a few feet away.
- Choose a smooth faux pumpkin and sketch three nested upside-down U shapes over a dry ivory base.
- Paint each curved band with a small flat brush, leaving a narrow ivory gap between colors.
DON’T
- Don’t push the arches into deep grooves where their outlines become difficult to follow.
- Don’t add a new color beside a wet band.
- Don’t crowd the motif with extra dots, lettering, or competing patterns.
Draw the largest arch first, then fit the smaller curves inside it rather than starting at the center. Rest your painting hand on a folded towel to steady the brush. Repeating one shade from a nearby cushion or rug makes the finished pumpkin feel connected to the room.
Monogrammed Mini Pumpkins
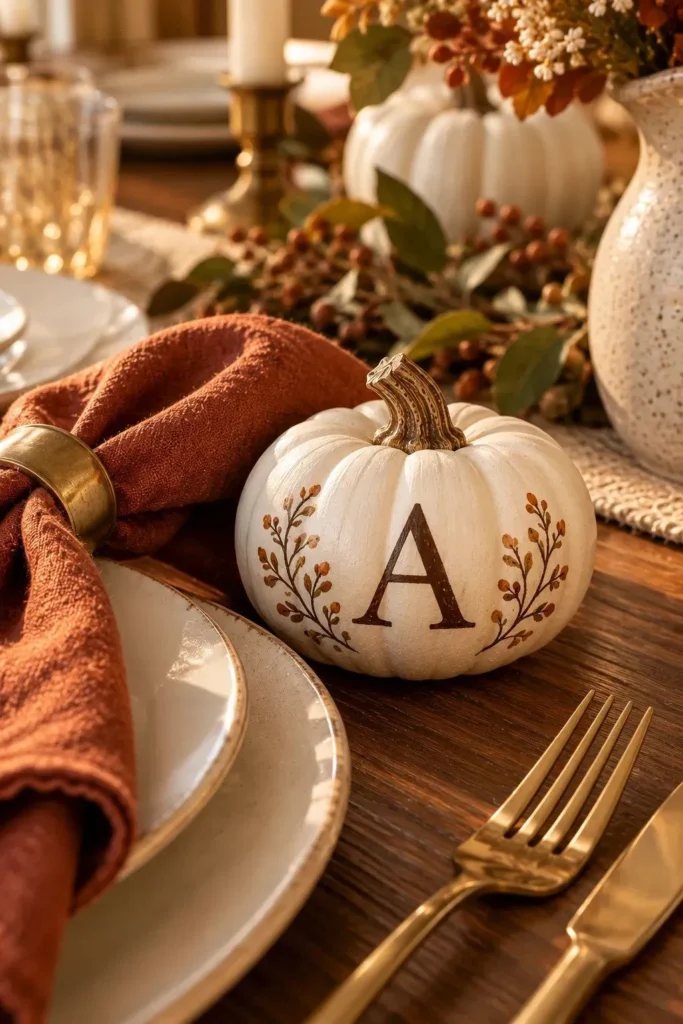
Design: One bold initial makes a tiny pumpkin feel personal.
Materials: Naturally white mini pumpkin, dark brown acrylic, and a fine brush.
Skill Level: Beginner.
Best For: Autumn dinners and small family gatherings.
Clean and thoroughly dry a naturally white mini pumpkin, then pencil a single initial onto its broadest side. Trace it with dark brown acrylic using a fine brush, keeping the letter simple. Set each pumpkin beside a folded napkin, with the initial facing the chair so guests can spot their place.
For more seasonal styling, see these Thanksgiving table decor ideas.
Sweater Stitch Pumpkins

Rows of tiny cream stitches give a painted pumpkin the familiar look of a knitted cardigan. Start with a dry taupe base and use a fine round brush to add short V shapes. Stack them in vertical columns, letting the pumpkin’s ribs guide the spacing.
For an easier way to paint pumpkins with this pattern, decorate only the front three sections and leave the back plain. Keep the stitches small and loosely spaced rather than joining them into thick lines. The design pairs naturally with a reading chair, wool throw, and wooden side table.
Smoky Marble Pumpkins

- Let a few wandering gray veins turn an ivory pumpkin into a marble-inspired accent.
- Apply an ivory base coat and let it dry completely before adding the veining.
- Mix a little gray acrylic with compatible glazing medium, following the product directions, for softer translucent lines.
- Draw two or three uneven diagonal veins with a fine brush, changing their thickness as you work.
- Soften selected edges immediately with a clean, barely damp brush, then add one or two fine charcoal branches.
Resist outlining every groove, which can make the result look striped rather than marbled. Keep most of the ivory surface visible and vary the direction of the smaller branches. A single finished pumpkin on a dark tray gives the delicate veining more contrast than a tightly packed group.
Woodland Mushroom Pumpkins

Quick Tip:
Tiny mushroom caps are easier to paint than they look. Make each cap from a flattened terracotta semicircle, then add a short cream stem beneath it once the cap dries. Use a fine brush tip for two or three ivory spots.
Vary the mushroom heights, but repeat the same three colors to keep the pattern cohesive. Sketch a few larger shapes first, then fill selected gaps with smaller ones. A smooth pumpkin gives the curved caps more room, while a beige background keeps the woodland details softer than a bright white base.
House Number Pumpkins

BEFORE: After the summer planters come down, a bare front step can feel unfinished. A few mismatched pumpkins may fill the gap without giving the entrance a clear focal point.
AFTER: Matching olive pumpkins with large ivory house numbers create a coordinated display. The repeated colors tie the arrangement together while the digits add a personal detail.
Choose stable faux pumpkins and apply exterior paint compatible with their material, following any primer instructions. Once dry, sketch one large digit on each front face and fill it with ivory. Arrange them in the correct order on a sheltered step, away from the main walking path.
Golden Wheat Pumpkins

- Bring a harvest detail into the room with golden wheat against deep brown. Paint the pumpkin chocolate brown and let the base dry fully.
- Use a fine round brush to draw three gently curved ochre stems rising from the lower third.
- Add short tapered strokes on alternating sides of each stem’s upper section. Angle the strokes upward to form the wheat heads.
- Finish each head with one narrow tip and add a thin leaf to one or two stems. Leave open brown space between the stalks.
Practice the tapered strokes on scrap paper before painting the curved surface. Press the brush lightly, then lift as you pull outward to create each grain shape. Keeping the stalks at different heights makes the grouping feel less rigid, especially when displayed beside real dried grasses in a simple vase.
Painted Terrazzo Pumpkins

| Design Detail | Larger Flecks | Smaller Flecks |
| Overall effect | Bold, clearly defined pattern | Delicate, scattered texture |
| Brush choice | Small flat brush for angular marks | Fine pointed brush for tiny chips |
| Spacing | Broad cream gaps between shapes | Closer placement with cream still visible |
| Best pumpkin size | Medium or large | Mini or small |
| Display spot | Entryway console | Table setting or narrow shelf |
A handful of angular color chips gives a plain pumpkin the look of terrazzo. Over a dry cream base, use a small brush to paint uneven triangles and short slivers in rust, olive, and caramel. Turn the pumpkin between marks, leaving more cream visible than color for a balanced finish.
Autumn Landscape Pumpkins

DO
- Frame a miniature autumn view on the pumpkin’s broadest side, leaving the back plain.
- Start with a dry ivory base and choose three matte hill colors, such as ochre, muted rust, and deep brown.
- Paint the farthest hill first, let it dry, then overlap the nearer layers from top to bottom.
- Add one small golden sun above the hills with a round stencil or a carefully painted circle.
DON’T
- Don’t divide the scene into equal horizontal stripes; vary the height and slope of each hill.
- Don’t paint an overlapping hill until the layer beneath it has dried.
- Don’t crowd the small scene with buildings, trees, and lettering that compete with the rolling shapes.
Check the design from several feet away before adding smaller details. The hills should read as overlapping shapes, with the darkest layer nearest the base. A narrow shelf or mantel works well for this design because the painted scene faces forward, like a small piece of seasonal artwork.
Conclusion
You do not need an elaborate display to make fall feel cozy. A few thoughtful colors and one simple pattern can connect your pumpkins with the textures already in your home. Choose the idea that suits your space, gather your supplies, and paint pumpkins in shades that make you smile.
Save this post on Pinterest so your favorite designs are easy to find when you are ready to begin. Try one small pumpkin first, then build a matching group if you enjoy the process. Share the article with a friend who loves decorating, and bring a little handmade warmth home.
For a softer, sweeter take, try these girly pumpkin painting ideas.
For even more ways to decorate with pumpkins beyond painting, see these charming pumpkin decor ideas for porches, tables, and mantels.


2 Comments