
30 Sophisticated Dark Green Kitchen Ideas to Savour
A rich green cabinet can make even an ordinary morning coffee feel a little more special. Add warm wood, soft light, and a few thoughtful details, and the whole room begins to feel inviting.
A dark green kitchen can be as bold or as subtle as you like. You might be ready to paint every cabinet, or you may simply want to refresh a pantry door or introduce a new backsplash. The challenge is finding the right shade and finishes for your room, especially when a color looks different in the evening than it did in the store.
These 30 ideas will help you explore green cabinetry, natural textures, lighting, and smaller decorative touches. You’ll find practical ways to test colors and materials, along with plenty of inspiration to create a kitchen that feels comfortable and personal.
Forest Green Lower Cabinets
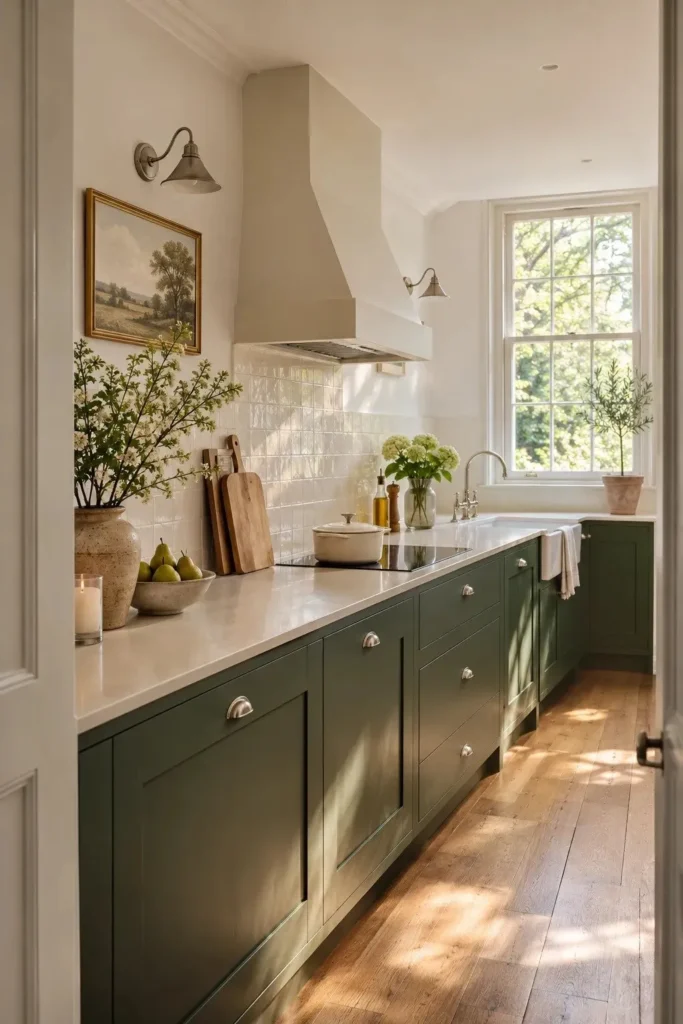
A narrow galley can carry a surprisingly rich green below the counter. Paint the lower doors, drawer fronts, and toe kicks the same forest shade so the color runs the length of the room. Above it, warm ivory walls give window light a broad surface to bounce across.
Before committing to a dark green kitchen, paint a sample board and stand it upright beside the dishwasher. Look at it over breakfast and again while making dinner. A green that reads almost black in the evening may need a lighter shade, especially beneath a counter that casts a deep shadow.
Glossy Pine Tile Backsplash
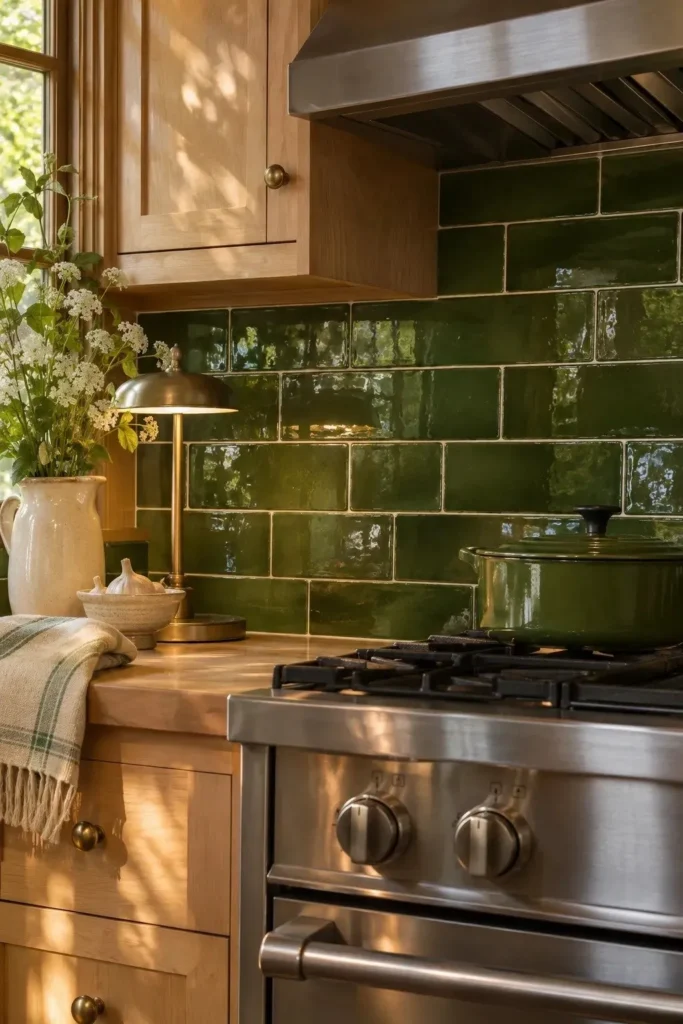
- Let the window pick your tile. Hold three green samples upright behind the stove and watch where daylight catches each glaze.
- Set the samples beside your cabinet door. A yellow olive glaze picks up honey tones in maple, while a cooler pine gives the wood more contrast.
- Compare putty and charcoal grout against the tile edges. Putty outlines each rectangle, while charcoal lets the glaze draw the eye.
- Ask for several loose tiles from the same collection. Lay them together to see how much the green varies from piece to piece.
Stand where you usually chop vegetables and check the samples under your evening lights. A bare strip of LEDs can reflect as a row of bright dots in glossy tile. A frosted diffuser softens those reflections so you see the ripples in the glaze while you work.
Green Pantry Door

Quick Tip:
Which shade still looks green from the hallway? Tape two painted samples to the pantry door and view them through the open kitchen doorway, where the color will sit beside the finishes in both rooms.
A pantry door gives you a full height panel of color for the price of a small tin of paint. Keep the casing the same cream as the baseboards to give the green a crisp outline. A washable satin finish makes fingerprints around the knob easier to wipe away.
Bottle Green Island

BEFORE: From the doorway, does your island disappear against a row of cream cabinets? Even the paneled end can be easy to miss when the island and the cupboards behind it share a finish.
AFTER: Paint the island base bottle green, carrying the color around the seating side and down to the toe kick. The pale oak top now has a clear outline, and afternoon light picks out the narrow shadows between the green panels.
Pull a stool into its usual spot before you settle on a shade. If the seat hides most of your sample, move the sample to the island end and look again from the doorway. That end panel may be the largest patch of green you see every day.
Olive Window Trim
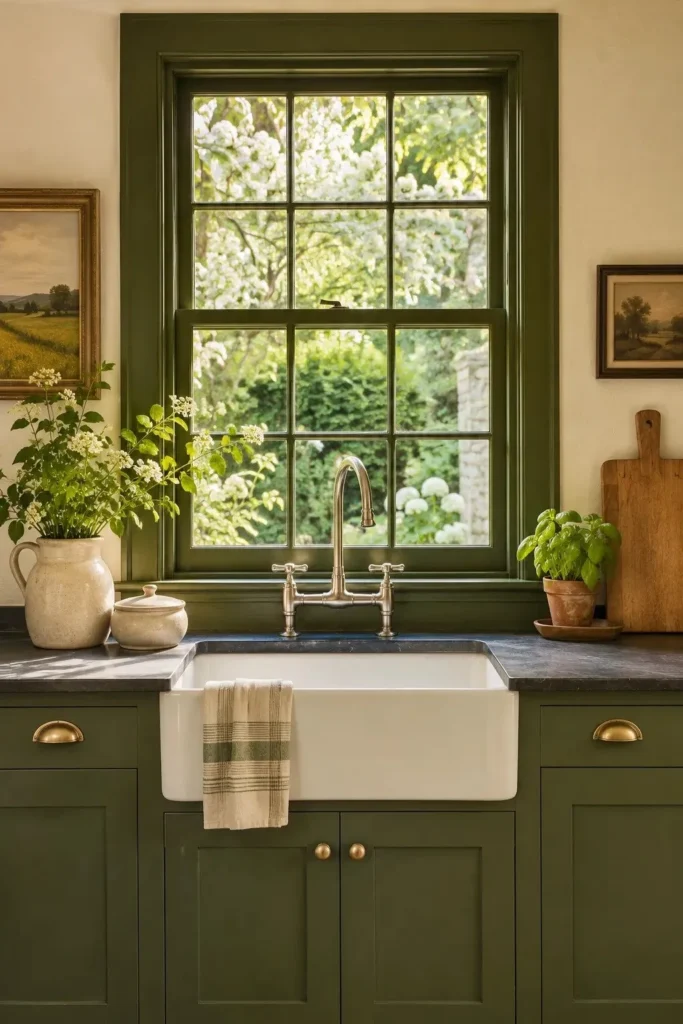
- Borrow a green from the view above your sink. Hold two olive swatches against the window casing and see which one picks up the foliage outside.
- Check both colors after sunset with the kitchen lights on. Choose the shade you still like against the dark glass.
- Clean and prepare the existing painted wood according to your trim paint instructions. Tape the wall edge and protect the counter below.
- Paint the fixed casing and sill in a washable satin finish. Follow the cure time on the tin before putting anything back on the sill.
The width of the casing changes how much olive you see. A slim strip gives white plaster a fine outline, while broad molding shows enough color to reveal its brown or gray undertone. For a better preview, cut your painted sample to the same width as the trim.
Reeded Glass Cabinet Doors
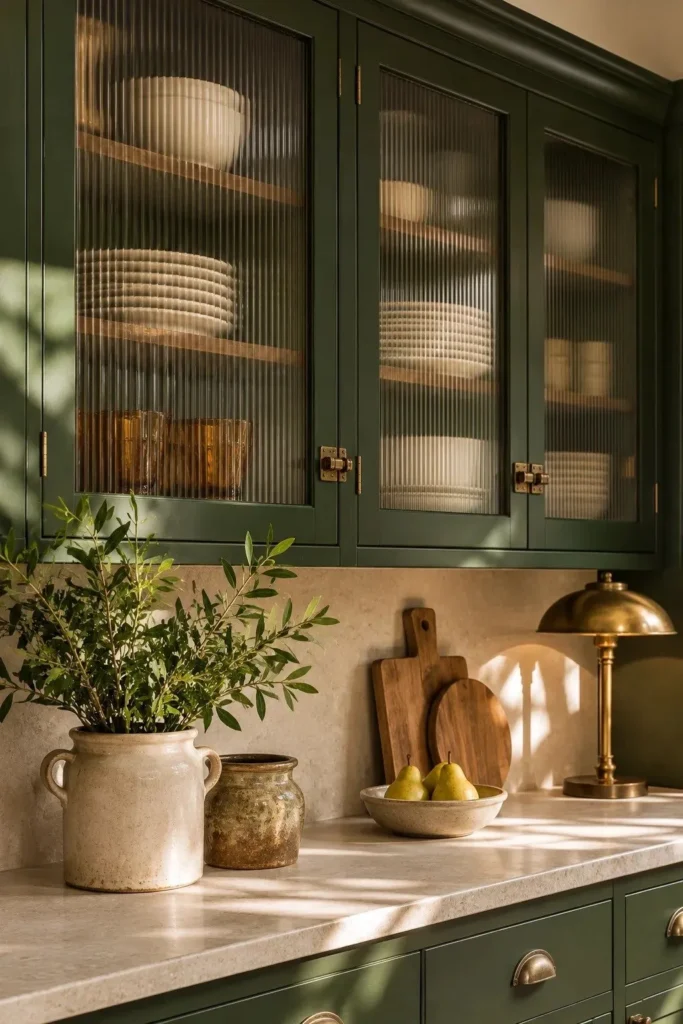
| Detail | Fine reeding | Wide reeding |
| Visual effect | Closely spaced lines give a small door a delicate texture. | Broader bands create a bolder pattern visible from the doorway. |
| Pairing with green | Slim green frames leave room for the fine lines to show. | Wide green rails echo the scale of the broader ribs. |
| Sample check | Hold it over a row of mug handles to judge the blur. | Hold it over a plate stack to see how the bands break up the rims. |
One ribbed pane can soften the jumble of everyday glasses while keeping their colors in view. Before ordering inserts, hold each sample a few inches in front of your own dishes. The gap matters because a tumbler pressed against the glass looks sharper than one sitting farther back on the shelf.
Aged Brass Cabinet Pulls
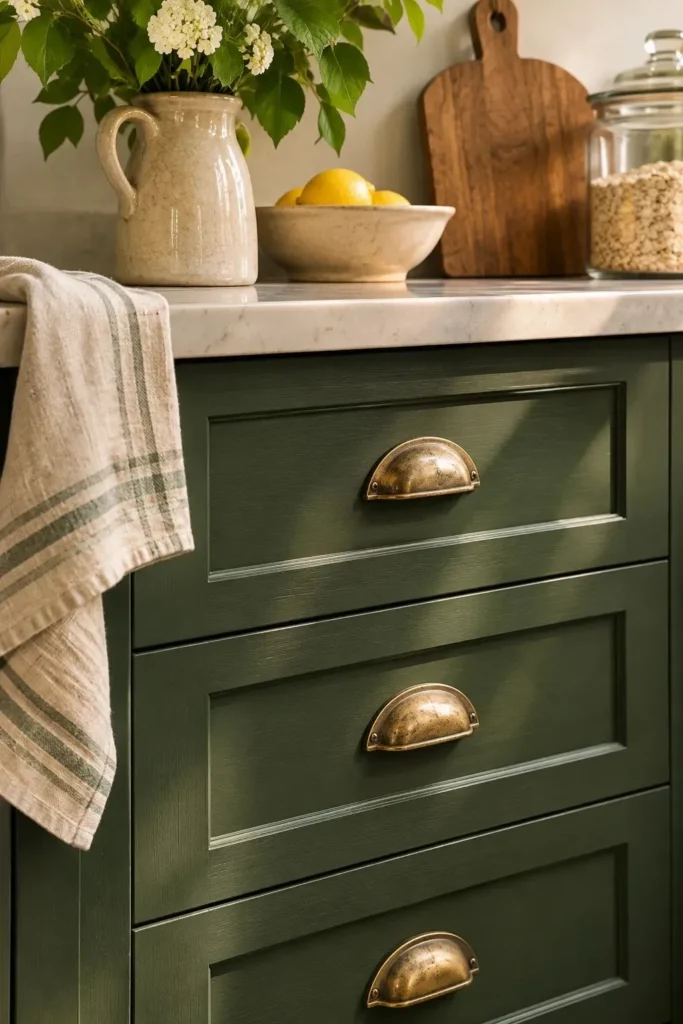
DO
- Test the pull on your heaviest drawer, where a comfortable grip matters most.
- Measure from the center of one existing screw hole to the center of the other before ordering replacements.
- Hold a brass sample against the painted door in daylight to judge how the gold tone sits against the green.
DON’T
- Assume the overall length of a pull tells you how far apart its screws sit.
- Choose a shallow cup pull before checking that your fingers fit underneath.
- Polish an aged finish without checking the maker’s care instructions.
On a bank of deep green drawers, brass repeats in little flashes each time you cross the room. For a quieter look, fit cup pulls to the drawers and small round knobs to the doors. The shared finish ties them together, while the different shapes suit the way each one opens.
Oak Display Ledge

Best spot: A green wall you can see from the table gives a favorite platter a place beyond the cupboard.
Shelf detail: A front lip or plate groove helps keep displayed pieces in position.
Finish: Clear matte oil preserves the quiet contrast between pale oak and spruce paint.
Placement: Stand your tallest piece on the ledge while planning clearance beneath nearby cabinets.
Cut a strip of cardboard to the proposed shelf depth and tape it in place before drilling. Walk past with a dinner plate in both hands. In a narrow kitchen, that quick test tells you whether the ledge can hold a platter comfortably or would work better on the dining wall.
Checkerboard Kitchen Floor

A checkerboard starts to look different the moment you pull out a chair. Large squares still read clearly beneath a breakfast table, while smaller checks show more repeats in a narrow aisle. Pair dark olive cabinets with warm ivory and soft charcoal to keep the green distinct from the floor.
Lay out paper squares in both colors and photograph them from the kitchen entrance. Shift the pattern half a tile, then compare the cuts along the cabinet fronts and threshold. A few minutes with paper can reveal a row of skinny triangles exactly where your eye lands first.
Walnut Countertop Edge

- Run your palm along a walnut sample. A lightly rounded edge feels comfortable where you lean against the counter to roll dough or stir a bowl.
- Hold the wood against a cabinet door in daylight. Look for a piece whose grain stays visible beside the deep green paint.
- Ask to see a finished offcut. A clear finish can deepen walnut’s color enough to change how it looks beside your cabinets.
- Keep a trivet and cutting board near the prep area to protect the surface from hot pans and knife marks.
For a smaller update, use walnut on the short stretch of counter where you make coffee. Measure the tray beneath your machine and leave room to lift it out for cleaning. The exposed front edge will give you a band of warm wood even when the worktop is busy.
Green Painted Ceiling
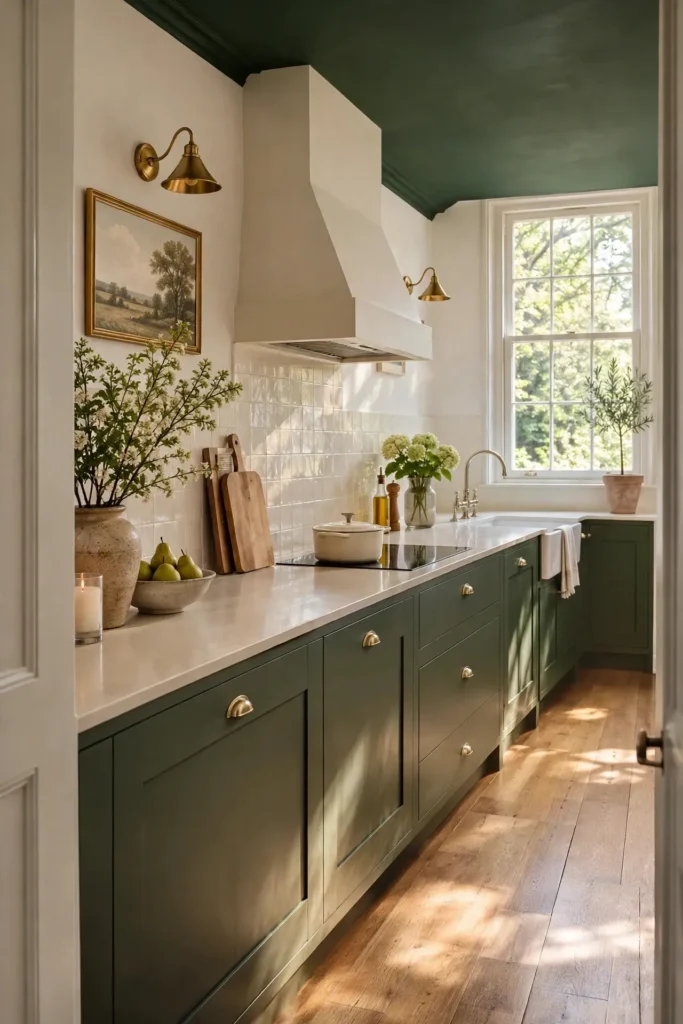
Quick Tip:
Turn your paint sample face down above your head. A green that looks lively on a vertical wall can appear much deeper overhead, so check it from your usual seat at the table.
Give the ceiling color a clean stopping point. With crown molding, paint the ceiling up to the molding’s top edge and carry the wall color over the trim. In a kitchen with uneven plaster, a matte finish helps small surface variations recede when daylight rakes across the ceiling.
Honed Limestone Backsplash

BEFORE: Busy veins and a row of countertop appliances compete for attention along the same short wall. From the doorway, the moss green drawers are the last thing you notice.
AFTER: A pale limestone backsplash gives the green a warm, even backdrop. Up close, tiny shell fragments and sandy flecks give you something to look at while you wait for the kettle.
Take home a sealed sample and dab lemon juice on one corner to see how the surface reacts. Limestone can etch even after sealing. Let the sample dry, then tilt it toward the window. Seeing the mark in your own light helps you decide whether that patina suits your kitchen.
Inset Spice Ledge
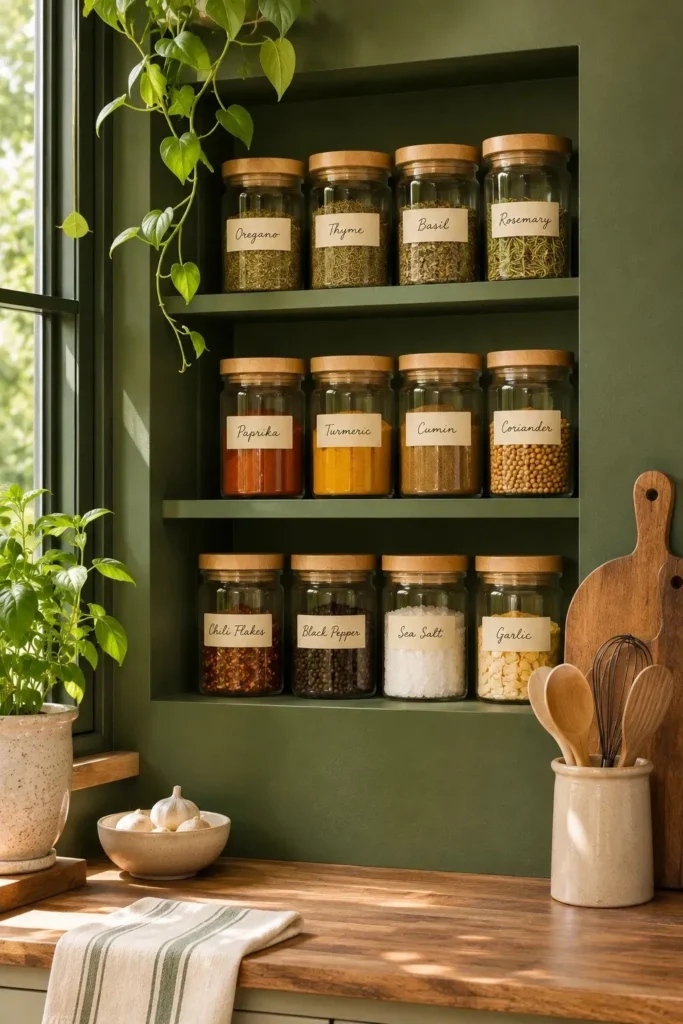
- Let your tallest spice jar set the shelf height. Leave enough room above the lid to lift it out without tipping the jars beside it.
- Choose an existing recess beside your prep counter, away from the stove and direct sun. A single row keeps every label visible.
- Cut a shelf to fit the recess and paint it the same laurel green as the back panel. Let the finish cure before loading it.
- Put your everyday spices within reach and write the names on the fronts of the jars so you can read them at a glance.
Test the arrangement while making a familiar meal. If you reach for cumin and coriander together, give them neighboring spots, even if that breaks alphabetical order. Leave a little space at either end of the row so you can grip the last jar without knocking it against the painted side.
Green Banquette Upholstery
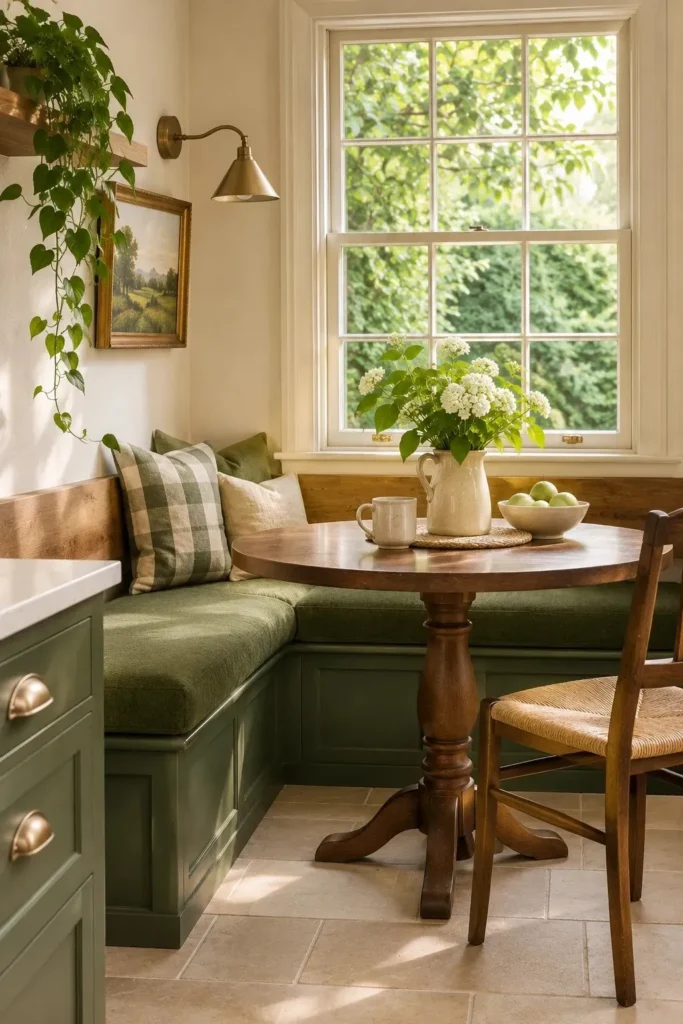
| Detail | Solid fern green | Green and cream ticking |
| Across the room | Reads as one broad band of color beneath the window. | Narrow stripes break up the long face of the cushion. |
| Beside painted cabinets | A slightly lighter fern shade stands out against pine green doors. | A green stripe repeats the cabinet color in smaller doses. |
| When sewing a cover | Plain fabric makes corner seams easier to align. | Allow extra fabric to match stripes where the front and top meet. |
Before choosing fabric, sit at the table on a folded blanket roughly as thick as your planned cushion. Check the space above your knees and whether your feet rest comfortably on the floor. Once the height feels right, choose a removable cover with a zipper along the back edge.
Fluted Green Range Hood

DO
- View the fluting sample from the doorway, where fine grooves may disappear into deep green paint.
- Match the hood surround to the nearby cabinet color so the ridges stand out through light and shadow.
- Use the hood manufacturer’s specifications to plan the surround materials, clearances, and access to filters.
DON’T
- Choose a groove too narrow for your cleaning cloth to reach.
- Carry decorative trim across a vent opening or removable access panel.
- Commit to the paint sheen before checking a grooved sample under your evening lights.
Brush a little flour onto a finished sample, then wipe across the ridges and down the channels. That small test tells you more about daily upkeep than a showroom photo. If the cloth catches, look for a wider, shallower flute that still casts a distinct shadow from the doorway.
Green Grout Grid

Color cue: The grout line can carry the cabinet color all the way up the wall.
Tile shape: Straight-edged squares create an even grid.
Sample size: Four tiles arranged in a square show how the grout looks where the joints cross.
Best pairing: A plain countertop gives the fine green lines room to stand out.
Make a sample with spare tiles before grouting the backsplash. Let it dry fully, then stand it upright against the countertop and step back to the doorway. If the grid catches your eye before the cabinets do, try a grayer olive or a shade closer to the tile color.
Soapstone Apron Sink

A single pale vein across a charcoal sink can be enough pattern for an entire cabinet run. Against pine green doors, the soapstone apron gives the eye a quiet place to land. Ask to see the actual sink before choosing it, since the most prominent markings may fall inside the bowl.
At the showroom, stand at the basin as you would at home and reach toward the drain. Notice where the apron meets your hips and whether you lean forward to reach the bottom. Before ordering, have your installer confirm the cabinet opening and support for the sink you chose.
Green Skirted Pantry

- Trade the swing of a cupboard door for the soft folds of a green curtain where a narrow aisle makes unloading groceries awkward.
- Choose washable cotton or linen in a close weave. Hold it against a shelf of packages to check how much lettering shows through.
- Wash and dry the fabric before cutting, then measure the drop with the rod in its final position.
- Split the skirt into two panels if you regularly reach for items at both ends of the shelf.
Leave enough clearance beneath the hem for a broom to pass without catching the fabric. For a tidy drape, add just enough fullness to form a few soft folds when the panels meet. Too much cloth bunches at the sides and steals the hand space you wanted in the first place.
Burgundy Pendant Shades

Quick Tip:
How much burgundy do you want to see from your breakfast stool? Suspend a paper cone the size of your chosen shade from string, then sit across from someone to check that the pendant clears your sightline.
Choose an enamel shade with a pale interior to direct light onto the worktop. In a dark green kitchen, the wine red exterior adds warmth even with the lights off. Hold a burgundy sample beside the cabinet door after sunset, when both colors can look considerably deeper.
Terracotta Paver Floor
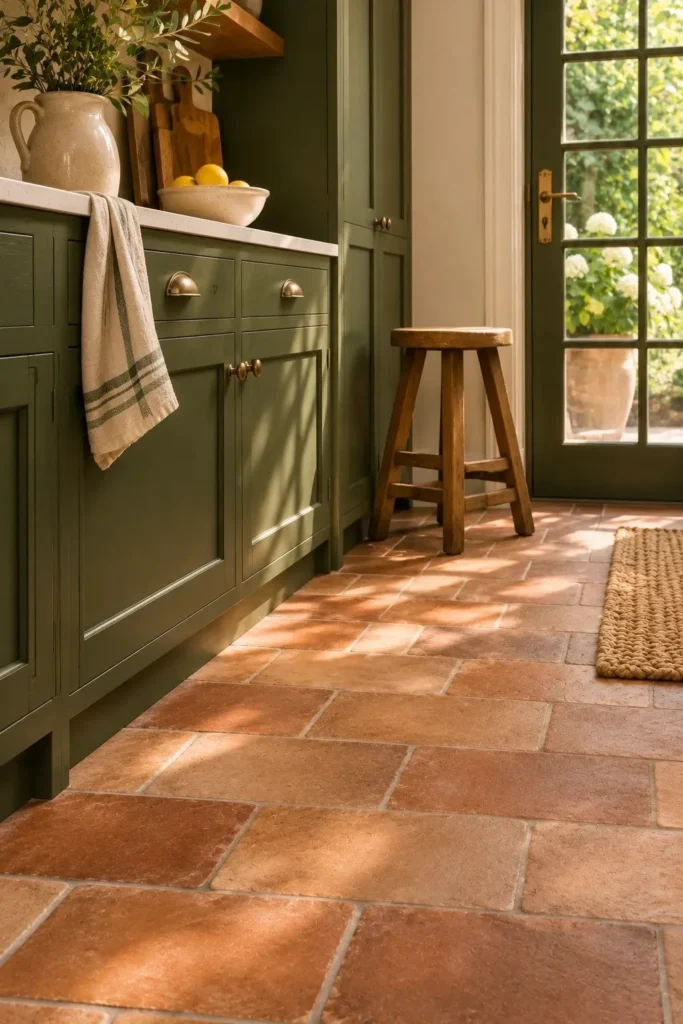
BEFORE: Cool gray flooring and green cabinets can look a little flat together, especially on an overcast morning. At ankle height, the dark toe kick almost disappears into the floor.
AFTER: Russet and apricot pavers draw a warm line beneath the cabinetry. In staggered rows, their gently uneven edges give a long galley a quieter rhythm than a high-contrast pattern would.
Lay out several pavers from the batch beside your cabinets before deciding on grout. Sweep a little flour across a sample with a recessed joint and see how easily it brushes out. In a busy baking kitchen, the depth of that joint matters as much as its color.
Green Glass Cupboard Backs

- Give your everyday plates a screen test. Stand a green paint card behind one pale plate and one clear glass on the shelf you use most.
- Measure each opening at the back of the cupboard. Cut a thin, rigid insert to fit and check that it clears any adjustable shelf pegs.
- Paint the inserts in your chosen shade and let them cure. Secure them flush against the cupboard back with removable mounting strips suitable for the surface.
- Return the dishes a few at a time, leaving a little green visible between stacks.
Look through the closed doors before you decide where everything belongs. A deep green panel gives white china a crisp outline, but a row of green tumblers can nearly disappear against it. Move clear glassware toward the brighter side of the cupboard, where daylight catches the rims.
Green Fridge Panels

| Design detail | Flat green panels | Green Shaker panels |
| Sightline from the doorway | A broad, smooth face shows the paint color clearly. | Recessed centers cast slim shadows that define each door. |
| Cabinet pairing | Flat fronts repeat the shape of nearby slab drawers. | Frame widths can echo those on neighboring pantry doors. |
| Daily cleaning | A cloth passes easily across the smooth face. | The lower rail has a ledge that needs an extra wipe. |
Start with the refrigerator model, because its panel dimensions and weight limits determine what your cabinetmaker can build. If the fridge sits beside a wall, check the door swing with the handle included. Make sure the door opens far enough for the crisper drawer to slide out for cleaning.
Copper Pan Rail

DO
- Hang the copper pan you reach for most at the end nearest your prep spot.
- Mark each pan’s outline on paper and tape the shapes to the wall to check spacing.
- Choose a rail and fixings rated for the combined weight of the cookware and suitable for your wall.
DON’T
- Mount the rail so low that the largest pan hits the counter as you lift it off.
- Crowd the hooks so closely that neighboring pans knock together.
- Place the rail behind a swinging door or across an outlet you use.
A broad copper base catches more light than a narrow rim, so turn one skillet face out and hang the saucepans sideways beside it. Step back to the kitchen entrance. A strip of green between the pieces lets you see each silhouette and gives your hand room to lift a pan free.
Botanical Roman Shade
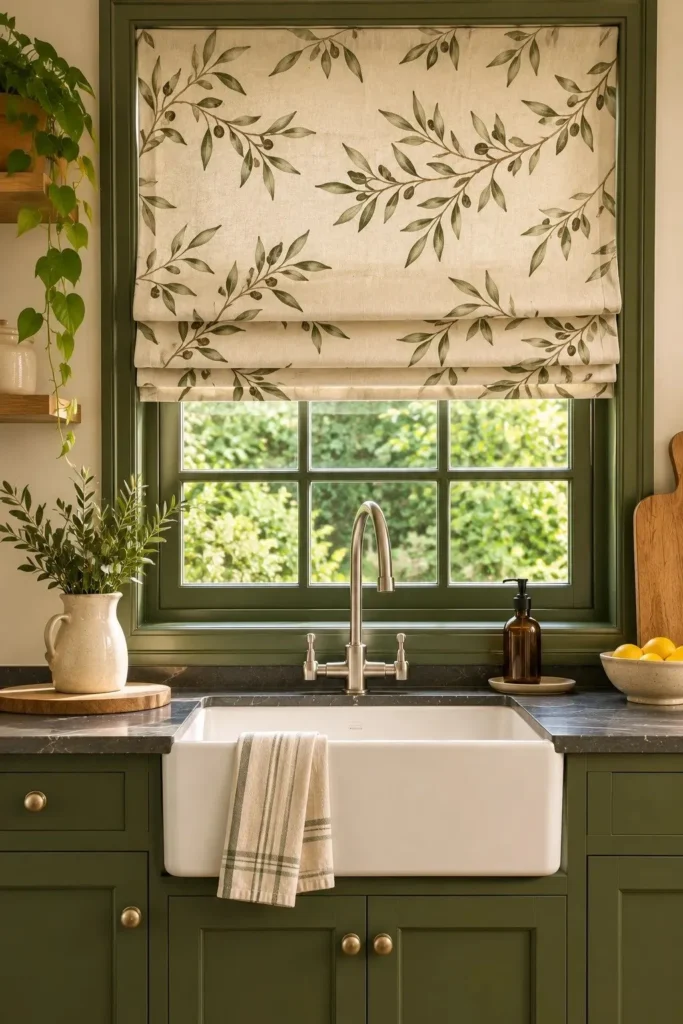
Pattern scale: One leafy branch should still be recognizable when the shade folds up.
Color cue: A muted olive print picks up pine green cabinetry against a lighter ground.
Best placement: A window with enough clearance between the lowered fabric and the faucet.
Useful feature: A cordless lift keeps the sill clear when you open the window.
Fold a fabric swatch into loose pleats and hold it at the top of the window. A print that looks busy when spread flat may show just a few leaves once raised. Check it again with daylight behind it, since the weave can soften the outlines more than you expect.
Butter Yellow Cupboard Interior
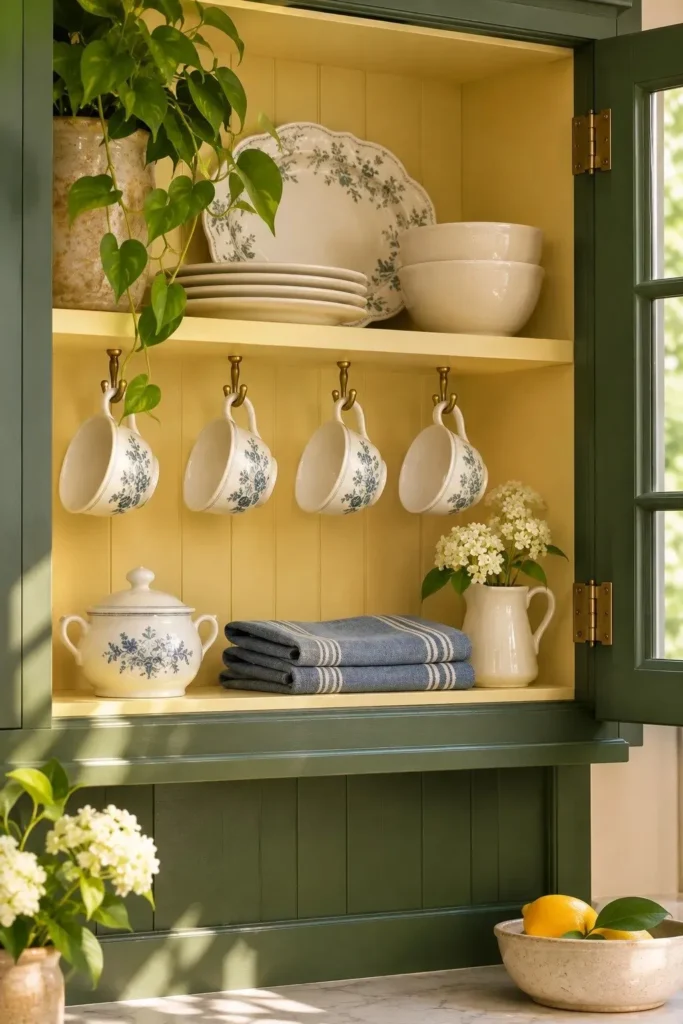
Opening a pine green cupboard to find butter yellow shelves makes a small morning ritual feel special. Choose a creamy yellow that still looks warm in the shadow of the upper shelf. Set a white mug against your sample to see how much color will show around the dishes.
Paint the back, sides, and shelf edges for a continuous sweep of yellow when the door opens. On adjustable shelves, keep paint out of the peg holes and let the finish cure before stacking plates. Start with the breakfast cupboard, where you’ll enjoy the color every morning.
Green Beadboard Peninsula

- Pull out a stool and look at the broad panel behind it. Narrow beadboard gives this often overlooked surface a pattern you can see from the table.
- Center a full board on the visible end and plan outward so the two edge pieces finish at similar widths.
- Hold the paneling and its trim beneath the overhang before fitting them. Sit down to check that your knees still clear the finished surface.
- Choose a washable satin paint for the stool side, where shoe marks tend to collect near the floor.
Wrap the grooves around the exposed end if that’s the side you see from the doorway. A slim corner molding gives the boards a clean meeting point. Paint the molding spruce green too, so daylight picks out the change in direction without a contrasting stripe at the corner.
Olive Striped Runner

Quick Tip:
Will the dishwasher door clear the rug? Fold a towel to the combined thickness of your chosen runner and rug pad, place it in the door’s path, and open the appliance fully.
Run the stripes along the aisle to draw the eye toward a window or glazed back door. An olive thread a shade lighter than the cabinets keeps the colors related, while a flax ground shows where the runner ends. Choose a washable flatweave with a nonslip pad cut just inside its edges.
Arched Green Alcove
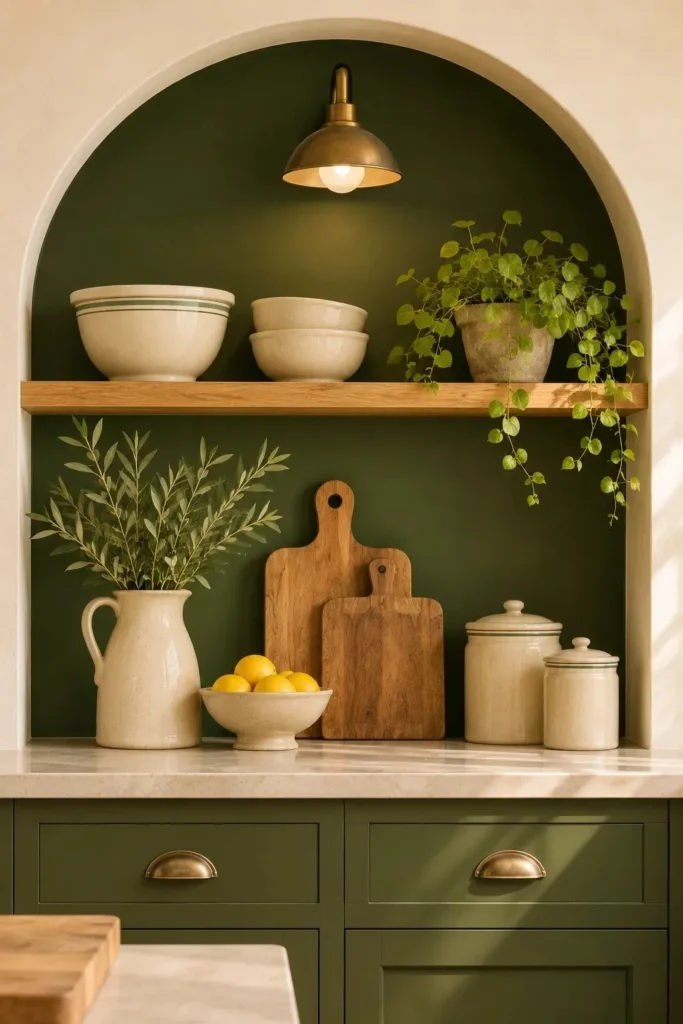
BEFORE: An arched recess painted the same ivory as the surrounding wall can lose its outline at midday. From the kitchen table, the clearest feature might be the dark bracket beneath a shelf.
AFTER: Carry cypress green from the back panel around the inner curve, stopping at the front edge of the arch. Now the ivory wall outlines the shape, and a pale bowl stands out against the green.
Set a bowl on the shelf and take a photo from your usual seat. If the rim disappears behind the curve, lower the shelf a few inches before fixing it in place. Leave the upper part of the arch open so you can follow its shape from across the room.
Freestanding Plate Rack

- Give your favorite dinner plate the first slot. Stand it in the rack and check that its rim clears the underside of the wall cabinet as you lift it out.
- Set the rack on a dry stretch of counter near the table. Keep enough space in front to put down a plate while serving.
- Check the peg spacing with your thickest everyday dish. You should be able to remove it with one hand while the next plate stays upright.
- Turn one patterned plate toward the room at the open end of the rack. Store the plates you use most in the remaining slots.
Viewed from the side, even decorated plates show little more than their rims. Angle the rack toward the breakfast table until the blue pattern on the end plate comes into view. Against bottle green paint, that small patch of blue and ivory can bring a whole set of inherited dishes into focus.
Mushroom Tile Toe Kick

| Design detail | Long rectangular tile | Small square tile |
| View along the cabinets | Long pieces create a quiet horizontal band. | Repeated squares draw attention to the base. |
| Layout detail | Center the layout on the longest visible run. | Line up a grout joint with a cabinet division to establish the spacing. |
| Cleaning | Fewer joints collect crumbs beneath the prep area. | More grout lines need attention along the floor. |
Tape tile samples to the recessed panel and stand at the counter in your usual shoes. Check that the added thickness leaves comfortable toe room. On a removable plinth, keep each joint between panels clear and preserve access to appliance vents, so routine servicing won’t disturb the tilework.
Conclusion
A dark green kitchen has room for your own style, whether you love the warmth of oak, the shine of brass, or the character of patterned tile. Start with the idea that caught your eye, and let it guide your next decision. A painted pantry door or a new runner can be a satisfying first step, while a green island gives you a larger change to enjoy every day.
Save this post on Pinterest so your favorite ideas are easy to find, and share it with someone planning a kitchen refresh. Pick a detail you love and make it your own.
