Winter Centerpieces: 32 Sparkling Ideas for Your Table
Three golden pears in a silver bowl can catch the last of the afternoon light. After dark, a handful of cranberries around a glowing candle can make that same table feel cozy. Both winter centerpieces leave room for the best part of dinner: the person sitting across from you.
These 32 ideas start with things you might already own, from a soup tureen to a plaid thermos. If your breakfast table barely fits two mugs, a pair of hyacinth bulbs lets you watch spring arrive over coffee. For a longer table, a trail of glossy magnolia leaves gives every seat a view. You’ll find tips on choosing a vessel, arranging each piece, and checking the height from your chair before anyone sits down.
Silver Pear Compote

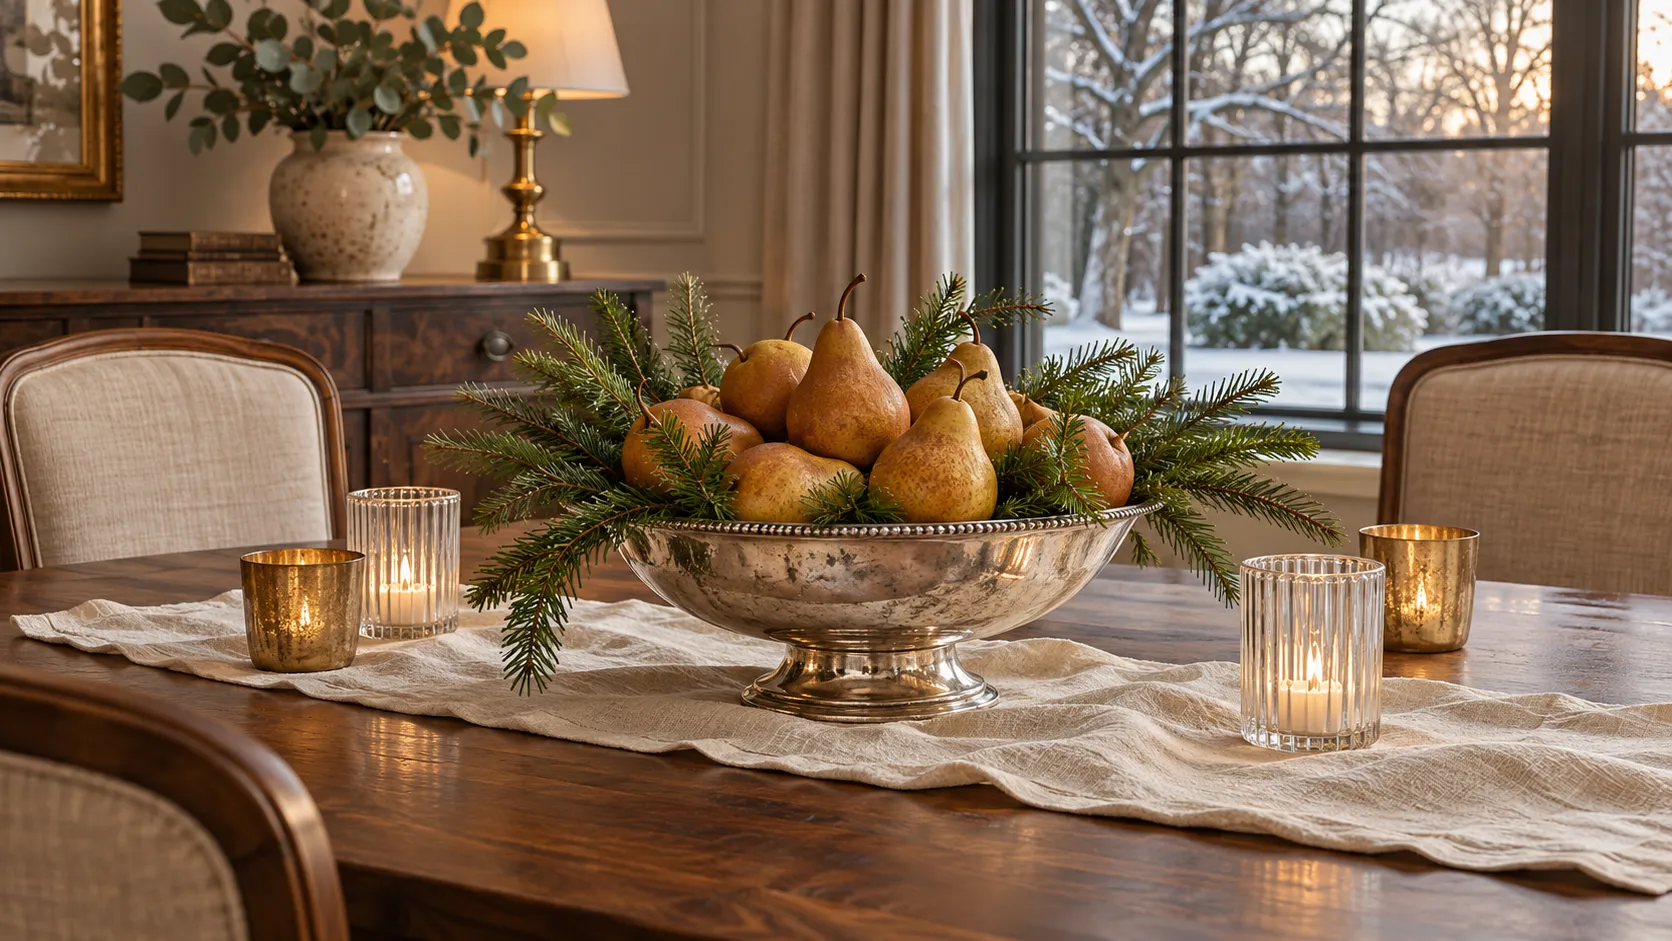
A silver bowl and three grocery store pears are enough to give your table the look of a winter still life. Set two pears upright in a shallow footed bowl and lay the third on its side. Tuck short fir tips into the gaps, leaving the golden skins visible.
The easiest winter centerpieces to live with leave room for dinner. Set out your plates before positioning the bowl, then slide a serving dish beside it to check the fit. If the table feels crowded, skip the runner. The silver foot casts a lovely reflection directly on polished wood.
Ribbed Glass Candle Row
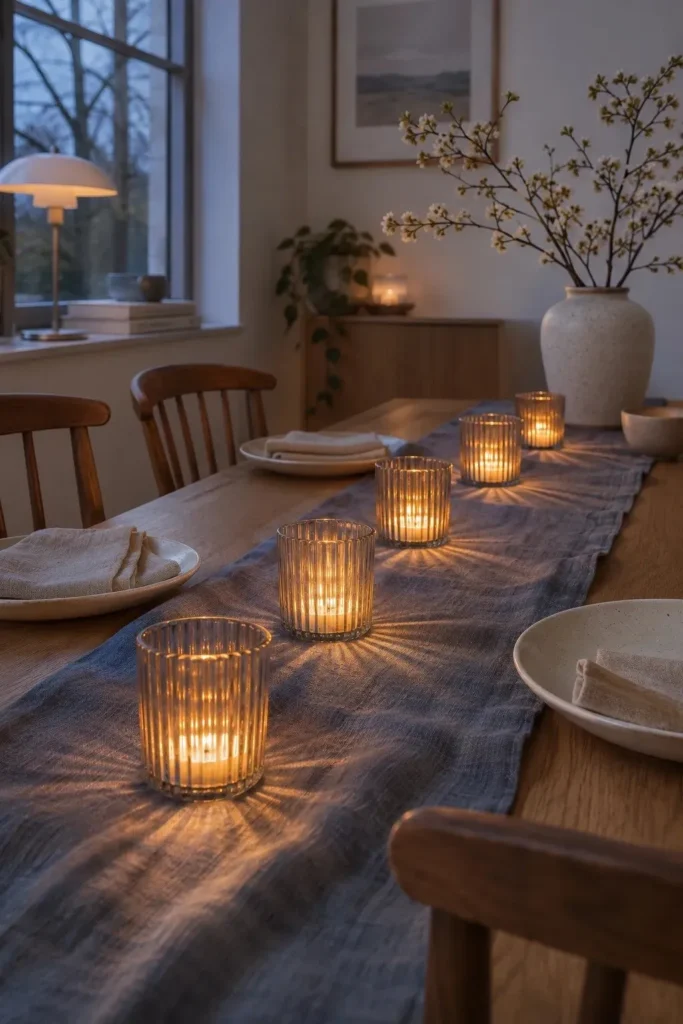
- Let the glass do the decorating. Choose clear ribbed holders so the light falls in narrow stripes across the runner.
- Start with one holder in the middle, then place two on either side, about a palm’s width apart.
- Slip a warm white LED tea light into each glass. Check the color of one against your linen before switching on the rest.
- Sit down at one end and look along the row. Shift any holder that lines up directly behind another from your seat.
On a narrow table, five little pools of light give each place setting a share of the glow. For a weeknight meal, lift out the middle holder and set a bread basket in the gap. The two pairs still look intentional, and nobody has to pass the rolls over a light.
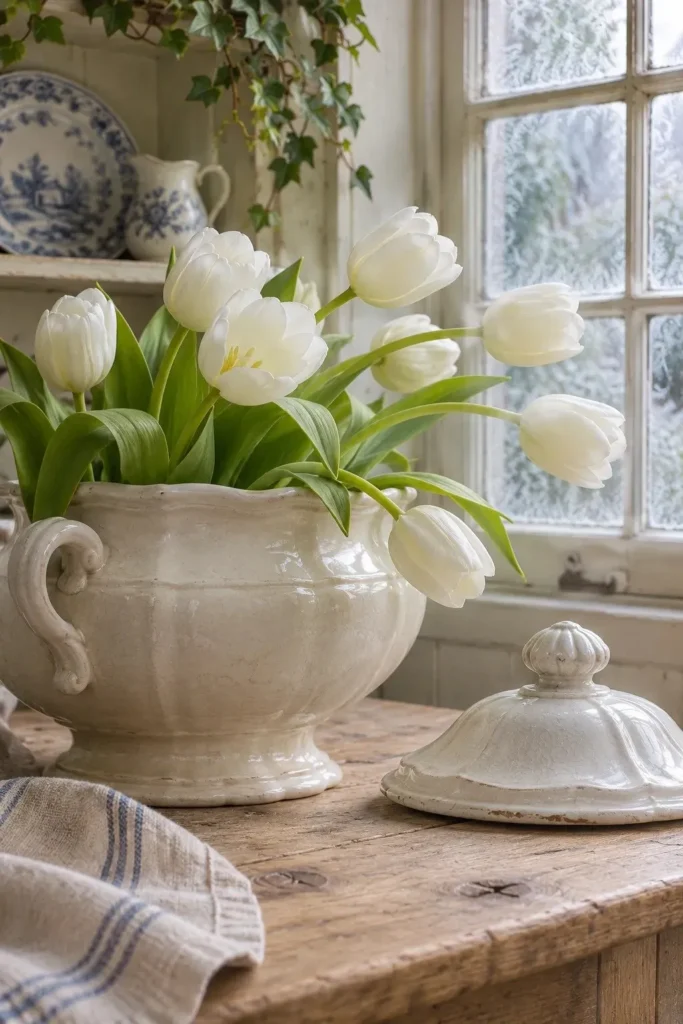
White Tulip Tureen
Quick Tip:
Give the soup tureen a second job as a vase. Set a water-filled jam jar inside before arranging the tulips, and choose one whose mouth sits just below the scalloped rim.
Cut the first few stems short enough for their blooms to rest near the handles. Leave two or three longer on one side so they follow the curve of the bowl. Tulips keep growing after cutting, so check their height the next morning and trim any that block the view across breakfast.
Mirrored Pinecone Tray
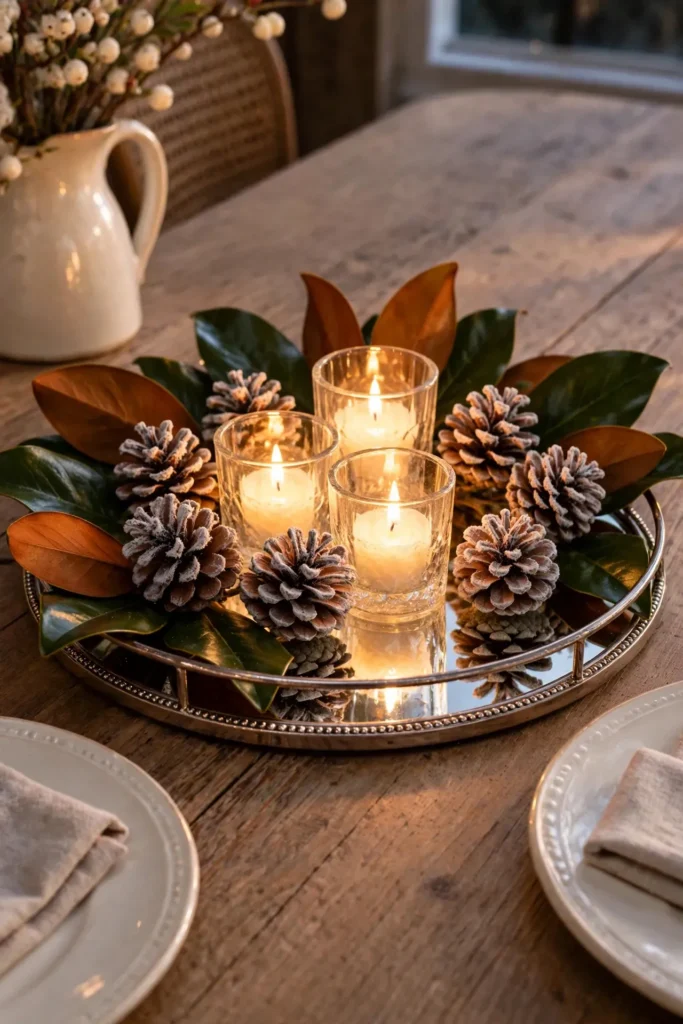
Before: A handful of pinecones looks promising until you set it on a dark wood table. From your seat, the brown scales almost disappear against the grain.
After: Set the same cones on a mirrored tray and each pointed scale gains a crisp outline. Lay one cone sideways near the rim so you can see its reflection from across the table.
Choose dry, open cones in two sizes. Stand the broadest one near the middle, then turn the smaller ones until their tips point in different directions. Leave enough bare mirror to see the undersides of the scales. That reflected detail is the best part of the arrangement.
Clove Orange Platter

- Turn the prettiest side of each orange toward you. A single stripe of cloves across bright peel makes a bolder pattern than a handful scattered at random.
- Mark a dotted line around the first orange with a toothpick, then push a whole clove into each hole.
- Give the second orange a spiral and the third a band around its middle. Space the cloves about a fingertip apart so each pattern stays readable.
- Group the oranges on a copper platter and tuck a few bay leaves beneath them to keep them from rolling.
Save this one for a kitchen table where you can enjoy the peel and spice up close. Three oranges fit on a small platter, with room around the edge to pick one up. For a brunch spread, set the platter beside the coffee pot so guests catch the scent as they pour.
Floating Hellebore Bowl
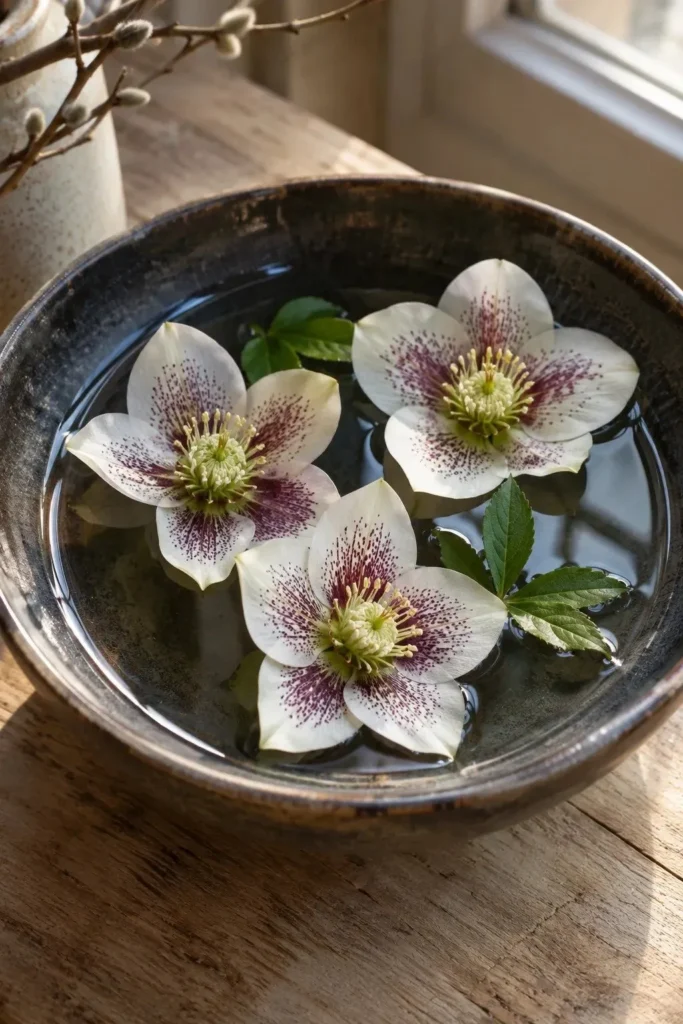
| Design choice | Charcoal ceramic bowl | Clear glass bowl |
|---|---|---|
| Flower color | Ivory petals stand out against the dark glaze. | Plum blooms show clearly over a pale tablecloth. |
| Water level | Leave a slim border of charcoal above the water. | Fill halfway so the waterline catches the light. |
| Best viewing angle | Look down to see the freckles inside each bloom. | Look from the side to see the petals meet the water. |
Hellebores usually nod toward the ground, so floating them face up reveals the markings you might otherwise miss. Snip each stem just below the flower and lower the bloom gently onto the water. Use a bowl wide enough for the flowers to drift apart without their petals folding against the sides.
Silvery Lunaria Seedpods
DO
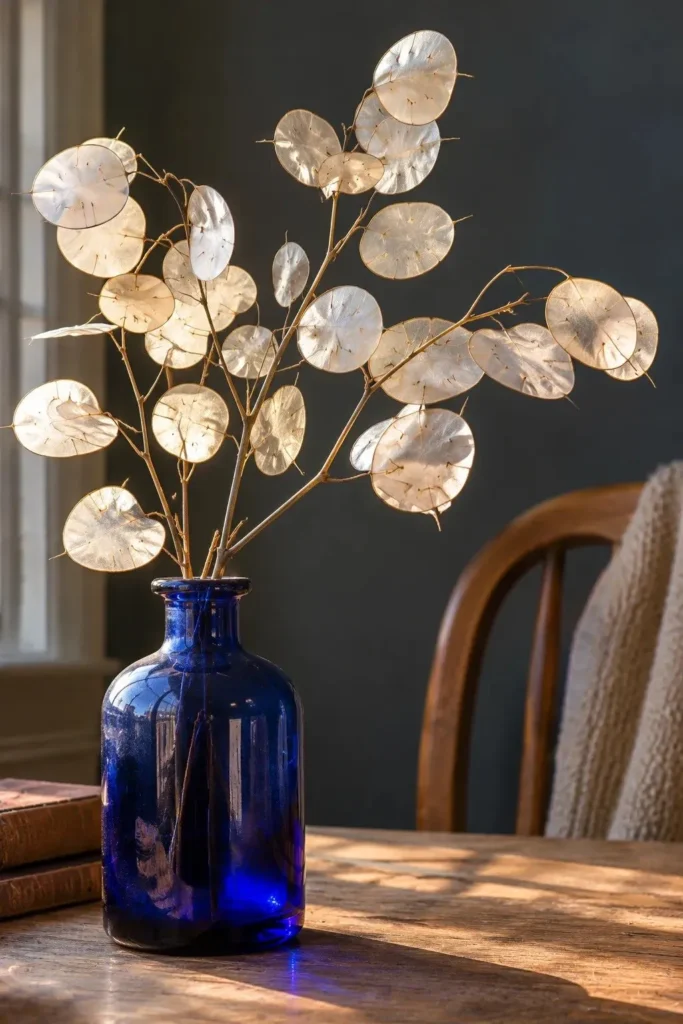
- Give the papery seedpods a dark backdrop so their silvery edges show up from across the table.
- Stand three stems at different heights in a narrow-necked bottle.
- Angle one stem toward the window to catch light through the translucent pods.
DON’T
- Don’t pack the stems tightly enough for the delicate discs to rub together.
- Don’t add water to dried stems.
- Don’t leave a tall spray at eye level between two place settings.
The easiest way to find the right spot is to take the bottle around the table in daylight. Watch one seedpod as you move it. Where the light passes through from the side, you’ll see its fine veins and pearly surface at the same time. Set the bottle there.
Cranberry Glass Lantern
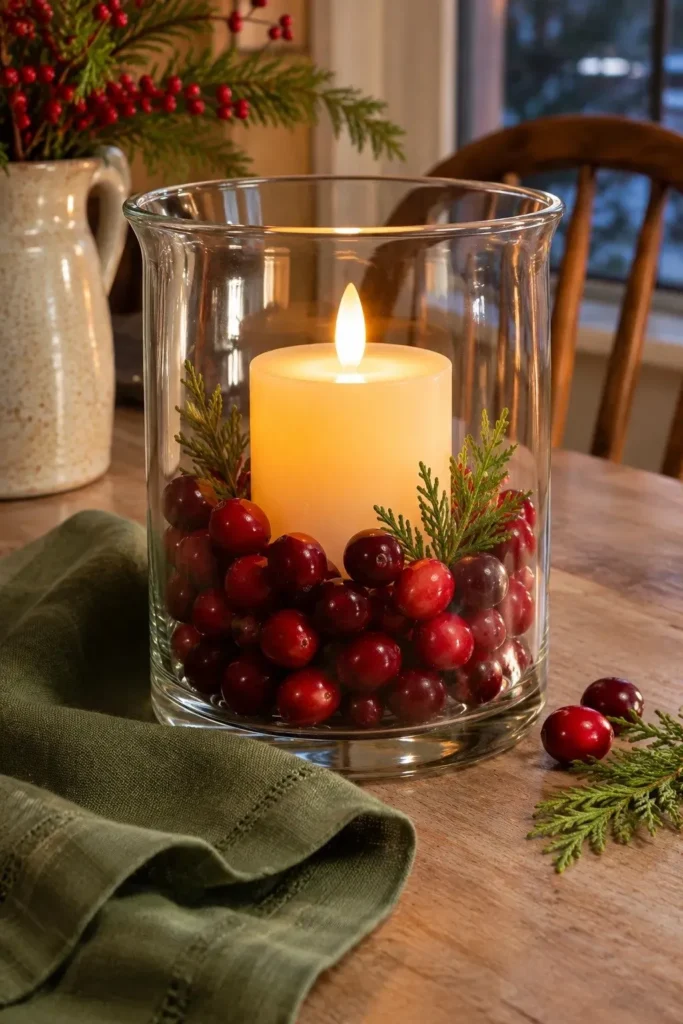
Best detail: A ring of ruby cranberries glows around the candle.
Time: About five minutes to assemble.
Materials: A glass hurricane, a smaller clear tumbler, fresh cranberries, and an LED pillar that fits inside the tumbler.
Best for: A small round table with room for one focal point.
Set the tumbler inside the hurricane and pour cranberries into the gap between the two glasses. Stop while the berries sit below the top of the candle. The inner glass holds the fruit in a tidy ring, and you can lift the candle out to reach its switch without sending berries across the table.
Miniature Alpine Village
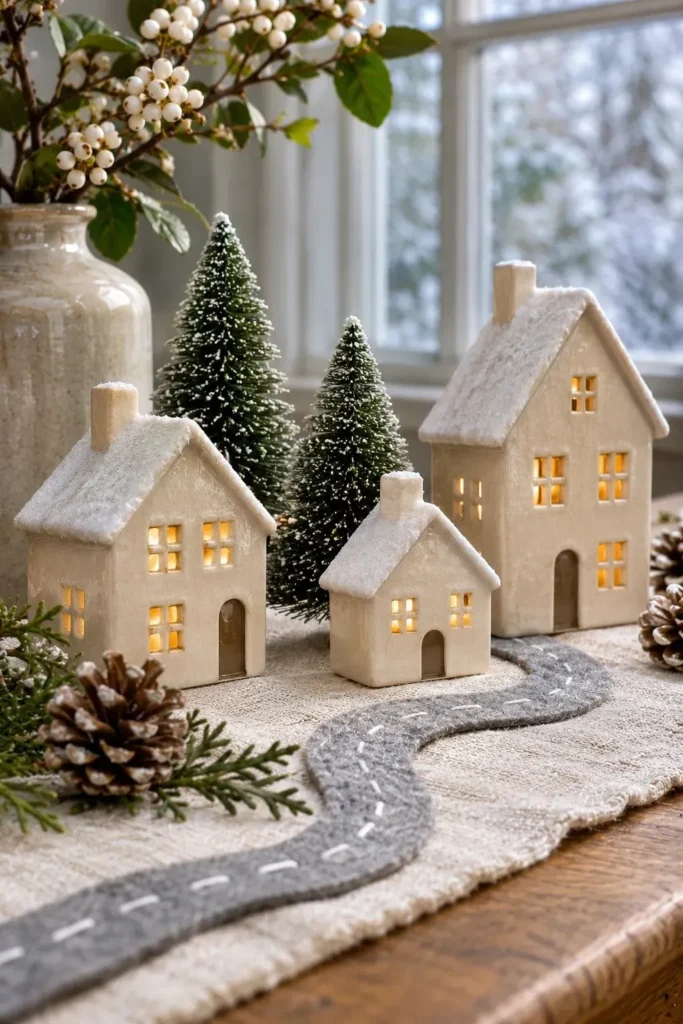
Where would you walk if you lived in this little village? Start with that question as you set three ceramic cottages on a linen runner. Space the front doors a few inches apart and turn the last house slightly inward, as if the lane takes a bend just beyond it.
Cut a strip of gray felt about two fingers wide for the lane. Tuck one end beneath the nearest doorstep and curve the other behind a pair of bottlebrush trees. From a seat at the table, the trees hide the end of the path and make the village feel larger.
Rosemary Brie Wreath
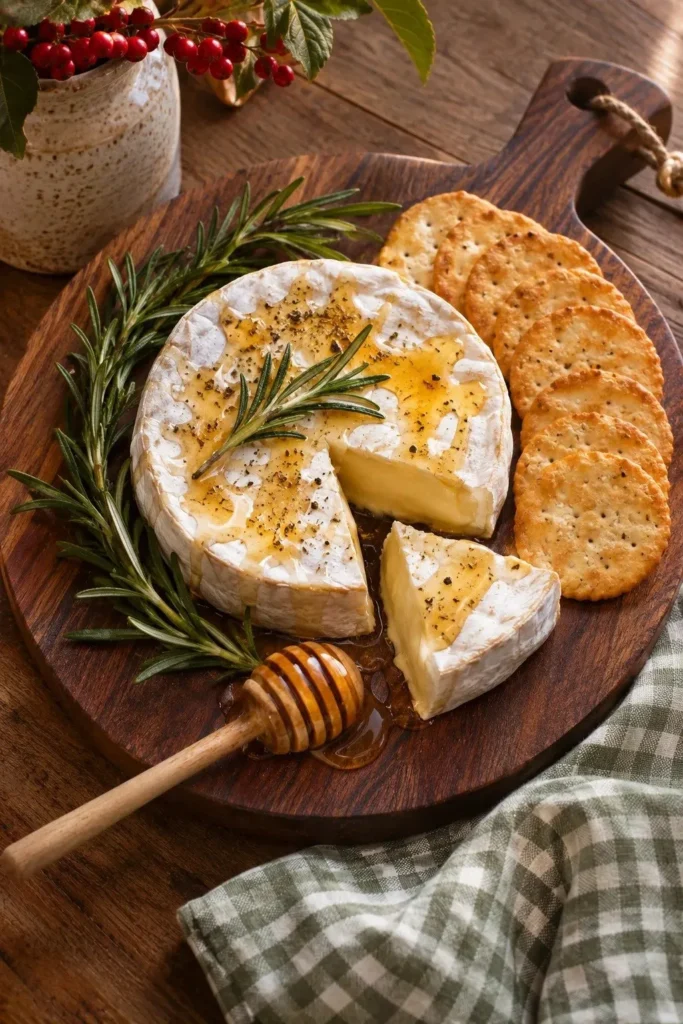
- Let the first appetizer double as the centerpiece. Set a wheel of Brie just off center on a round board to leave room for crackers.
- Overlap short rosemary sprigs around the cheese with their tips pointing in the same direction.
- Leave an opening in the rosemary on the side closest to your guests. Rest the cheese knife there so the first slice is easy to reach.
- Spoon a little honey onto the rind just before serving. Keep it in the middle so it reaches the first few slices without running onto the crackers.
For a small gathering, cut the first wedge yourself and pull it forward into the opening. Guests can see where to start, and the pale interior gives the wreath a second shade of ivory. Keep extra crackers in a bowl nearby so refills take seconds once everyone sits down.
Framed Paper Snowflake
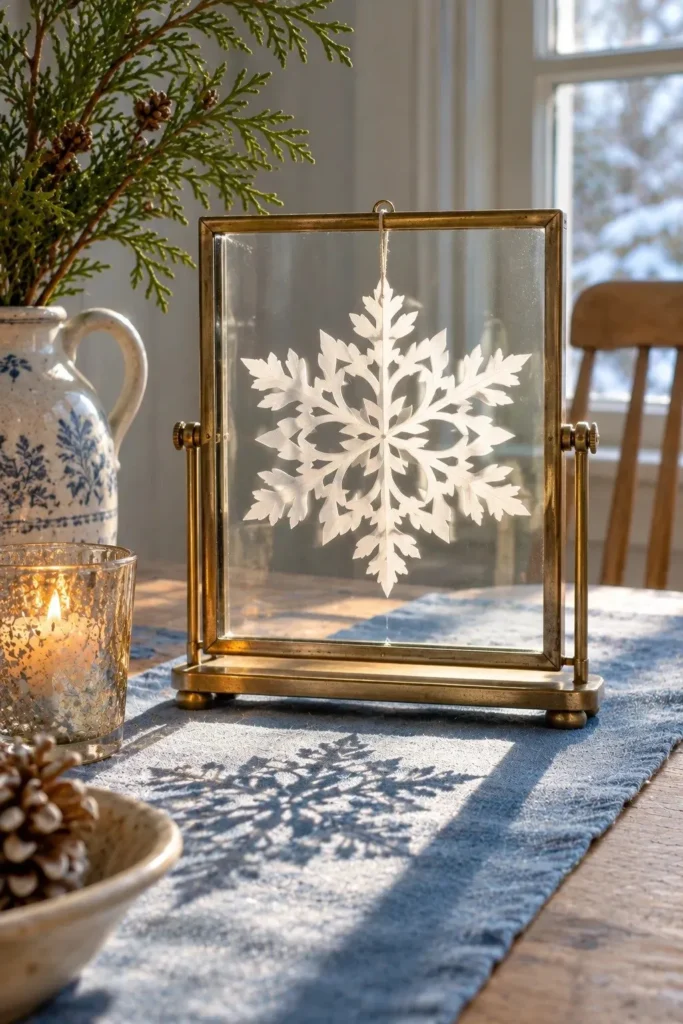
Quick Tip:
Let sunlight draw a second snowflake on the table. Stand a clear floating frame beside a sunny window and turn it until the paper casts a crisp shadow on the runner.
Cut the snowflake from thin white paper and press it flat under a heavy book before framing. Leave a finger’s width of clear glass around the outer points so the pattern reads from either side of the table. A blue runner makes even the smallest cutouts easy to see.
Magnolia Leaf Runner

Before: Loose magnolia leaves scattered across a long table can look like clippings waiting to be cleared. With every glossy side facing up, their outlines blend into a single dark patch.
After: Overlap the leaves down the middle, tucking each stem beneath the leaf ahead of it. Flip every third leaf to reveal its cinnamon underside and give the row a rhythm you can see from either end.
Start at the center of the table and work outward in both directions so the leaf tips point toward the ends. For a dinner with shared dishes, build two short stretches with a platter-sized gap between them. The greenery can stay in place when the food arrives.
Birch Log Bundle
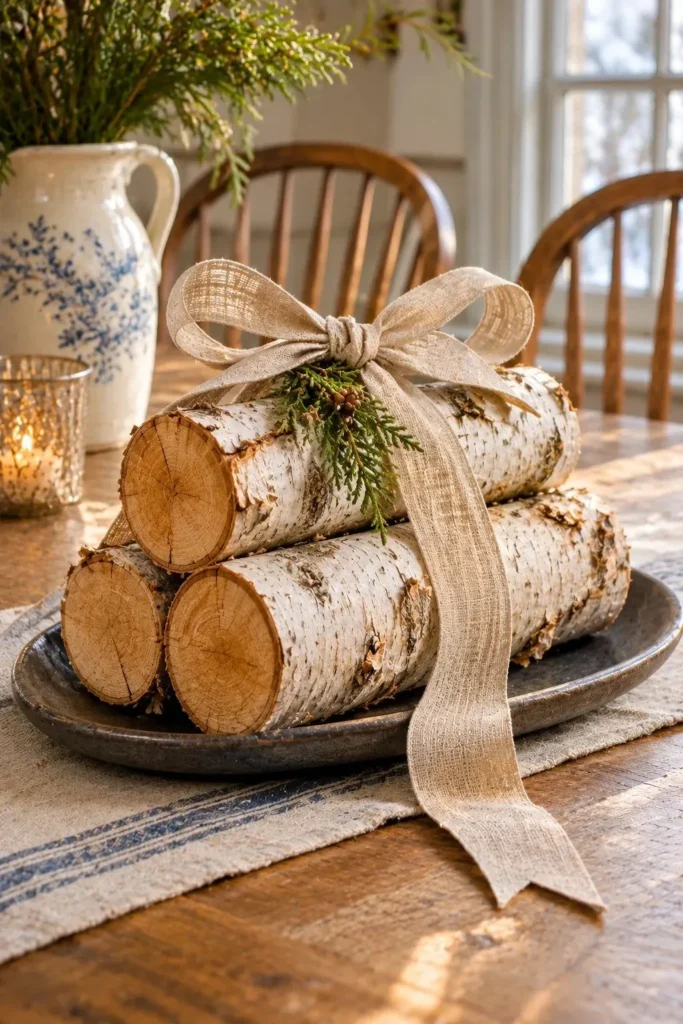
- Turn the prettiest side of the birch toward your guests. Look for dry logs with dark horizontal marks and a few loose curls of white bark.
- Lay two logs side by side on an oval platter. Set a slightly shorter log in the groove between them so the stack holds its shape.
- Slip a wide linen ribbon beneath the stack and knot it just off center. Trim the tails short enough to rest on the platter.
- Rotate the bundle a quarter turn so one place setting gets a view of the cut ends and another faces the bark.
The cut ends are worth showing, especially on a pale table where white bark can fade into the background. A dark platter gives the bundle a clear outline and catches stray flakes. For a narrow breakfast table, use pieces about the length of your hand so there’s still room for mugs.
Cushion Moss Garden

| Design choice | Shallow ivory dish | Charcoal slate tray |
|---|---|---|
| Moss placement | Cluster three mounds in a loose triangle. | Arrange them in an uneven line along the tray. |
| Finishing detail | Fill the gaps with fine gray gravel. | Set one smooth stone beside the smallest mound. |
| Best table shape | The compact cluster suits a round breakfast table. | The long, low arrangement fits a rectangular dining table. |
A thumb’s width of space between moss mounds makes each rounded shape easier to see. Set the largest piece first, then check the arrangement from your chair before placing the others. Preserved cushion moss keeps the display low and needs no watering, so you can use a favorite serving dish.
Plaid Thermos Bouquet

DO
- Give a vintage plaid thermos a spot at breakfast by filling it with a handful of cream carnations.
- Strip any leaves that would sit below the waterline.
- Cut the outer flowers short enough to hide the threaded rim.
- Leave a few pussy willow tips above the petals so their gray buds stand out.
DON’T
- Don’t force a thick bunch through the narrow mouth. Add the stems individually.
- Don’t fill the water to the brim, since the stems will displace some of it.
- Don’t let the bouquet hide the plaid that gives the arrangement its character.
Set the detached cup beside the bouquet and drop a few sugar packets inside for breakfast guests. That little detail lets everyone recognize the old thermos, even with its neck hidden by flowers. If the table seats two, skip the willow and keep the carnations just above the rim.
Glass Icicle Branch
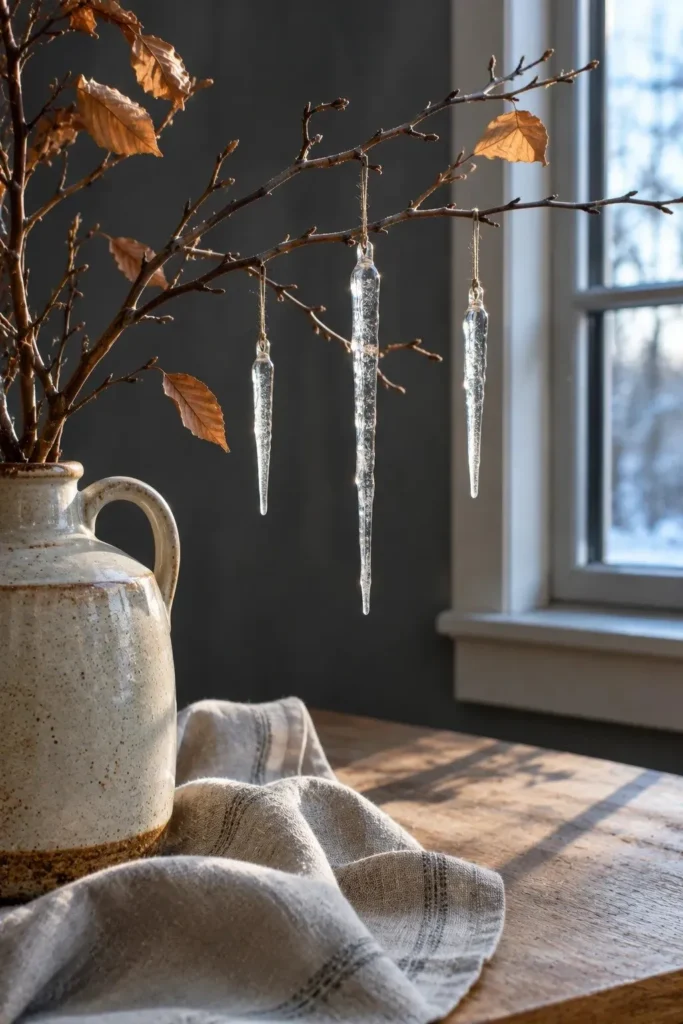
Best light: Low afternoon sun brings out the ridges in clear glass icicles.
Vessel: A heavy jug with a narrow mouth holds one branching stem.
Scale: Three small pendants suit a branch about the length of your forearm.
Best placement: The open end of a dining table, where the branch can spread sideways.
Set the jug in place before hanging the glass. Loop each icicle over a separate twig, close to a fork where the loop can settle. Leave a little air between the pendants. From the far end of the table, you’ll see three distinct slivers of light against the bare wood.
Pewter Feather Fan

A pewter creamer is just tall enough to show off the stripes on pheasant feathers. Choose five craft feathers in shades of chestnut and cream. Set the longest one a little off center, then trim the outer quills until the tips open into a fan above the spout.
If the feathers slide to one side, tuck a small piece of folded paper inside the creamer to hold the quills apart. Turn the handle toward the nearest place setting. Seen from that angle, the curved pewter handle balances the sweep of the feathers, and both shapes stay visible.
Snowflake Shortbread Stand
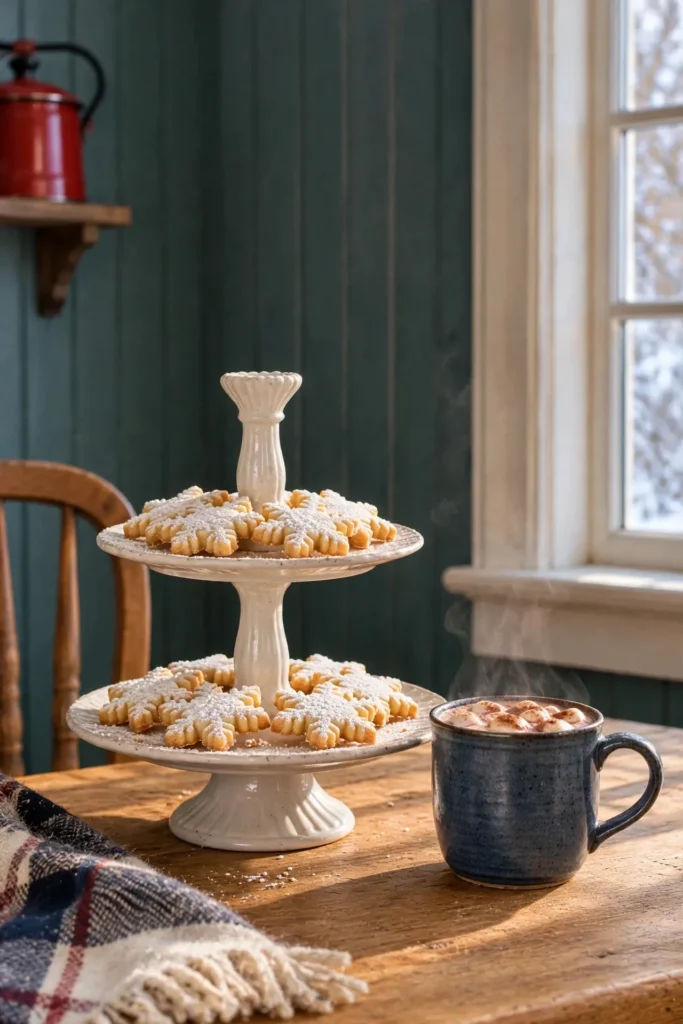
- Put dessert in the middle of the table while the coffee brews. A dark cake stand gives pale shortbread enough contrast for each snowflake to show.
- Trace the six arms of each cookie with a thin line of white icing. Leave some golden shortbread showing between the lines.
- Let the icing dry before you stack the cookies so the patterns lift away cleanly.
- Make a short stack in the center, then lay individual cookies around the edge where guests can reach them.
For a coffee table, choose cookies small enough to pick up by the middle. The narrow points on larger snowflakes can snap when someone lifts one from the edge. Keep a folded napkin beside the stand so a guest can take a cookie and get back to a warm cup.
Brass Bell Swag
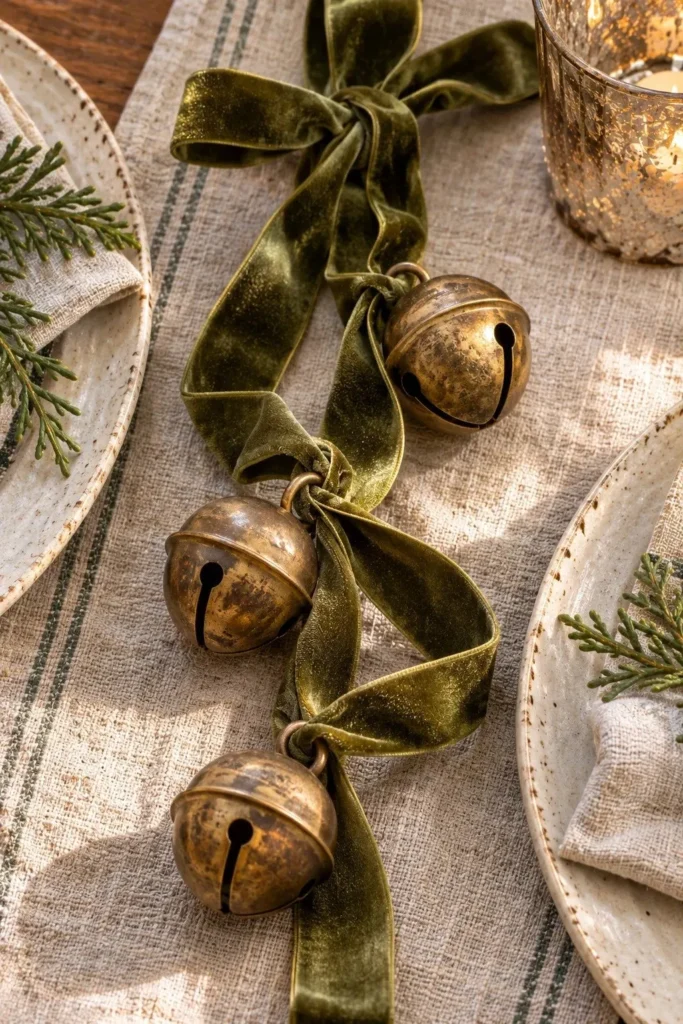
Before: A handful of brass bells looks charming until one rolls against a dinner plate. Gather them in a pile and the smaller bells all but disappear.
After: Thread a narrow velvet ribbon through each bell loop and knot it in place. Lay the ribbon in a loose curve down the table, turning each bell so its weathered brass face catches the light.
Start with the largest bell in the middle and leave about a handspan of ribbon on either side before tying the smaller ones. The gaps let you see where the velvet changes color as it bends. At dinner, you can lift the whole piece by its ends to make room for a platter.
Felt Evergreen Grove
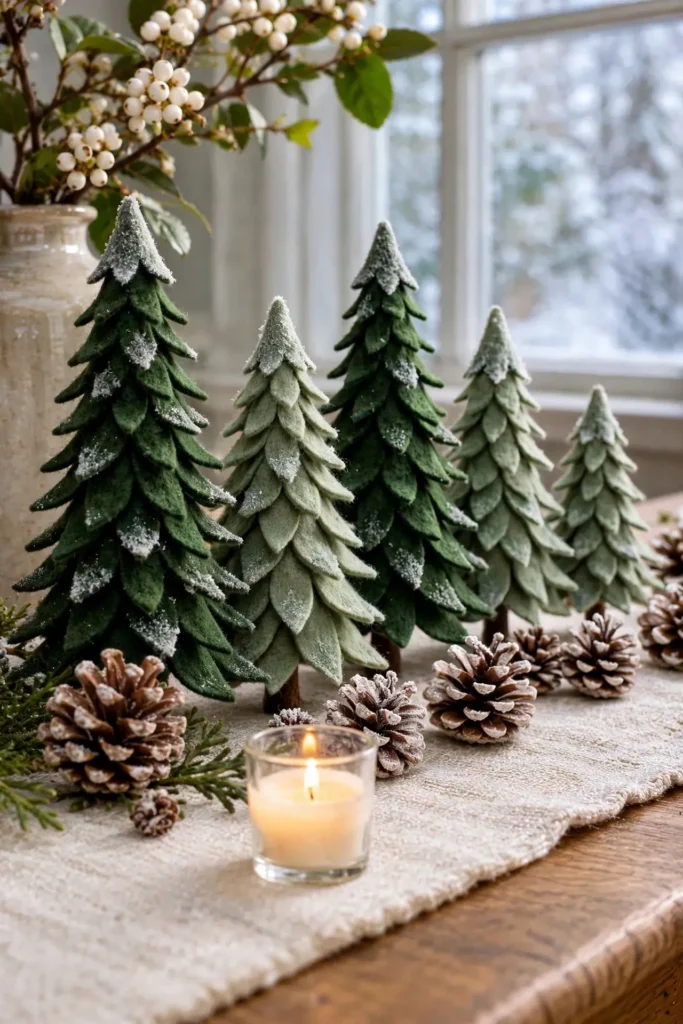
- Cut a fir tree silhouette from paper and fold it down the middle to check that both sides match. Give the tree a broad, flat base so it can stand.
- Trace the pattern twice onto stiff craft felt and cut out both shapes. On one tree, cut a slit from the tip halfway down. On the other, cut from the base halfway up.
- Slide the two slits together at right angles. Set the tree on the table and trim any uneven bottom edges until all four sides touch.
- Repeat with two shorter patterns in different greens. Group the trees slightly off center, leaving a little space between their branches.
Keep the tallest tree below the eye line of someone sitting opposite you. A grove about the size of your hand still shows off the cut branches, especially on a light runner. When winter is over, slide the pieces apart and store them flat in an envelope.
Dried Hydrangea Basket
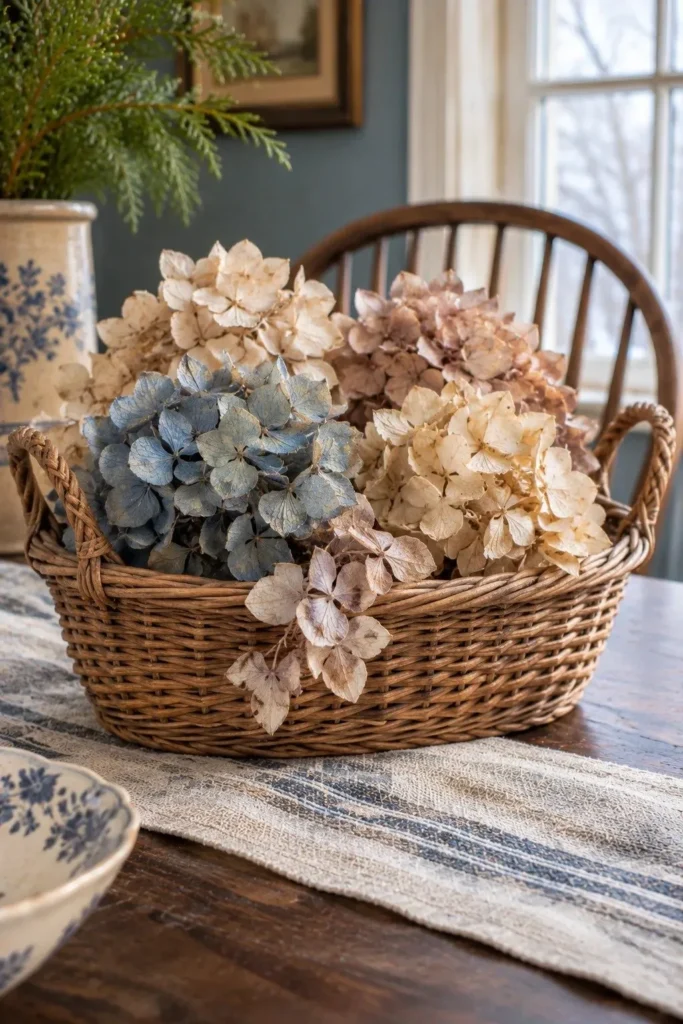
| Design choice | Round basket | Long oval basket |
|---|---|---|
| Best placement | Center it on a small breakfast table. | Run it lengthwise between facing place settings. |
| Bloom arrangement | Cluster three large heads close together. | Stagger the blooms so their edges overlap. |
| Color placement | Set one faded blue bloom among pale heads. | Repeat the blue near opposite ends. |
Dried hydrangeas are easier to arrange if you hold them by the stems, since the petals crumble under your fingers. Fit an empty jam jar inside the basket and rest the stems in it. Cut them just short enough for the lowest petals to brush the wicker rim.
Striped Amaryllis Cachepot
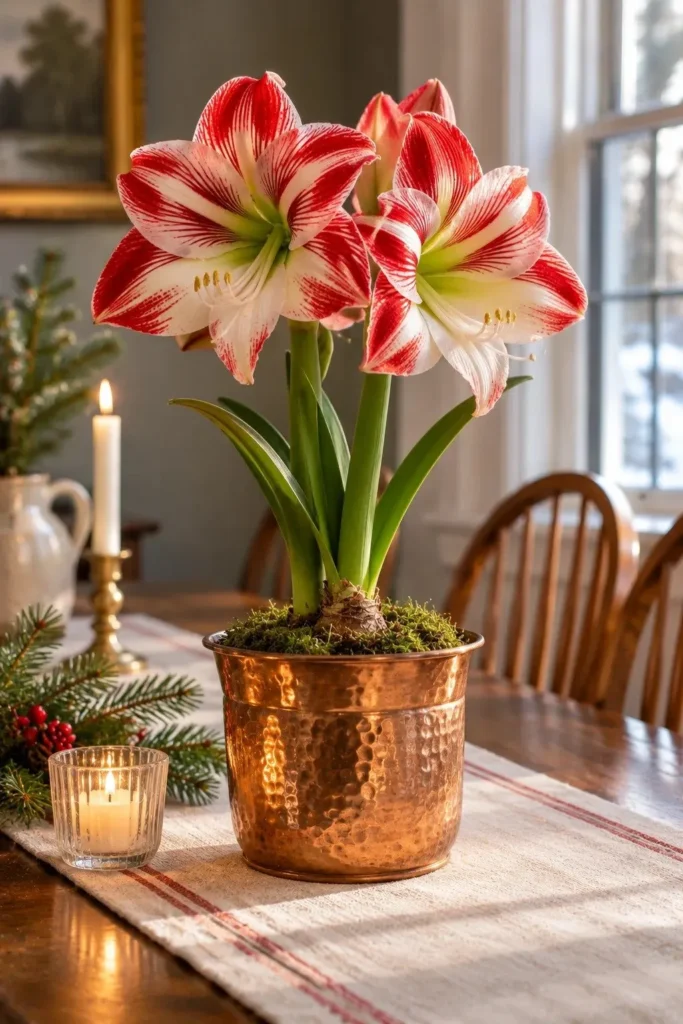
DO
- Let one striped amaryllis take the open end of the table, where its tall flowers can face the room.
- Choose a copper pot just wide enough to slip the nursery pot inside.
- Turn one open bloom toward the seats and leave a side view of the buds.
- Lift out the nursery pot for watering and let it drain before putting it back.
DON’T
- Don’t bury the exposed top of the bulb under decorative moss.
- Don’t leave water standing in the bottom of the copper pot.
- Don’t crowd the stalk with extra stems that hide the stripes.
Choose a plant with one flower open and a second bud still closed. The open bloom lets you see the stripe color before bringing it home. At breakfast, turn the pot a little as the next flower opens so each side of the table gets a view of the petals.
Winter Postcard Gallery

Best detail: Three postcards can bring an entire winter outing to the table.
Materials: A grooved wooden postcard holder and three cards or small photo prints.
Setup time: About five minutes.
Best placement: Against the wall on a breakfast nook table, with the pictures facing the seats.
Give the little gallery a subject your family recognizes. A neighborhood sledding hill, the corner café, and the walk home make a lovely sequence if you have winter photos on your phone. Print them with a slim white border so even a snowy scene stands out against a pale wall.
Amethyst Geode Pair
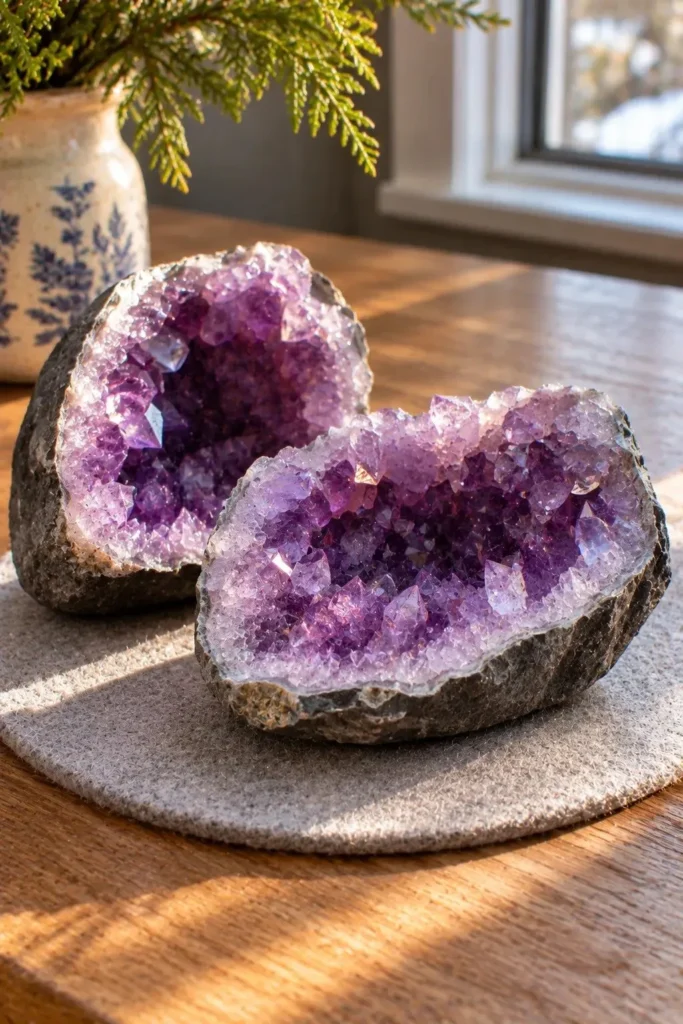
A split geode gives you two little windows into the same stone. Set the halves near the middle of the table with their crystal faces angled toward opposite seats. Slip a piece of felt beneath each base to protect the wood, then check that neither half rocks when you touch it.
Low afternoon light brings out details that are easy to miss from above. Turn one half a few degrees until the smallest lavender points catch the light. On a dinner table set for two, leave a gap between the stones just wide enough for the salt cellar.
Oyster Shell Platter
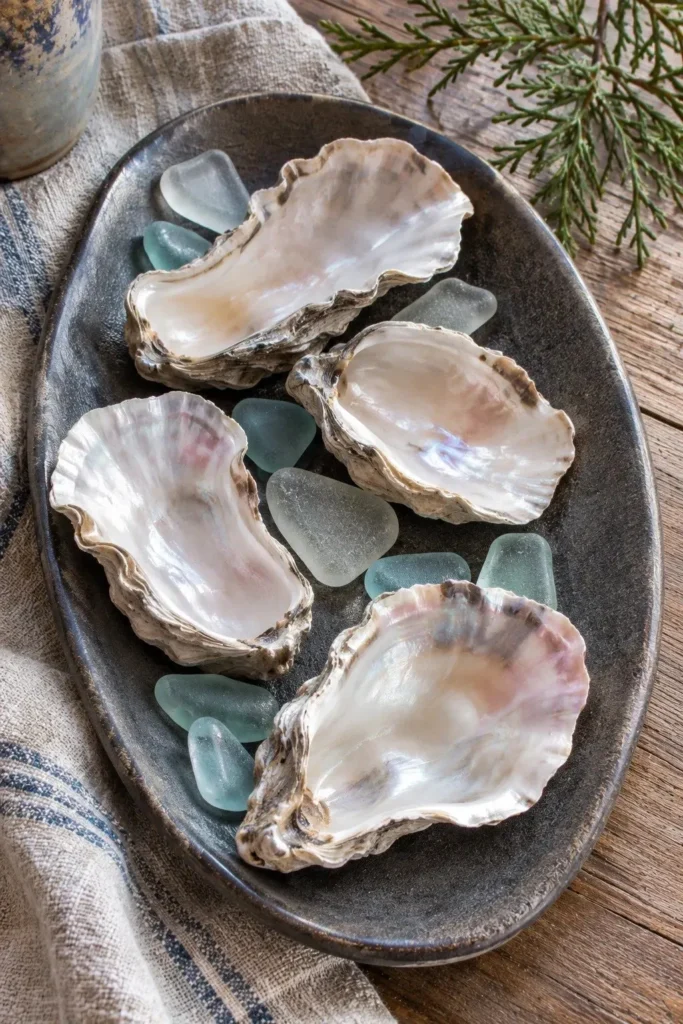
- Start with the shell that catches the most light. Set it just off center on a dark platter with its pearly interior facing up.
- Arrange four smaller, clean craft shells around it. Turn their narrow ends in different directions so their outlines stay visible.
- Tuck a pea-sized piece of removable putty beneath any shell that rocks on its curved base.
- Add a few pieces of pale sea glass near the rim. Leave the shell interiors empty so their pink and silver tones show.
For coastal winter centerpieces, the prettiest angle is often the one you see while sitting down. Take your usual seat and turn the platter slowly. Stop when two or three shells pick up the window light at once. Even on an overcast afternoon, the pearly surfaces have a soft sheen.
Yarn Snowball Bowl
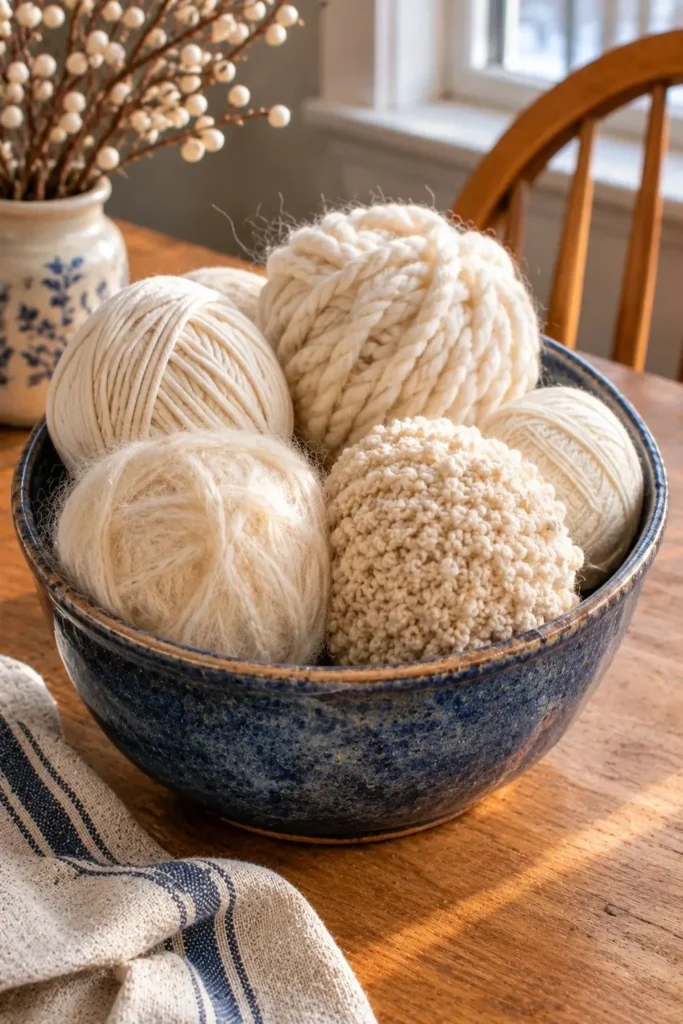
Quick Tip:
Save your softest yarn for the outside of each snowball. Wind leftover yarn into a firm center, then cover it with a single layer of ivory wool or cream bouclé.
Make the balls in three sizes, from a walnut to a small orange. Set the largest in the bowl first and tuck the little ones into the gaps. Pull each loose end under a few strands with a crochet hook so you can unwind the yarn for another project later.
Winter Puzzle Tray

Before: A half-finished puzzle claims the middle of the table, but nobody can find the skater’s missing red mitten. Loose pieces drift under napkins, and clearing up for lunch means taking the scene apart.
After: Build the pond and a few skaters on a shallow tray, then gather the loose pieces in a saucer. The little winter scene gives guests something to look at and a reason to linger over coffee.
Check the finished puzzle dimensions against the inside of your tray before you start. Leave enough room at one end for the saucer. A scene with a few bright details works especially well here because someone with five minutes to spare can spot a red mitten and fit it into place.
Citrus Ice Ring

- Check the fit before you freeze anything. The ring mold should be narrow enough for the finished ice to float freely in your punch bowl.
- Arrange thin blood orange slices around the base of the mold, overlapping them like scales. Tuck a few washed rosemary tips between the slices.
- Pour in just enough water to cover the bottom edges of the fruit. Freeze until firm so the pattern stays put when you add the rest of the water.
- Fill to your desired depth and freeze solid. Briefly dip the outside of the mold in warm water, turn the ring onto a plate, then slide it into the punch with the fruit facing up.
For a brunch table, pale apple or white grape punch lets the red citrus show through. Leave space beside the ring for the ladle, especially if guests will serve themselves. As the ice melts, the orange slices loosen and drift across the surface, so the bowl looks different by the second round.
Blue Willow Evergreens

| Design choice | White pine | Cedar |
|---|---|---|
| Shape | Long needles make a soft, rounded spray. | Flat sprays form a low fan. |
| Stem placement | Cross three stems loosely at the jar opening. | Face the broad side of each spray toward a seat. |
| Best jar shape | A narrow neck holds the stems together. | A wider mouth gives the sprays room to spread. |
Look at the pattern on your jar before deciding how much greenery to keep. If the porcelain shows a little bridge or a pair of birds, turn that detail toward the table and trim any sprig hanging across it. Set the lid painted side up so it becomes part of the arrangement.
Copper Cocoa Caddy

DO
- Give chocolate stirring spoons the tallest spot in the caddy so guests can find them by their handles.
- Set marshmallows in a shallow bowl with a small scoop.
- Turn the mug handles outward for an easy reach.
- Leave one compartment open for used spoons, lined with a washable cup.
DON’T
- Don’t crowd the caddy with mugs if they wobble against the dividers.
- Don’t set the chocolate spoons beside a hot cocoa pot where they can soften.
- Don’t fill the marshmallow bowl to the rim or the first scoop will scatter them.
A divided carrier earns its spot in the center of the table on a snowy afternoon. Set it between two people decorating their cocoa and put the warm pitcher at one end. Each person gets a clear view of the toppings, and the pitcher has a clear path back to the kitchen.
Hyacinth Bulb Glasses
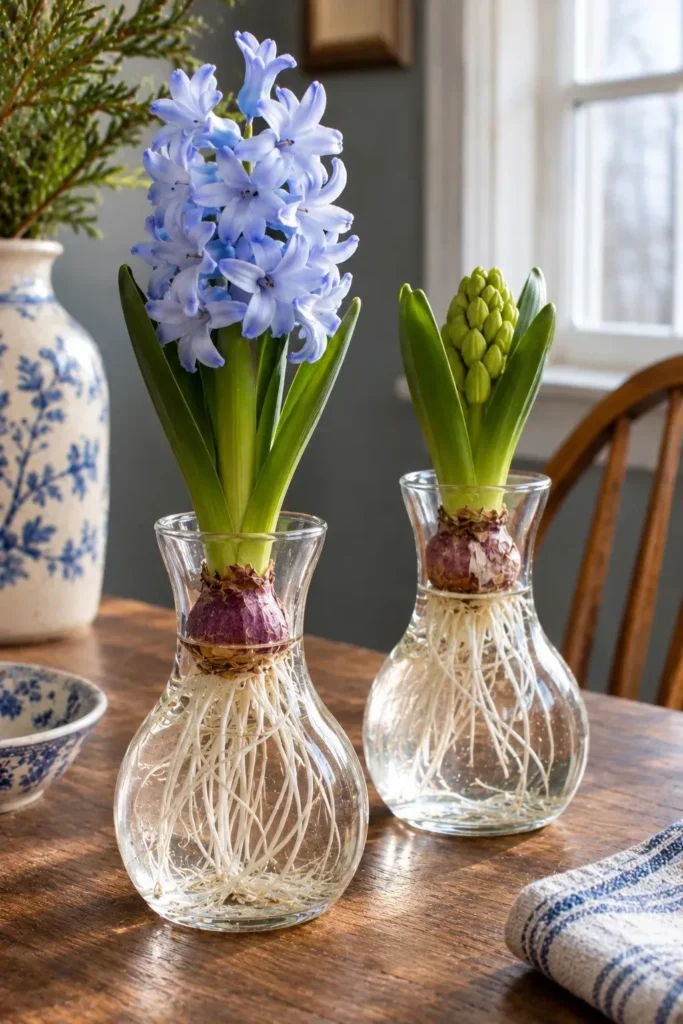
Best detail: The white roots are as much a part of the display as the blue flowers.
Setup time: Five minutes with hyacinths already growing in bulb glasses.
What to choose: One bulb beginning to bloom and another with a tight bud.
Best spot: A small table in bright, indirect light where you can see the glasses from the side.
Set the glasses a few inches apart so you can see each tangle of roots. When topping up the water, leave a small gap beneath the base of the bulb. Let the roots reach into the water. By the time the first flower fades, the second gives you something new to watch.
Punched Tin Constellations

At dusk, a punched tin lantern looks like a little patch of night sky in the middle of the table. Choose one with a mix of tiny pinholes and larger star cutouts. Slip a warm LED tea light inside and turn your favorite cluster of stars toward your seat.
For two people sitting opposite each other, choose a lantern with cutouts all the way around. Set it on a folded navy napkin just wide enough to frame the base. The dark linen picks up the blue of the evening window while the brightest stars show through the tin.
Conclusion
Start with the way you actually use your table. If dinner means passing bowls from hand to hand, try the birch bundle on a platter you can lift away. If Saturday coffee tends to stretch into the afternoon, set out the winter puzzle tray and leave a few red mittens for someone to find. The best winter centerpieces give people a reason to enjoy the table you’ve set.
Save this post on Pinterest for your next gathering, and share it with a friend who loves setting the table. Then pick one idea and give it a place at dinner tonight.
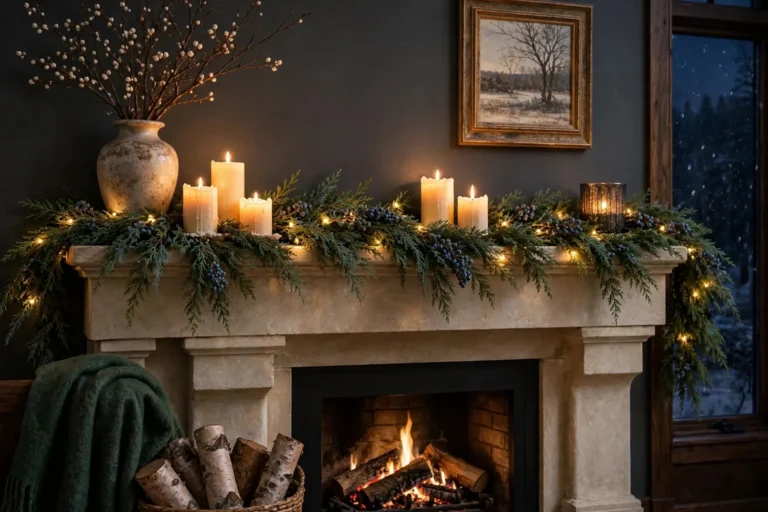
If your table sits near the hearth, a winter mantel display can echo the same greenery and candlelight across the room.