
Indoor Pond: 30 Mesmerizing Ideas for a Calm Corner
When sunlight hits an indoor pond, a single ripple can send a ribbon of light across the wall. Let the water settle, and you might see the fern beside your chair reflected right down to the tip of each frond.
The trick is choosing a setup you’ll enjoy from the spot where you actually sit. A tall bowl might catch your eye from the doorway yet hide the water once you settle into your chair. A low basin brings floating leaves into view, while a bamboo spout gives you a gentle trickle between page turns.
These 30 ideas range from a porcelain bowl with three smooth stones to a glass pond that divides a room. You’ll find ways to choose the right height, make use of your window light, and leave enough room for easy cleaning.
Blue Porcelain Pond Bowl

A blue and white porcelain bowl gives an indoor pond a pattern you can enjoy from across the room. Choose a wide, watertight bowl with the decoration on the outside. Set it on a low stand beside your reading chair so you can see the water over the rim.
Arrange three smooth stones just off center, with the tallest one breaking the surface. Before you add anything else, sit in the chair and look down. If the pale glaze shows through the water between the stones, you have enough contrast to see the shape of each one.
River Pebble Shoreline
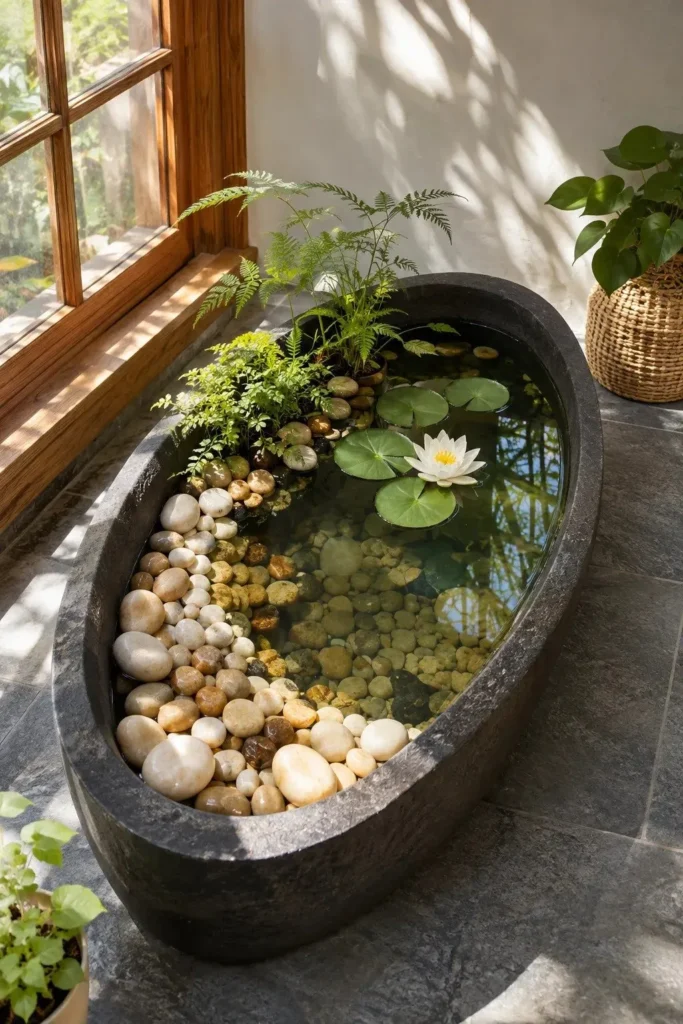
- Give the water a curved shoreline by grouping your pebbles in a crescent along one end of a shallow basin.
- Start with a few palm-sized stones at the widest part of the crescent. Fill the gaps with smaller, rounded pebbles.
- Taper each tip to a single row of stones so the curve has a visible beginning and end.
- Pour in water slowly. Stop while the highest pebbles are still dry and the lowest ones sit just beneath the surface.
The waterline does most of the decorating here. A honey-colored pebble looks richer where it dips below the surface, so even a handful of similar stones gives you several shades. Leave the opposite end of the basin open to catch the window’s reflection and give the curved bank a clear outline.
Slate Spillway Basin

Quick Tip:
What sounds gentle from the doorway can seem surprisingly loud beside your chair. Choose a low spillway with an adjustable pump, then listen from your usual seat as you turn the flow down.
Slate gives the water a dark backdrop, so a narrow stream is easy to see. Angle the basin until daylight catches one edge of the falling water. For a reading corner, aim for a flow you can hear between page turns without losing track of the sentence.
Fern-Framed Corner Pond

BEFORE: From the armchair, the first thing you notice is the strip of bare wall between two matching fern pots. The basin sits in the gap, but its water reflects only the blank wall.
AFTER: Raise one fern on a short stand and tuck the other just behind the basin. A few fronds now arch over the rim, and their reflections bring the greenery right down to the water.
Work backward from the seat you use most. Set the basin in place first, then shift the pots until you can see individual leaves reflected in the water. Keep each fern in its own saucer so you can lift it out for watering without spilling potting soil into the pond.
Cedar Slat Pond Surround

- Borrow a detail from your favorite wood furniture. Choose a freestanding cedar planter box with slats running in the same direction as the grain on a nearby bench or cabinet.
- Measure the inside of the box and fit a rigid, watertight basin that can rest flat on the floor or a solid base.
- Position the empty surround and basin together. Check from your usual seat that the wood conceals the sides and you can still reach over the rim.
- Set one smooth stone at the far end, then fill the basin until the water sits just below its lip.
A long, narrow surround works especially well beside a bench because both pieces follow the same line. Leave a hand’s width between them so you can wipe up a splash or retrieve a dropped book. The cedar looks its best when enough of the slatted face is visible from the doorway.
Glass-Sided Water Garden
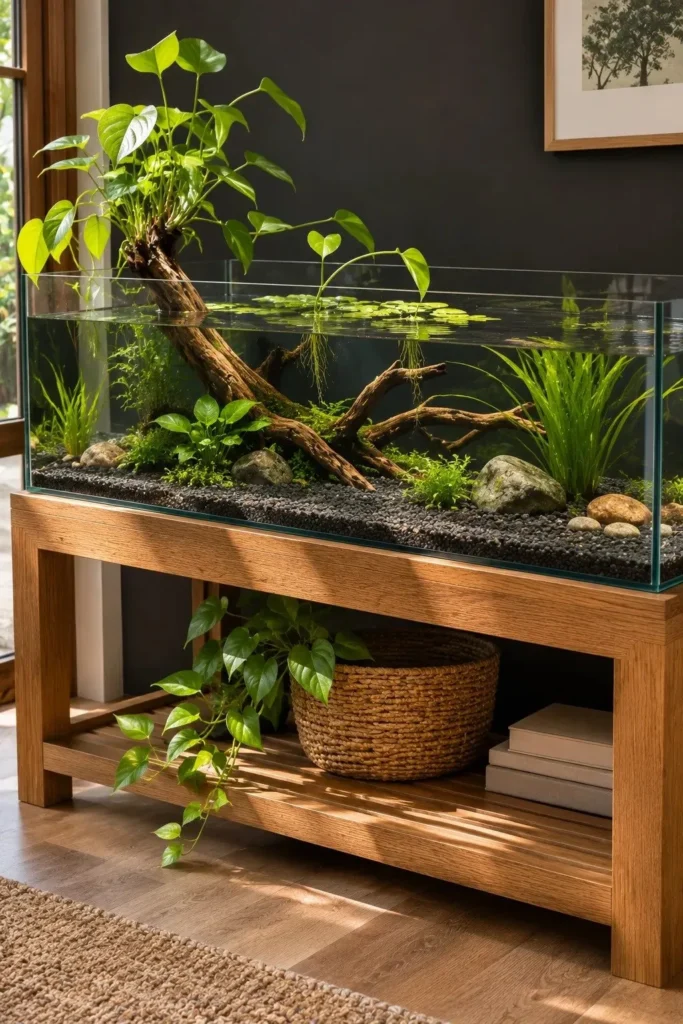
| Design choice | Black backdrop | Frosted backdrop |
|---|---|---|
| Focal point | Pale driftwood stands out sharply | Dark branches form a clear silhouette |
| Gravel color | Charcoal gravel blends into the background | Sandy gravel keeps the lower half bright |
| Best placement | Beside a light wall for a crisp outline | Against a pale wall for a softer edge |
Choose the backdrop from chair height, where you can see through the glass as well as across the surface. Hold a sheet of black paper behind the tank, then swap it for tracing paper. The better choice is the one that lets you follow the shape of the driftwood at a glance.
Floating Leaf Basin
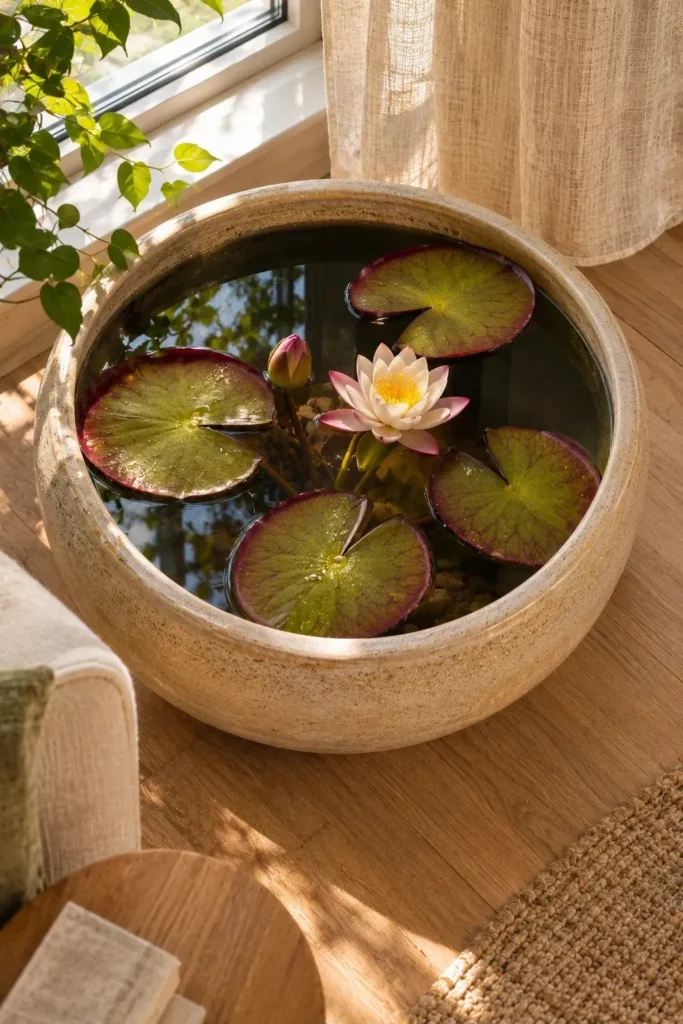
DO
- Give the prettiest leaf room to cast a shadow on the bottom of the bowl.
- Choose a watertight basin with enough depth for the lily variety you buy.
- Set the lily in an aquatic planting basket so you can lift it out for care.
DON’T
- Don’t pack stones around the basket so tightly that you can’t lift it.
- Don’t fill the gaps between leaves with ornaments.
- Don’t let yellowing leaves collect on the surface. Snip them off near the base of the stem.
Check the view from above before choosing a spot. Beside a low chair, you can see the leaf veins and the little crescent of shadow beneath each pad. A tall pedestal hides those details from a seated reader, so save the height for a corner you usually pass on foot.
Mosaic Pond Rim
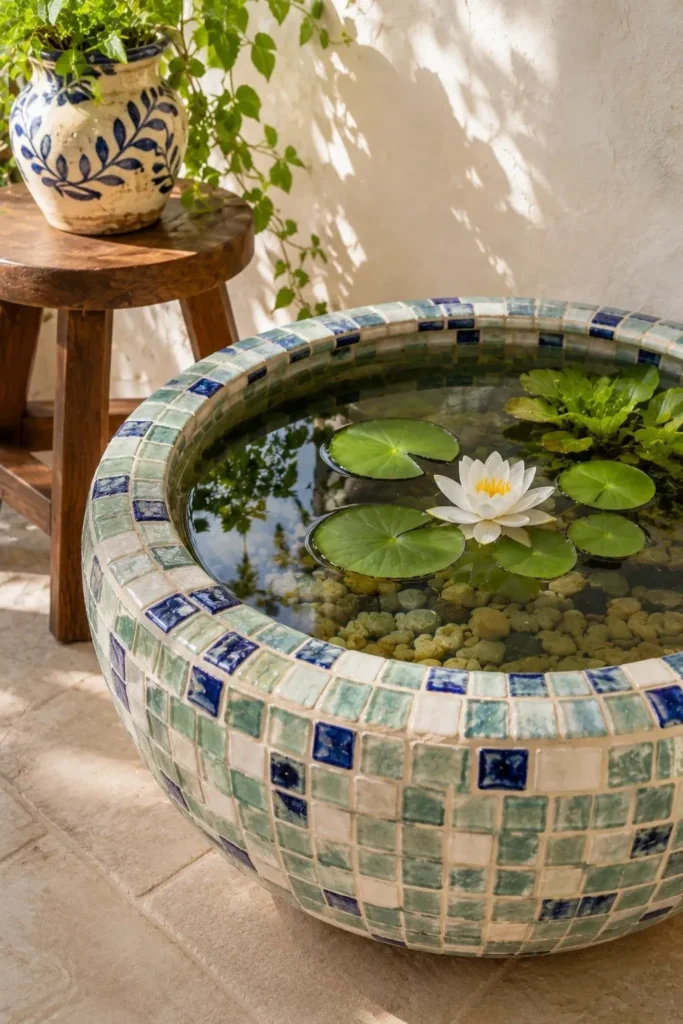
Focal point: A single row of cobalt tiles draws a bright circle around the water.
Tile finish: Glossy pieces catch side light, especially along the curved edge.
Grout color: Pale gray keeps the outlines visible against both blue and white tiles.
Best view: A low basin lets you see the whole pattern from your chair.
Before choosing a finished mosaic basin, cut a paper ring the width of the rim and place it where the bowl will sit. This gives you a sense of how much pattern you’ll see. In a corner with a colorful rug, repeat just one rug color in the tile.
Shoji Screen Pond
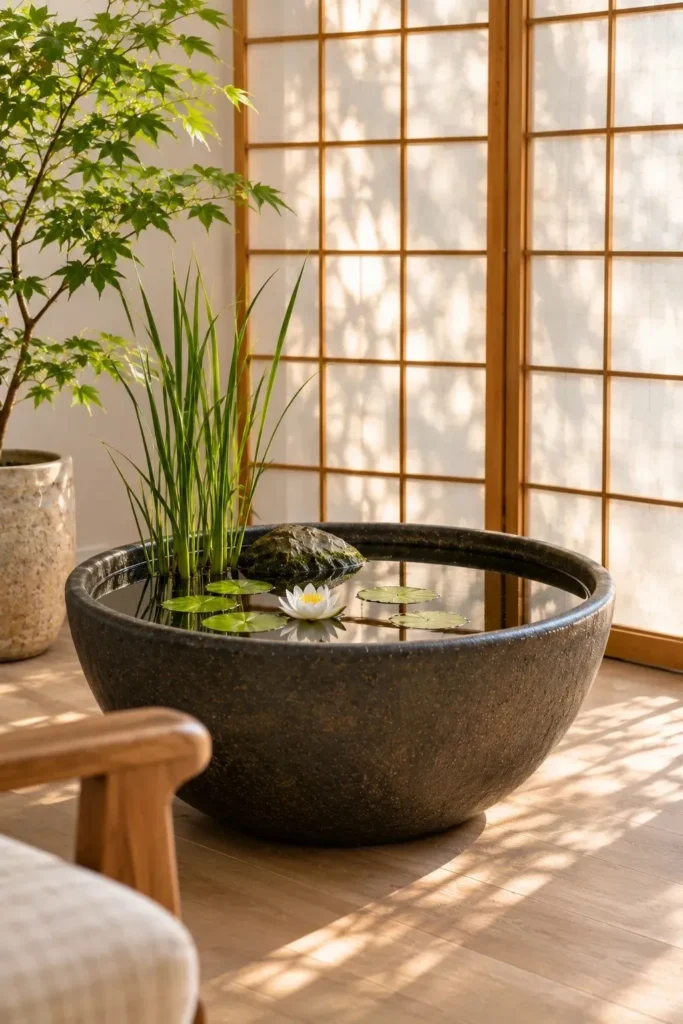
A folding shoji screen gives a round pond a corner of its own, even in an open living room. Place the center panel behind the basin and angle one wing toward the wall. From the sofa, the dark curve of the bowl will stand out against the pale rectangles.
Set the screen slightly to one side of a window so daylight passes through one panel and leaves the next in softer light. Keep a gap behind the basin for cleaning. Then sit down and adjust one wing until a few lattice lines appear across the water.
Two Bowl Cascade
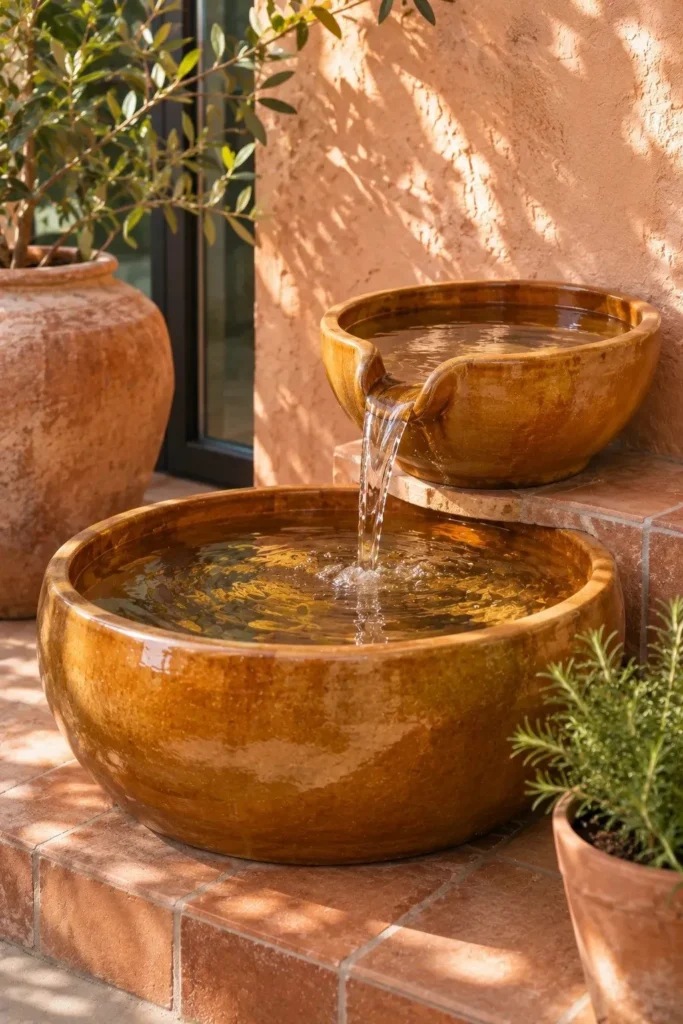
- Let the falling water land off center so you can watch ripples travel across the lower bowl.
- Choose a recirculating two-bowl fountain with a notched upper lip that directs the stream.
- Turn the upper bowl until you can see the water cross the gap from your favorite seat.
- Start the pump on its lowest setting. Increase the flow only until the water clears the lip instead of running down the outside.
The finish inside the lower bowl changes what you notice. A pale glaze lets you see the stream’s shadow move across the bottom. A deep brown glaze draws your eye to the bright rings on the surface. Hold each color in your room’s light before choosing your bowls.
Dwarf Papyrus Pond

Quick Tip:
The stems cast a second garden on the wall. Before filling the basin, move the potted papyrus along a sunny wall until the fine tips cast distinct shadows.
Keep the papyrus at one end of the basin so the upright stems have an open stretch of water beside them. Use a removable aquatic basket and check the planting depth on your plant’s tag. That way you can adjust the basket height without having to empty the whole bowl.
Understairs Pond Nook
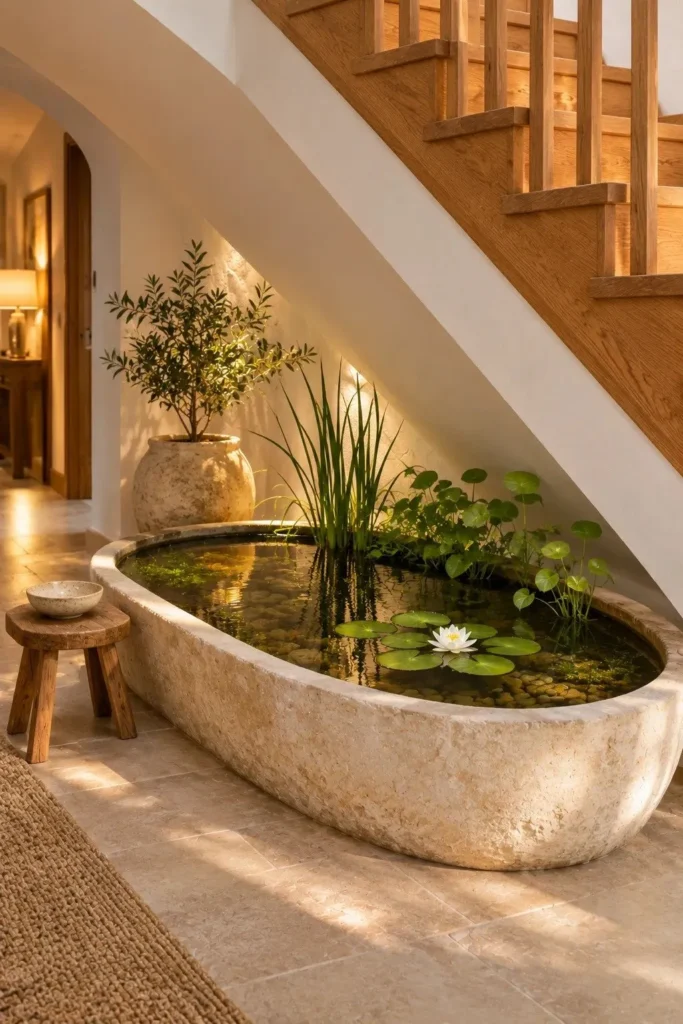
BEFORE: The lowest part of the staircase disappears behind a row of baskets. From the hallway, their handles interrupt the clean diagonal of the stairs, and the deepest basket is awkward to reach.
AFTER: An oval pond sits lengthwise beneath the slope, with its front rim visible from the hall. The open space above the water lets you see where the staircase meets the wall.
Mark the footprint with a strip of painter’s tape before moving the basin into place. Kneel at the taller end and check whether you can reach the far rim with a cloth. A slightly smaller basin that you can clean comfortably will serve this nook better than a tight fit.
Bamboo Spout Basin

- Give the stream a dark backdrop. Choose a charcoal basin wide enough to catch the water from a bamboo fountain kit.
- Rest the bamboo support across the rim and turn the cut end toward the middle of the bowl.
- Connect the spout to the pump according to the kit instructions. Tuck the tubing behind the support so it stays out of view.
- Fill the basin to the pump’s recommended level. Test the lowest flow setting and check the rim for stray droplets.
Listen from the spot where you usually sit. A spout close to the surface makes a gentler sound, while a longer drop gives each splash a sharper note. If your kit has an adjustable support, move it a little at a time until you find the sound you like.
Ribbed Metal Pond

| Design choice | Galvanized silver | Matte charcoal |
|---|---|---|
| Light on the ribs | Each ridge catches a thin silver highlight | Side light brings out the ridges as soft shadows |
| Floor pairing | Warm brick brings out the cool metal tones | Pale tile makes the oval outline easy to see |
| Plant detail | Broad green leaves stand out against silver | Slender chartreuse stems show clearly against charcoal |
Check the tub from the doorway before you fill it. If the ribs catch a harsh stripe of window glare, turn the oval slightly until the highlight softens. For a vintage tub with uncertain seams, fit a watertight liner and tuck its edge just beneath the rolled metal rim.
Pondside Lantern Pair
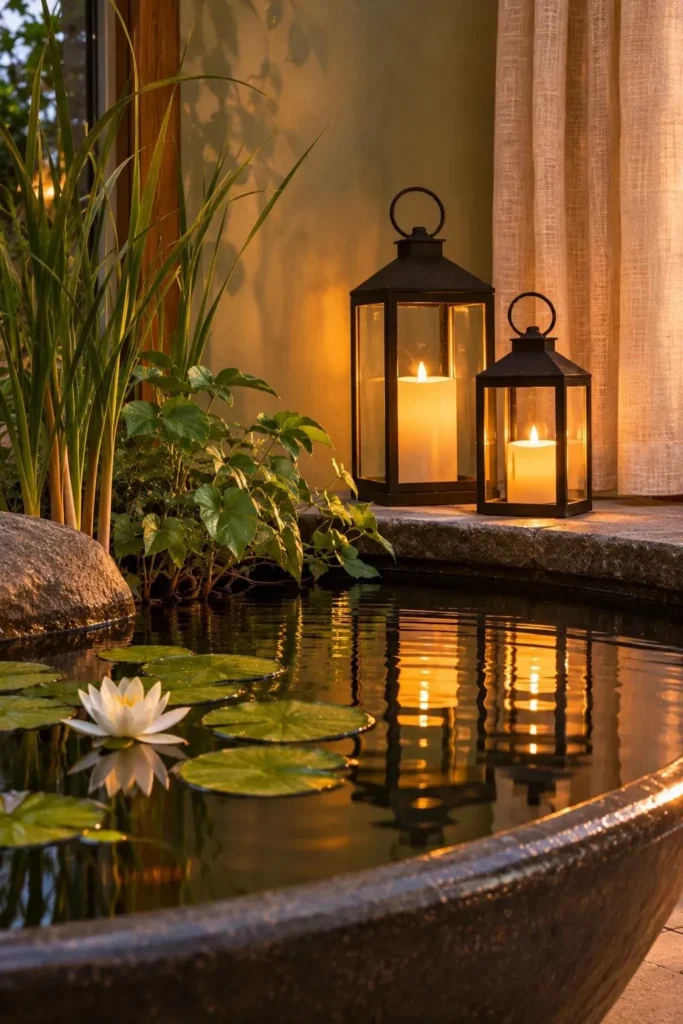
DO
- Let one lantern sit slightly behind the other so the two reflections fall at different points on the water.
- Choose warm battery candles with a steady glow for a quiet reading corner.
- Place both lanterns on a dry, level ledge where their bases sit flat.
DON’T
- Don’t balance a lantern on the basin rim to gain height.
- Don’t place the taller lantern where its frame hides the smaller light from your chair.
- Don’t crowd the ledge with ornaments that you’ll need to move each time you wipe it.
Set the lanterns out at dusk, when you can judge the reflections from your seat. Slide the nearer one a few inches along the ledge and watch its reflection shift. Stop when a strip of dark water separates the two pools of light. That little gap gives each glow a clear outline.
Basalt Column Bubbler

Water movement: Water beads at the top, then follows the grooves down the stone.
Best angle: A side view lets you see the water catch the light along one edge.
Basin shape: A wide, shallow bowl leaves the foot of the column visible.
Setup: Choose a recirculating kit with a basin and support sized for its column.
Before filling the bowl, turn the column so its deepest groove faces your seat. Once the pump is running, look for a thin silver line along that groove. If the whole top disappears under a rush of water, lower the flow until you can see the stone through it again.
Orchid Ledge Pond

A single orchid stem can reach halfway across a pond while its pot stays on dry land. Set a potted moth orchid on a low ledge behind the basin, then turn the pot until the flowers face the room. The lowest bloom should sit just above the rim from your usual viewpoint.
Leave the nursery pot inside a removable outer pot so you can carry it to the sink for watering and let it drain before returning it. If the stem arches to the left, shift the orchid toward the right end of the ledge. That gives the flowers open water beneath them.
Painted Arch Backdrop
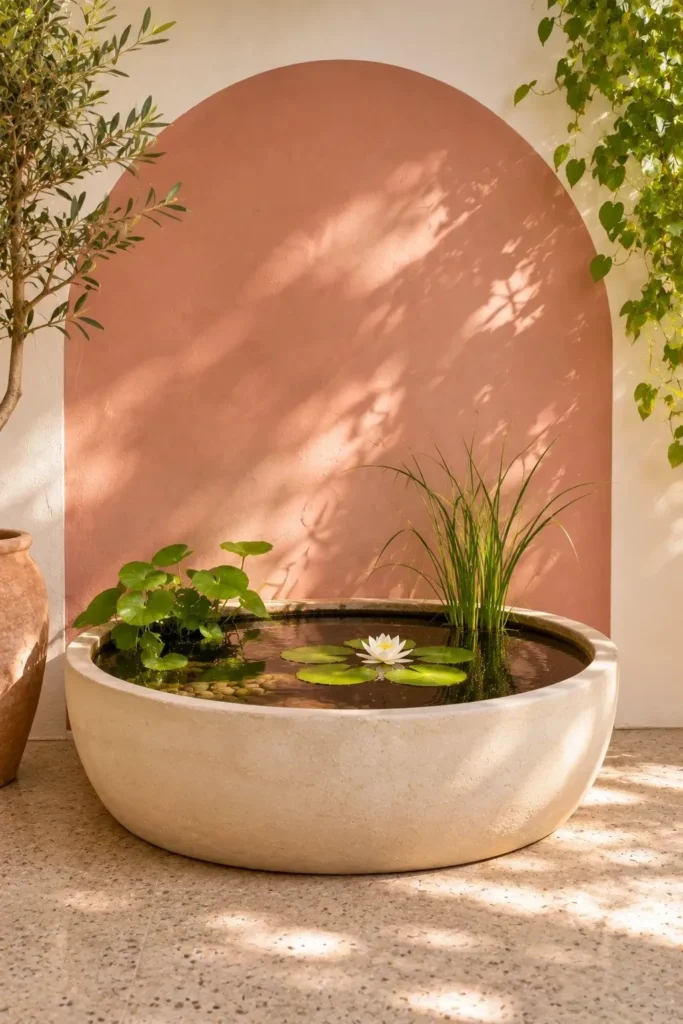
- Give a pale basin a clear silhouette with a painted arch in muted terracotta, olive, or dusty blue.
- Mark the basin’s center on the wall with painter’s tape before moving it aside.
- Cut the arch from kraft paper first. Tape it up and check its proportions from the doorway.
- Trace the outline, paint inside it, and let the wall dry before putting the basin back.
Use the rim to decide how wide the arch should be. Start with a hand’s width of color showing on either side, then trim the paper if the shape feels too broad. In a room with tall baseboards, end the paint at the trim for a clean lower edge.
Trailing Pothos Rim

Quick Tip:
The bare joint below a pothos leaf is the part you want underwater. Choose a cutting with a visible node, then slip the stem into a clip-on propagation holder with the node submerged and the leaves above the surface.
Group the cuttings at one end of the rim, with the longest vine trailing down the outside. This leaves room to skim the water without untangling stems. A pale basin gives you a good view of new roots, especially where they cast fine shadows across the bottom.
Triangular Corner Basin

BEFORE: A round tub leaves a wedge of floor behind it that’s hard to reach with a dust cloth. Pull it forward for cleaning and its widest point sticks out beside the armchair.
AFTER: A triangular basin follows the angle of the walls, with its long front edge facing the chair. The water is easy to see from the seat, and there’s room to walk past the front corners.
Fold a sheet of paper into a triangle and lay it on the floor where the basin would go. Walk past with a laundry basket, then sit in the chair and reach toward the back point. Those two checks will help you choose a depth that suits the room.
Miniature Footbridge Pond
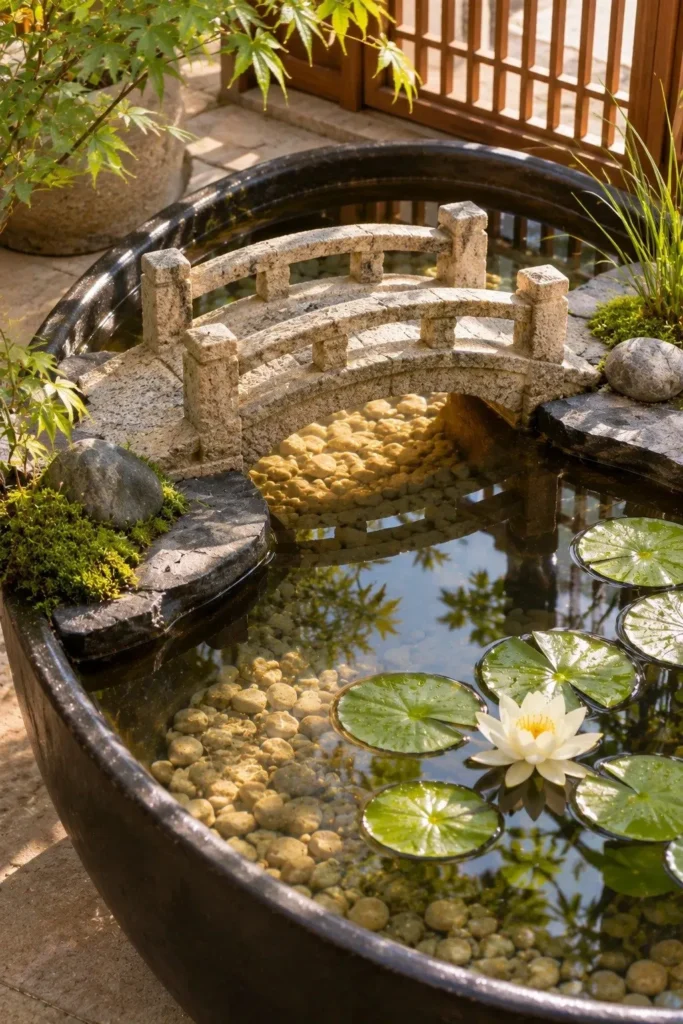
- Make the crossing short enough to see past it. Lay a strip of paper across the narrow end of the basin to test the bridge position.
- Choose a small, flat-footed stone bridge made for water features. Look for an open arch tall enough to see through from chair height.
- Set two broad, level stones in the empty basin as banks. Rest one bridge foot fully on each stone and check that neither side rocks.
- Fill the basin to just below the arch and scatter a few pale pebbles beneath the opening.
The bridge earns its place when you can see water beneath it and open pond beyond it. Place it off center and leave the opposite bank bare. From a low seat, the pale pebbles will show through the arch, giving your eye a small detail to discover on a second look.
Half Barrel Water Garden
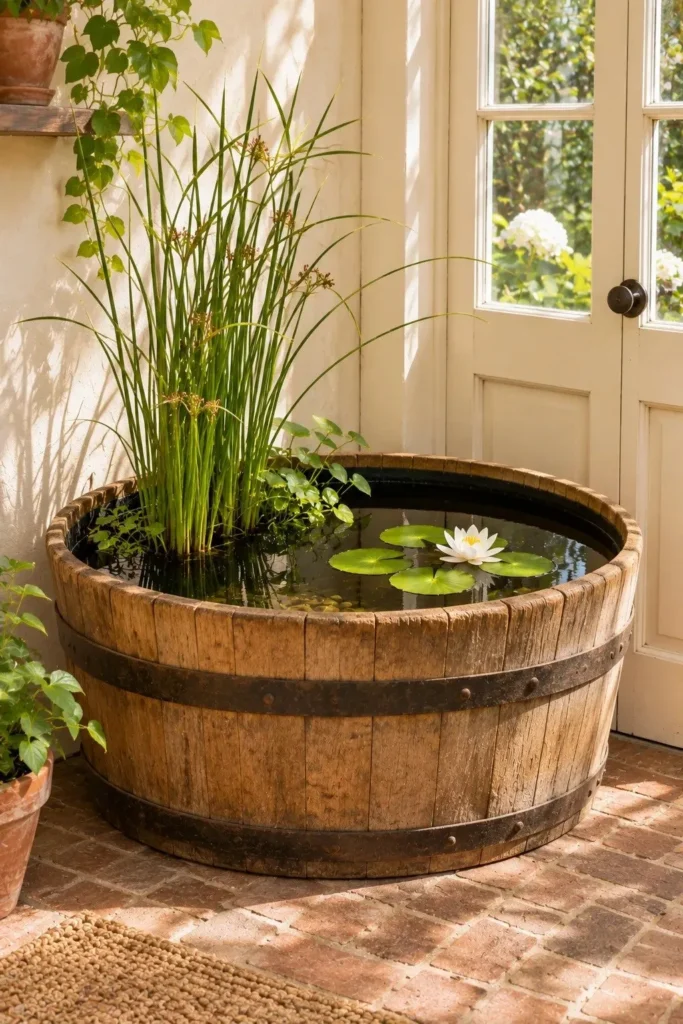
| Design choice | Lined oak half barrel | Watertight barrel-style resin tub |
|---|---|---|
| Surface detail | Each stave has its own grain and knots | Molded grooves repeat around the sides |
| Setup | Fit a pond liner and conceal its upper edge | Fill the one-piece tub after checking it for leaks |
| Placement | Let the iron hoops stand out against a pale wall | Choose a dark finish to match a window frame or door |
The trickiest detail is often the strip just inside the rim. On an oak barrel, a fitted black insert gives you a tidy edge without folds to catch fallen leaves. Measure the inside diameter at the top and bottom before buying one, since barrel sides curve inward toward the base.
Floating Blossom Bowl
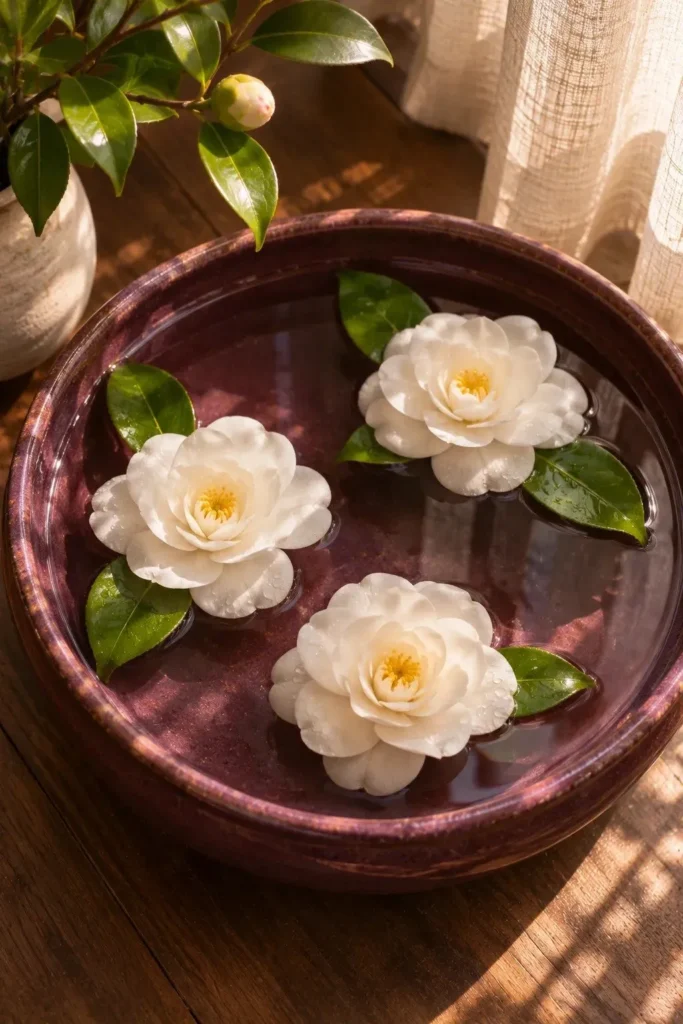
DO
- Let one open camellia take the spotlight in a small bowl. In a wider basin, float three with space between them.
- Trim each stem just beneath the flower head so the bloom sits low on the water.
- Lower each blossom onto still water with the petals facing up.
DON’T
- Don’t crowd the surface with loose petals that can hide the outline of each flower.
- Don’t place fresh blooms beside a running spout that keeps splashing the petals.
- Don’t leave fading flowers in the bowl once they start shedding.
For a weekend gathering, float a single bloom first and carry the bowl to the spot where guests will see it. A pale flower against a plum or ink-blue glaze reads clearly even from across the room. Add the other two only if each still has its own patch of water.
Rain Chain Basin

Water movement: A thin stream slips from the point of each cup into the open cup below.
Best backdrop: A plain, dark wall makes the separate drops easier to see.
Setup: A freestanding recirculating fountain supplies the chain from above.
Viewing angle: A slight side view shows the gaps between the cups.
Start at the lowest pump setting and watch the last cup. The stream should land well inside the basin, even if the chain sways a little. If drops reach the rim, check that the stand is level and the cups hang directly over one another before turning up the flow.
Moon Gate Pond

A wooden circle behind a shallow pond frames whatever you place inside its outline. Choose a freestanding miniature moon gate and set it behind the bowl, with its feet hidden by the rim. A circle slightly narrower than the bowl leaves the curved sides of both pieces easy to see.
I’d start with a single leafy branch in a slim vase behind one side of the gate. Turn the stem until just its tip enters the opening. You’ll see the shape of each leaf against the wall, and the empty middle will keep the woodwork in view.
Raised Moss Island
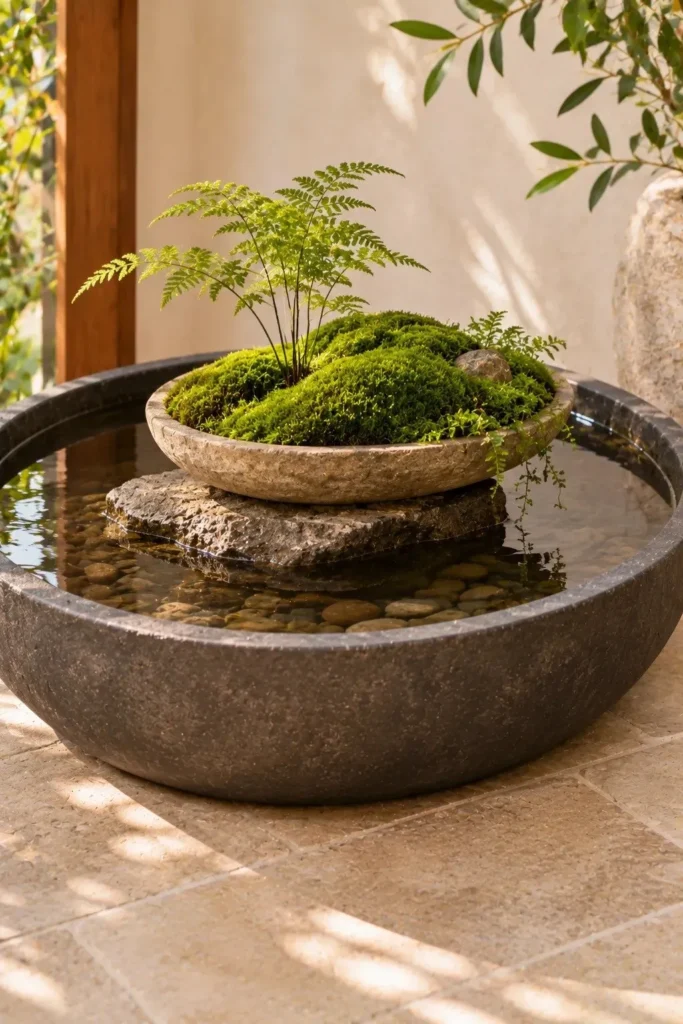
- Give the moss a little island of its own. Pick a shallow planting dish small enough to leave a visible ring of water around it.
- Rest the dish on a broad, flat stone. Check that it sits level before filling the basin.
- Use nursery-grown moss suited to your room’s light, and keep its planting surface above the pond water.
- Offset the island toward one end so there’s room to slip your fingers under the dish and lift it out.
The detail worth getting right is the edge where green meets water. From your usual seat, look for any planting mix showing above the lip of the dish. Tuck the moss close to that edge, then water and drain the whole dish separately to keep loose soil out of the basin.
Vintage Sink Pond

Quick Tip:
A vintage sink is easiest to repurpose when a fitted insert holds the water. Measure the bowl beneath the rim, including its rounded corners, before choosing the insert.
Keep the broad back ledge visible. It’s the detail that makes the piece recognizable as an old sink, and it gives you a handy spot to set a small jug while topping up the water. A folded cotton cloth on one end can catch the last drip from the spout.
Room Divider Pond
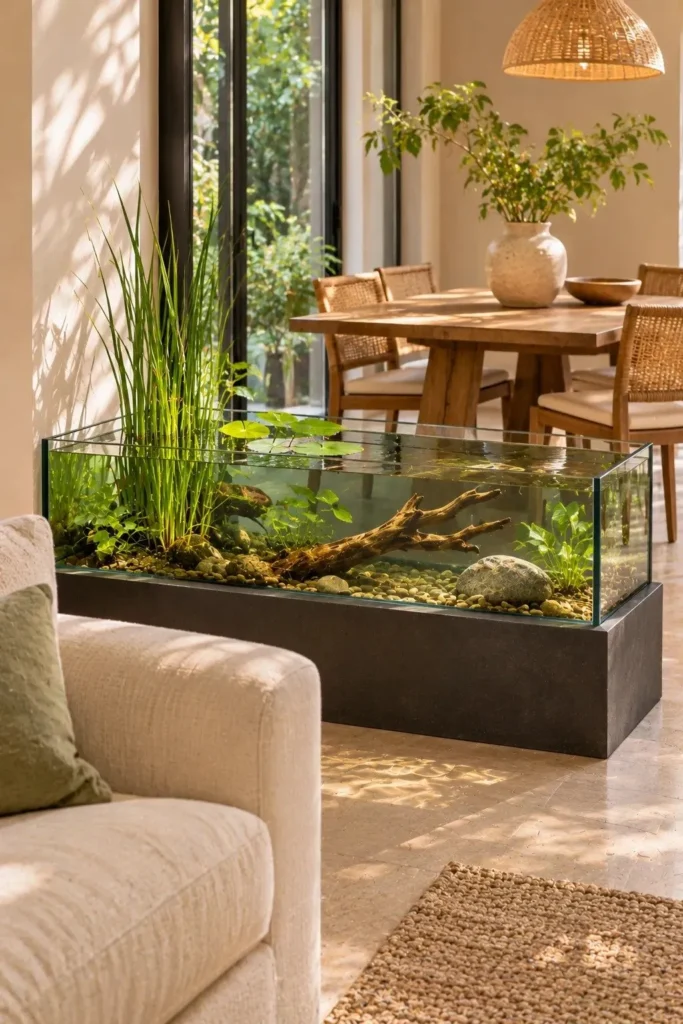
BEFORE: From the front door, the dining table and sofa seem to share one crowded corner. A tall shelf would separate them, but it would also cut off the view through the window.
AFTER: A low, clear-sided indoor pond marks where the sofa ends and the dining nook begins. The window stays visible above it, and the same driftwood branch looks different from either side.
Use a stand rated for the filled tank, and mark its footprint before settling on a spot. Pull out the nearest dining chair and walk behind it as someone would during dinner. Leave enough clearance for that everyday movement, even if it means choosing a shorter tank.
Woven Basket Pond

- Match the basket to a watertight bowl you already own. Measure the inside of the basket at its narrowest point so the bowl slides in easily.
- Set the empty bowl inside. Its base should sit flat and its lip should rise just above the weave.
- Position the basket, then pour water into the bowl with a narrow-spouted jug to keep the fibers dry.
- Place one pale stone slightly off center. Against a charcoal interior, even the submerged part will show through the water.
The basket should come away easily when it’s time to clean. Leave enough room to grip the bowl with both hands once you’ve emptied it. For an easier fit, choose a straight-sided basket with an open top. A style that narrows at the neck makes removal awkward.
Ripple Reflection Wall

| Design choice | Window sunlight | Adjustable spotlight |
|---|---|---|
| Position | Set the basin where a patch of direct sun reaches the water | Aim the beam across the water toward a pale wall |
| Timing | Reflections appear when sunlight reaches that corner | Switch it on while you read in the evening |
| Adjustment | Shift the basin a few inches within the sunlit patch | Tilt the lamp until the reflected light reaches the wall |
Test the angle with a mixing bowl of water before moving your pond. Draw a fingertip across the surface and watch the wall for a flicker. Once you’ve found the right spot, a gentle ripple from a small pond pump can keep those ribbons of light moving while you read.
Conclusion
Start with the detail you’d enjoy on an ordinary Tuesday. Maybe it’s the sound of water over slate while you read, or a white blossom floating in a dark bowl beside your morning coffee. That small preference can guide your choice of indoor pond, from the shape of the basin to where you place it.
Save this post on Pinterest so you can find your favorite design again, and share it with a friend who has a bare corner in mind. Then try one idea with a bowl you already own. Pull up a chair and see what catches the light.