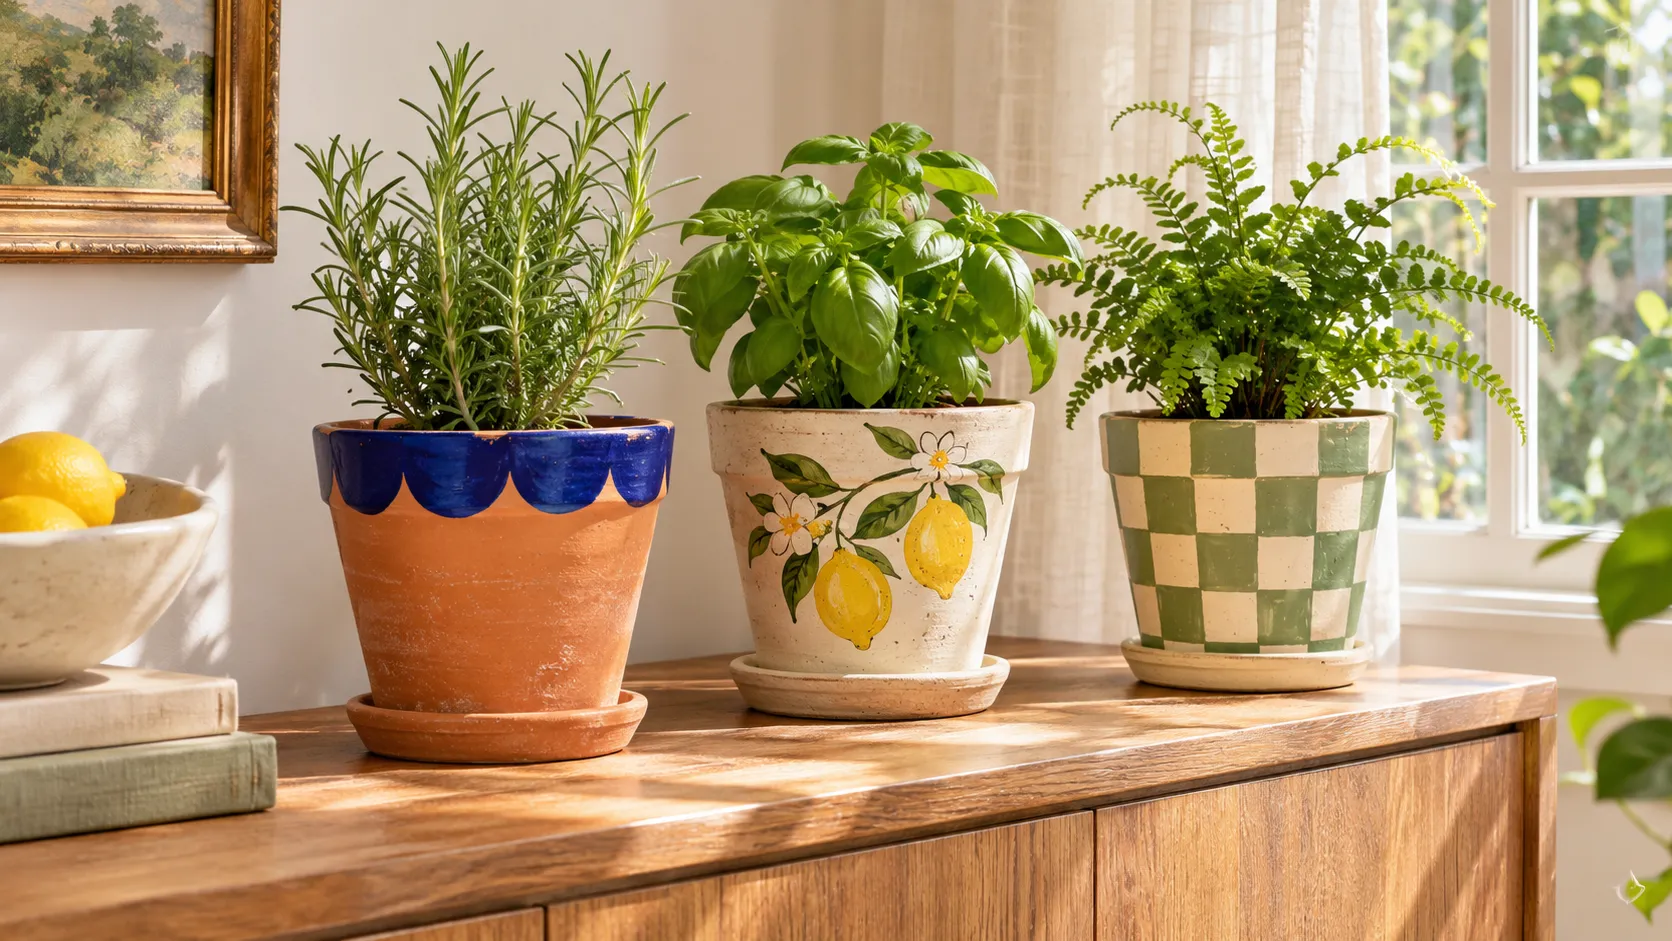
32 Expressive Pot Painting Ideas for Plain Clay Pots
A coin and a little cobalt paint are all it takes to give a clay rim a row of scallops. That’s one of the easiest projects in 32 Expressive Pot Painting Ideas for Plain Clay Pots. If you’ve ever picked up a brush and wondered where to make the first mark, start there.
Think about where your finished pot will sit. A single lemon branch shows up beautifully on a kitchen sill, where you mostly see the front. On a coffee table, a pair of painted koi gives you a different view from either side. You’ll find simple ways to space a pattern, choose colors that stand out against terracotta, and fit a design around a curved surface. Pick the one you’d love to see beside your favorite plant.
Cobalt Scalloped Rim
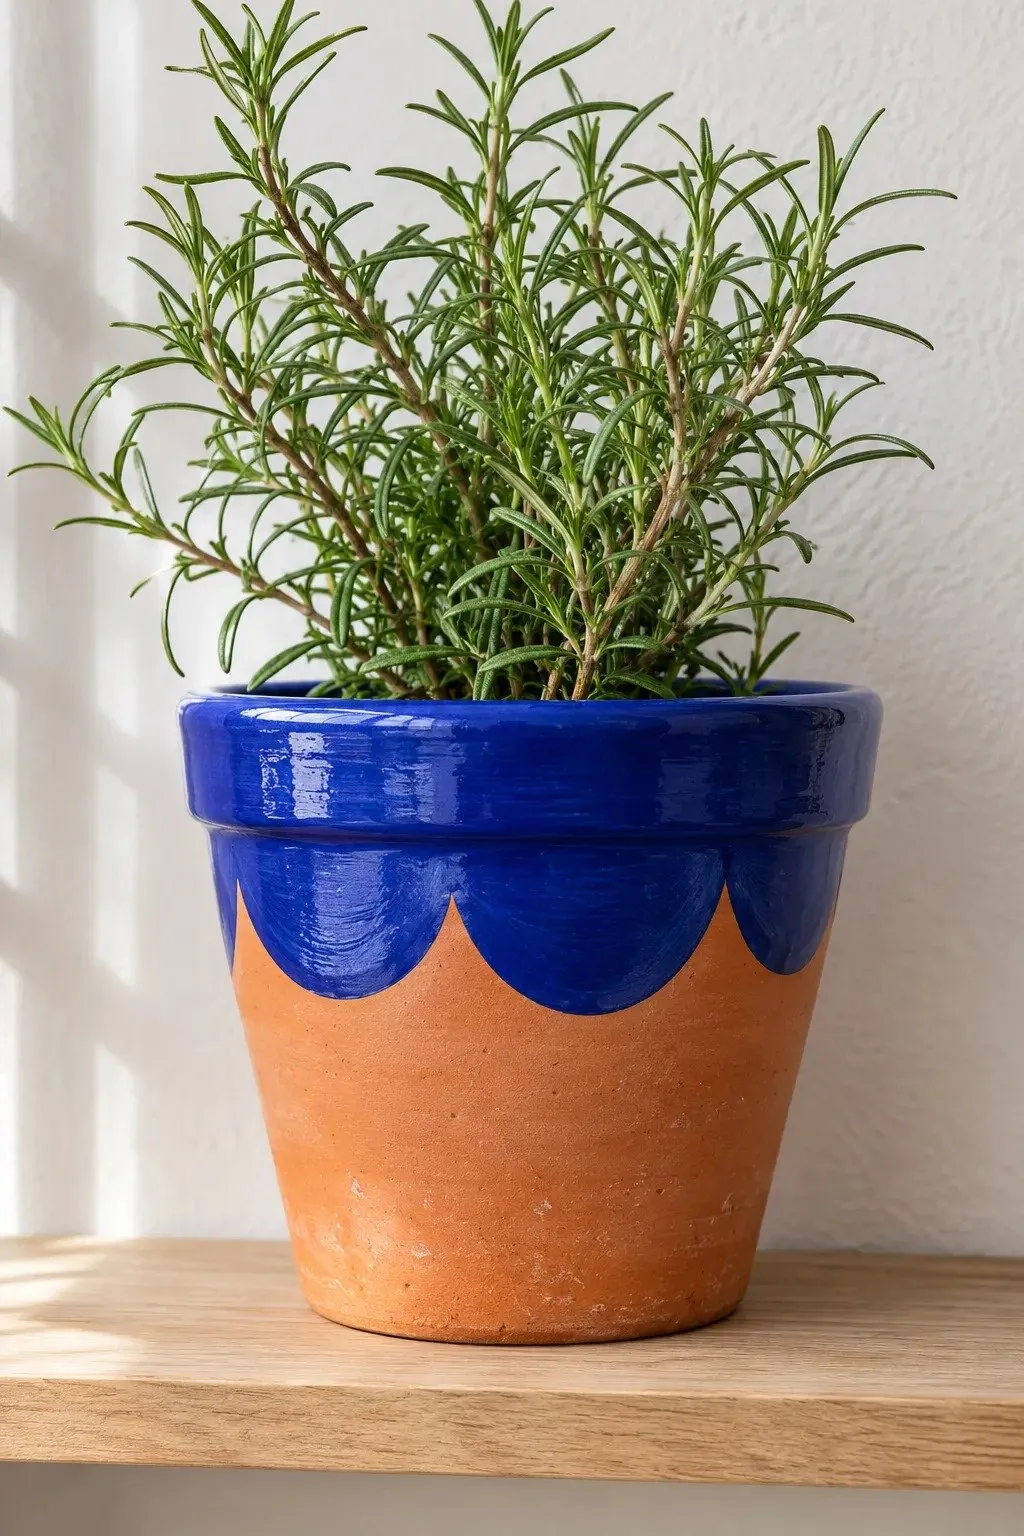
A scalloped edge makes one band of cobalt look like a ribbon wrapped around the pot. Start with clean, dry terracotta and a coin about as wide as your thumb. Hold the coin halfway below the rim and lightly trace its lower curve in pencil.
Move the coin around the pot, tracing each scallop where the last one ends. Check the final gap before painting so you can spread any adjustment across several curves. Fill the rim and scallops with cobalt acrylic and a small round brush. The exposed clay gives each curve a warm outline.
Lemon Branch Motif

- Let one lemon hang lower than the other. That small difference gives the branch a natural shape.
- Brush warm ivory acrylic over the outside of the pot. Once dry, sketch a branch curving diagonally across the front.
- Paint two yellow ovals with a slight point at each end. Connect each fruit to the branch with a short brown stem.
- Press the side of a small round brush near a twig, then lift as you pull outward. Each stroke forms one tapered olive-green leaf.
On a kitchen sill, most of the pot is visible from just one side. Set it in place first and mark the front with a pencil dot. Center the lemons there and let a few leaves curl around the side, where they come into view as you turn the pot.
Terrazzo Flecks
Quick Tip:
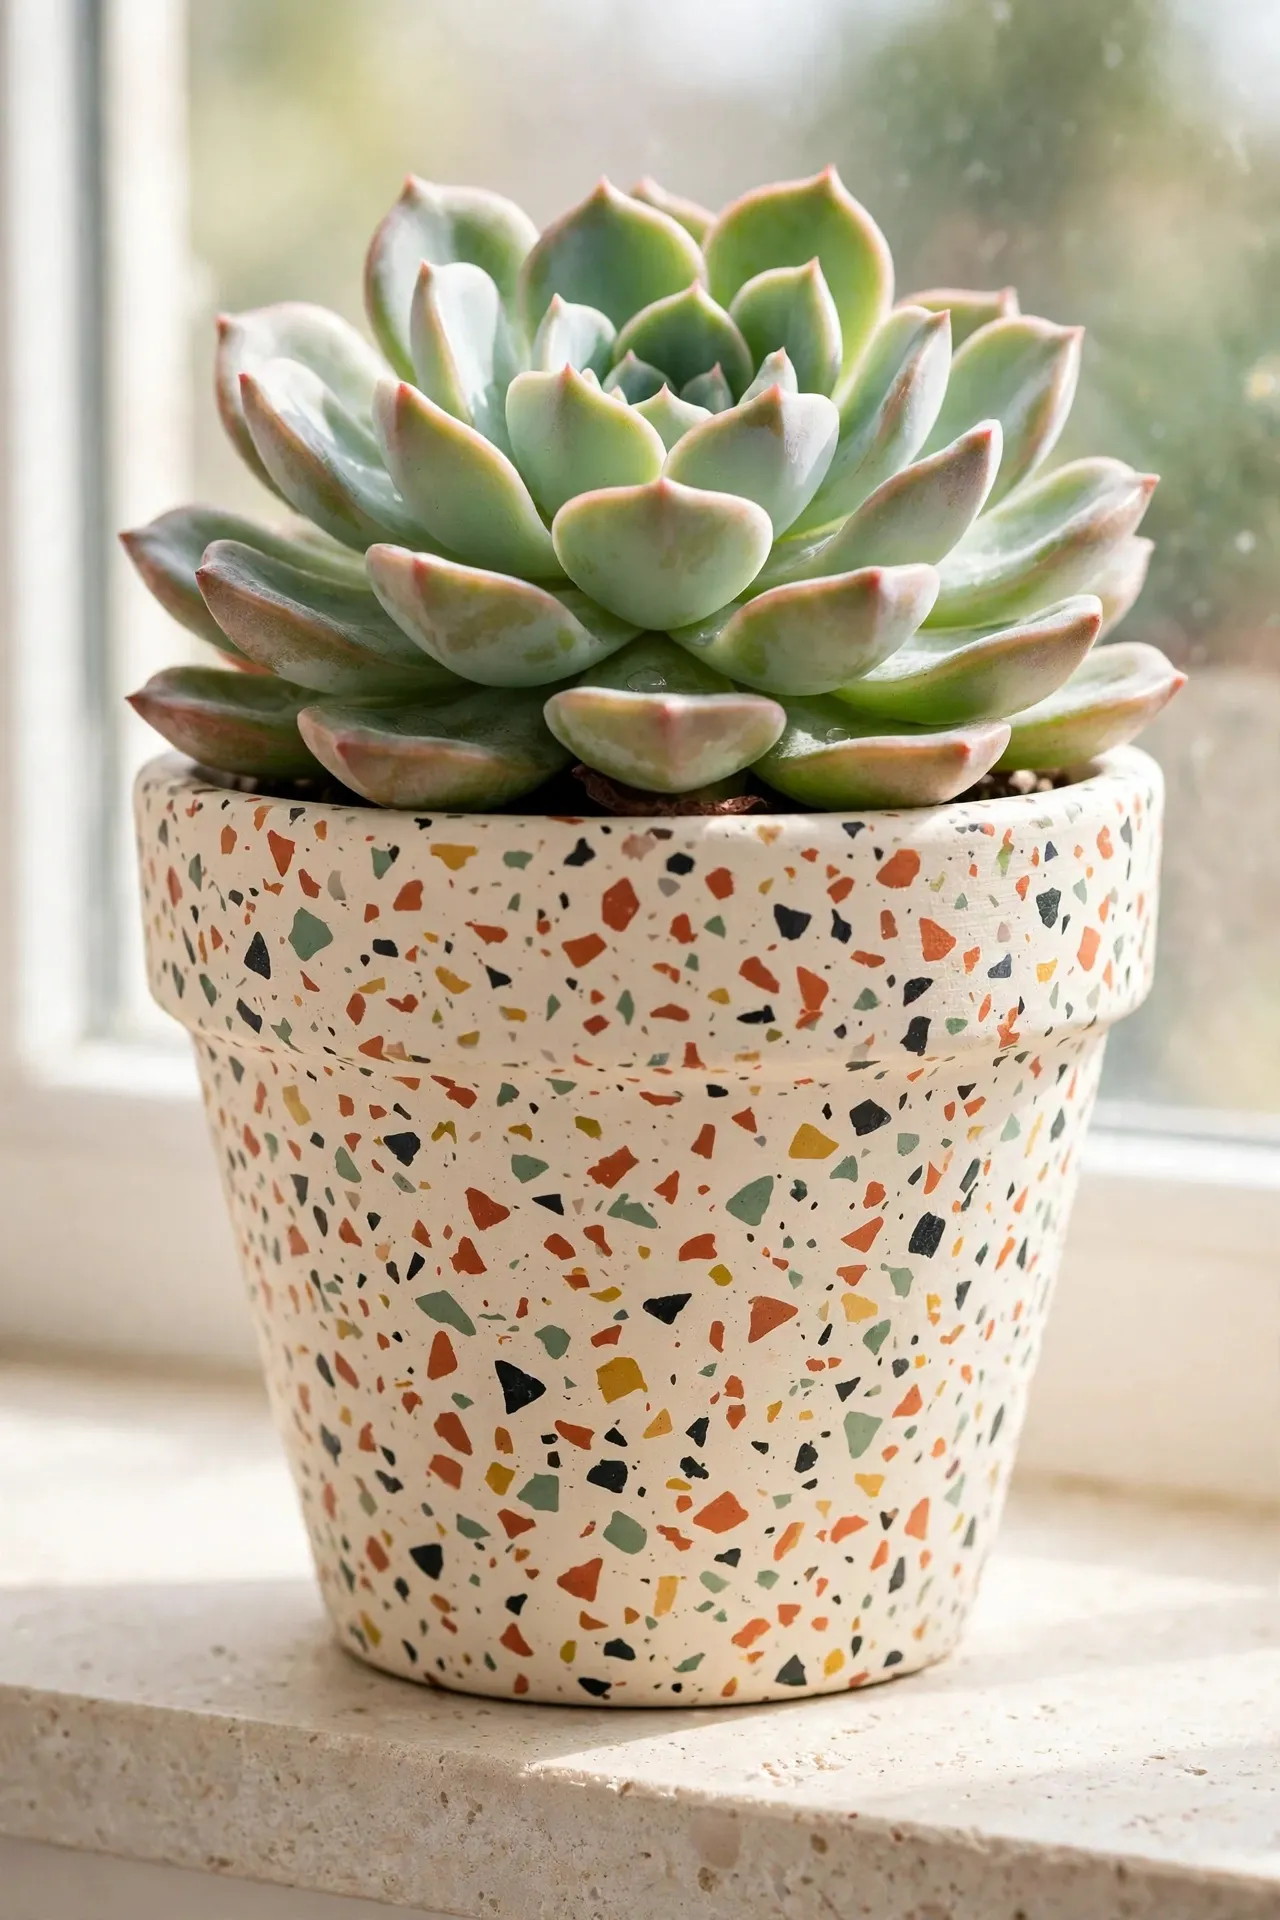
Want the flecks to resemble chips of stone? Snip a small craft sponge into uneven wedges, then test each cut face on scrap paper to see the shape it prints.
Start with a dry blush base and stamp the larger cream shapes first. Turn the sponge between impressions so an identical angle rarely repeats. Use the corner of a wedge for smaller rust marks, then finish with a few charcoal specks. Leave enough pink showing to separate neighboring chips.
Sage Checkerboard
BEFORE
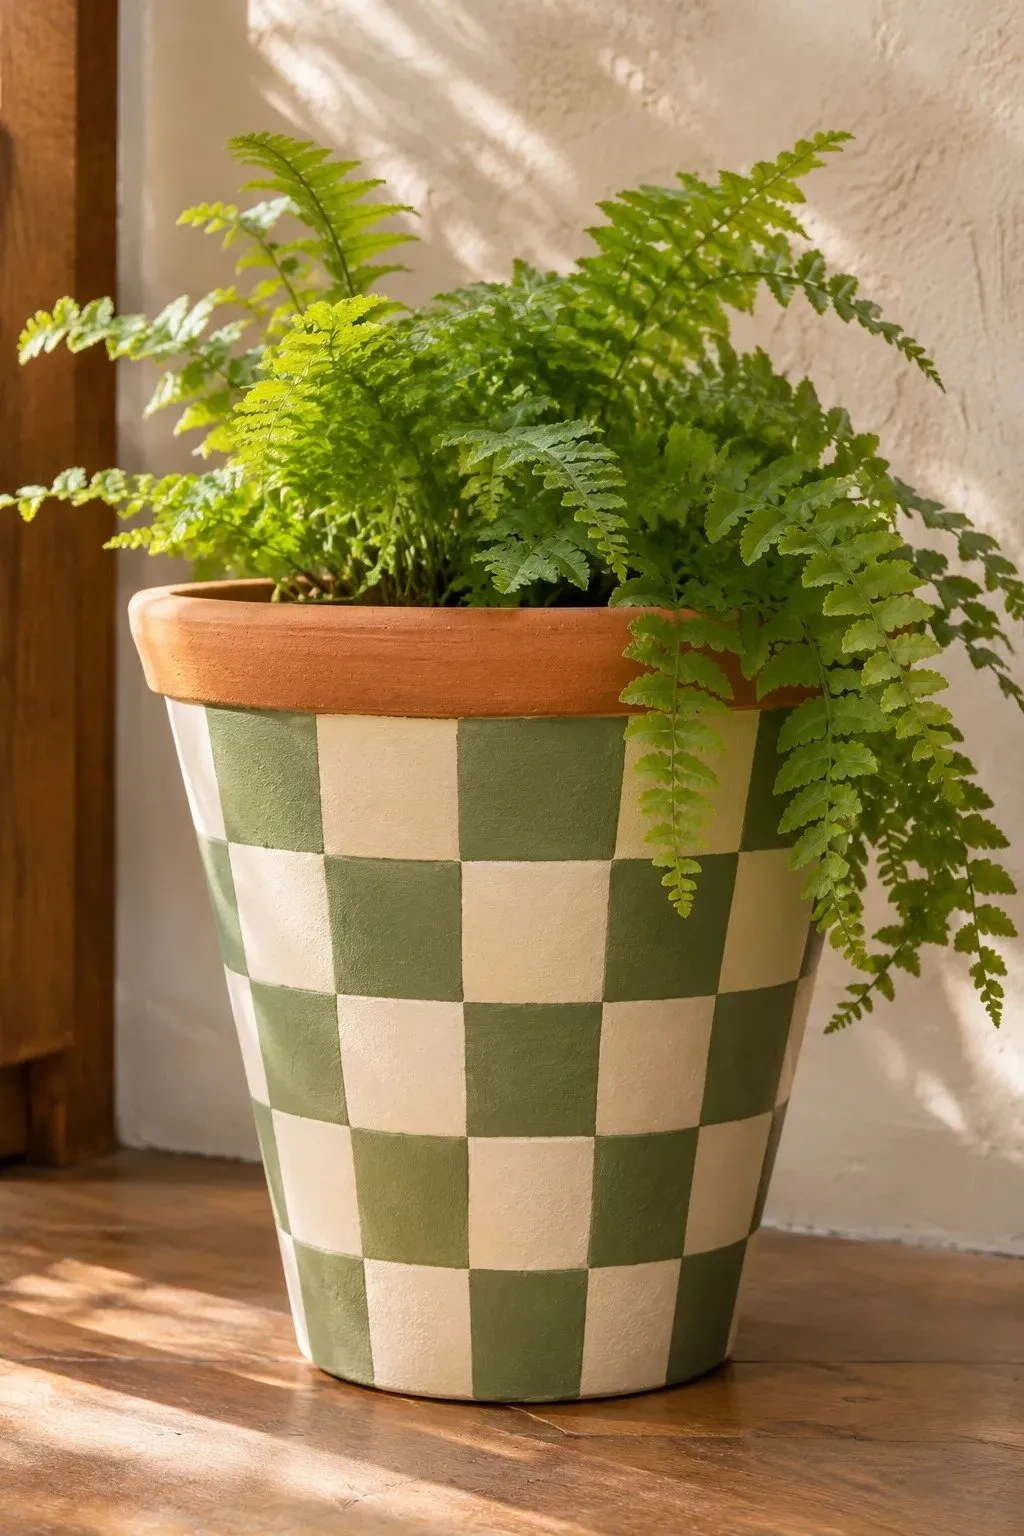
The trickiest square on a checkerboard pot is the last one. Checks that look even across the front can leave a skinny wedge at the back, where the pattern meets itself.
AFTER
An even number of columns lets the sage and ivory checks meet cleanly. Each check narrows slightly toward the base, following the shape of the pot.
Over a dry ivory base, fit separate paper strips around the pot near the top and bottom. Trim each to fit, then fold it into eight equal parts. Transfer the marks, join corresponding points, and draw a horizontal line halfway down. Paint alternate checks sage, reversing the colors in the lower row.
Block Print Tulips

- Cut a tulip head about an inch wide from craft foam. Three broad petal points will read clearly, even on a small pot.
- Glue the foam to a flat bottle cap for a handle. Once the glue dries, dab brick-red acrylic onto the raised shape with a sponge.
- Press the stamp onto a dry pink base, rolling it gently from one edge to the other to follow the curve. Lift it cleanly and reload for each flower.
- Pull a fine burgundy stem down from each bloom. Vary the stem lengths so the tulips sit at slightly different heights.
Practice once on a curved jar wrapped in paper before stamping the clay. A thick ridge around the test flower means there is too much paint on the foam. Blot it once and stamp again. A little pink showing through the red gives the petals their printed texture.
Layered Desert Hills

| Painted layer | Apricot sunset | Blue dusk |
|---|---|---|
| Sky across the upper half | Soft apricot | Dusty blue |
| Distant ridge with a low peak | Pale peach | Misty lavender |
| Middle ridge rising on the opposite side | Burnt sienna | Muted slate |
| Foreground hill along the base | Deep plum | Midnight blue |
Three crooked brushstrokes can give a small planter a sense of distance. Paint the sky first, then outline each ridge and fill the area below it, working from the farthest hill forward. Let each layer dry before overlapping it. Keep the darkest hill low so the softer ridges stay visible.
Copper Crescent Moons
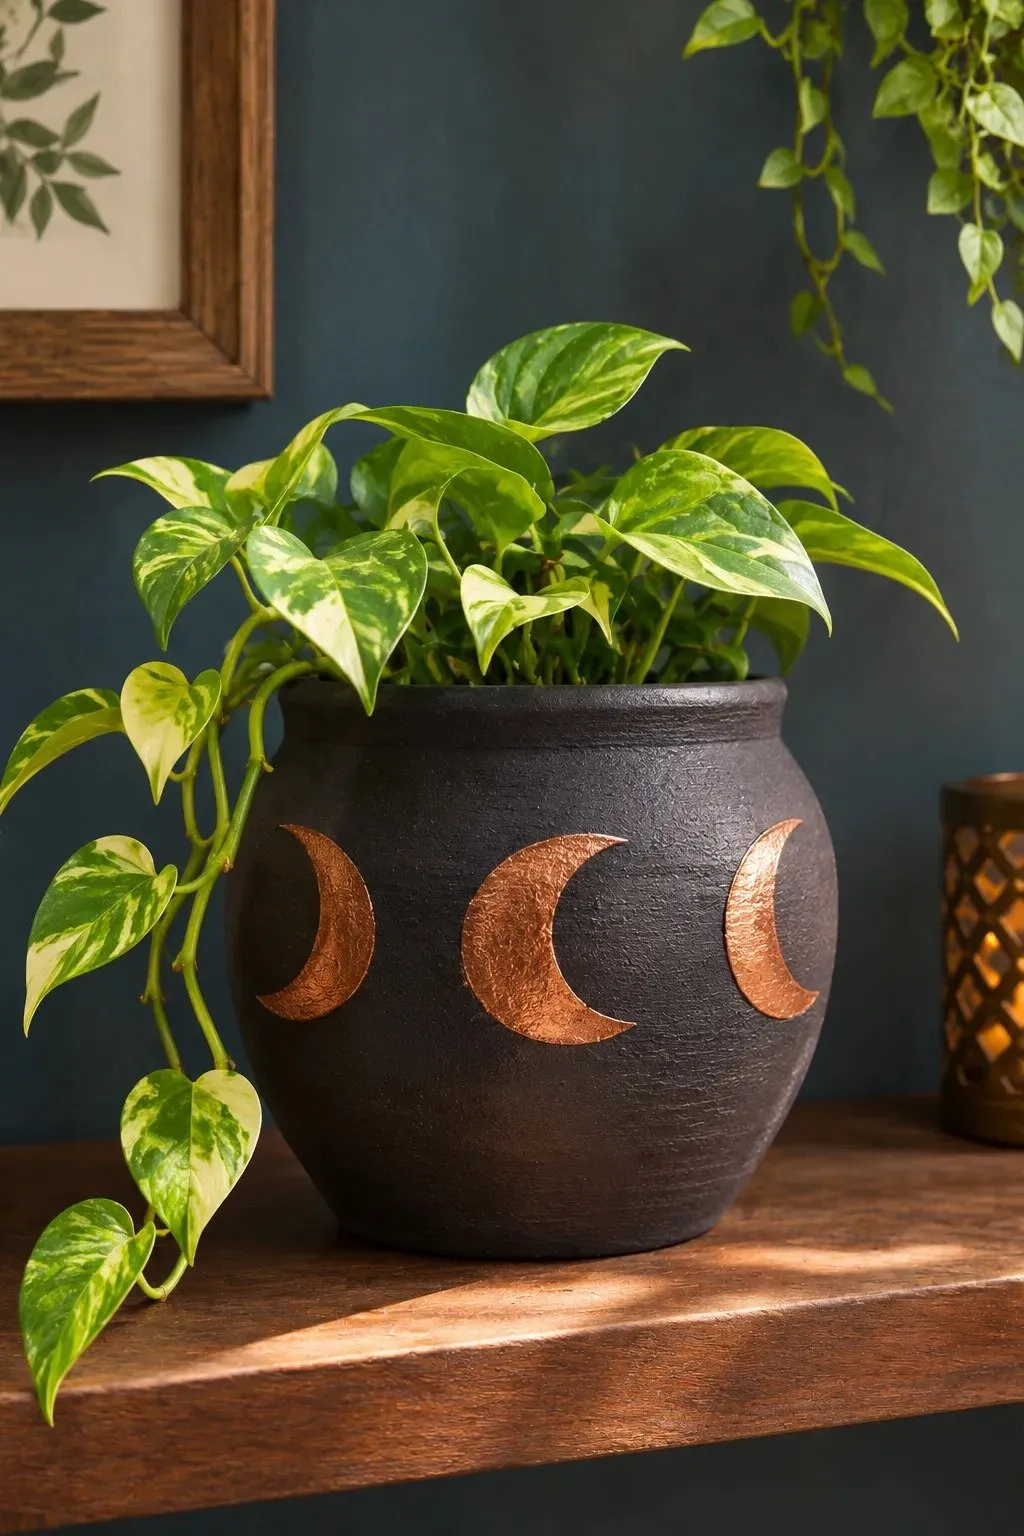
DO
- Set one crescent low on the front so a trailing vine can hang above it without hiding the copper.
- Cut the crescent from low-tack stencil film, leaving a wide border around the opening.
- Press both pointed ends of the stencil firmly against the dry charcoal base.
DON’T
- Don’t load the sponge until it drips, since excess paint can seep under the stencil.
- Don’t drag the sponge sideways across the narrow tips.
- Don’t handle the metallic surface until the paint has dried.
For a crisp crescent, lightly dab the stencil opening with the same charcoal paint you used underneath. Let that coat dry before tapping copper over it. The charcoal fills tiny gaps along the stencil edge, which helps keep the copper outline sharp even on slightly grainy clay.
Chalkboard Herb Nameplates

Best for: A kitchen herb shelf where the plants change more often than the pots.
Paint: Matte black chalkboard paint labeled for terracotta.
Stencil: A paper oval slightly wider than your longest herb name.
Lettering tool: A sharpened chalk pencil for small, readable letters.
Fit the name before you paint the oval. Write “rosemary” at the size you can read from the kitchen sink, then draw the border around it. Trace that shape onto each pot and fill it with chalkboard paint. Follow the label’s curing and conditioning directions before writing your first herb name.
Swimming Koi Pair

Two curved brushstrokes give these koi their sense of motion. On a dry celadon base, sketch two loose commas facing opposite directions. Widen the rounded ends for the heads and taper each body toward a forked tail. Leave a finger’s width between the fish so their silhouettes stay distinct.
Fill both bodies with ivory, then dab two or three uneven vermilion patches along each back. A fine gray brushstroke on either side suggests a fin without crowding the design. For this pot painting project, turn the planter as you work so your wrist can follow each curve comfortably.
Folk Art Hearts

- Two teardrop strokes make one heart. On a dry yellow base, press a small round brush loaded with red paint to the clay, then pull diagonally downward, lifting to a point.
- Mirror that stroke from the other side so the two tips meet. Fill any narrow gap with the tip of the brush.
- Space the hearts about one heart’s width apart. A paper strip marked with their center points makes placement easier.
- Once the red dries, dip the blunt end of a skewer into cream paint and dot five petals inside each heart.
Test the first heart on paper at the size you plan to paint it. If the cream petals merge into a single spot, switch to the pointed end of the skewer. A pinprick of yellow in the middle of each flower ties the detail back to the pot.
Sea Glass Ombré
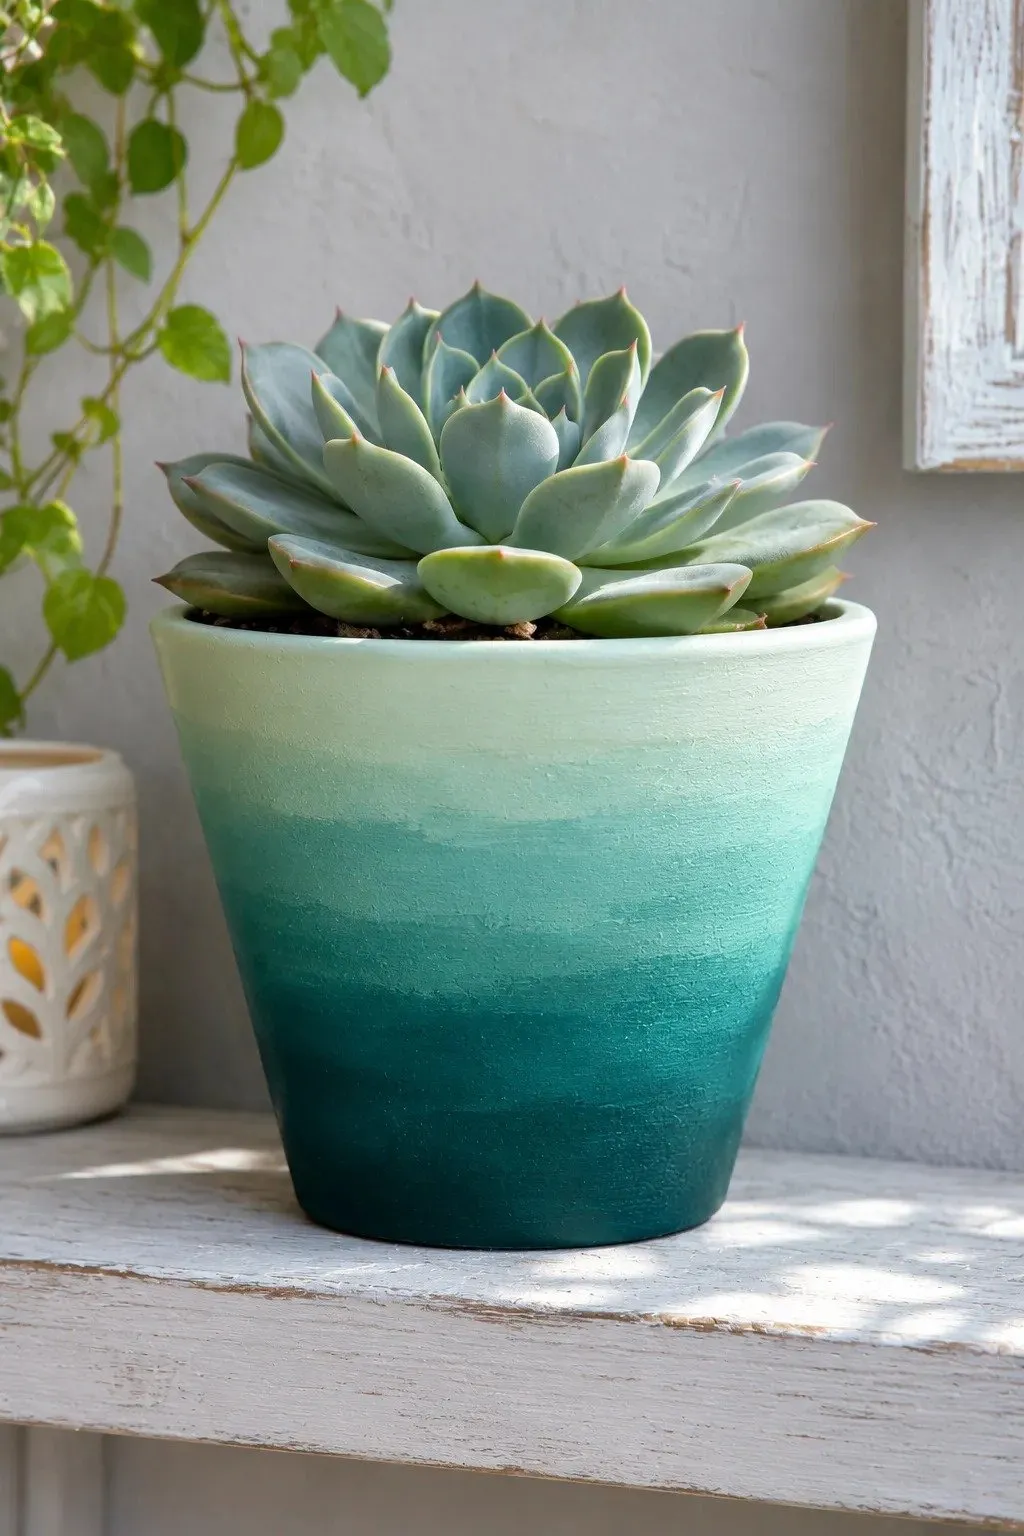
Quick Tip:
The middle shade does most of the blending work. Mix a small puddle of teal and pale mint before you begin so the seafoam is ready while the neighboring colors are still wet.
Brush pale mint over the upper third, seafoam around the middle, and teal along the bottom. Work around the planter in short sections. At each join, tap a barely damp sponge across both colors, turning to a clean patch between joins so dark teal stays away from the pale rim.
Miniature Row Houses
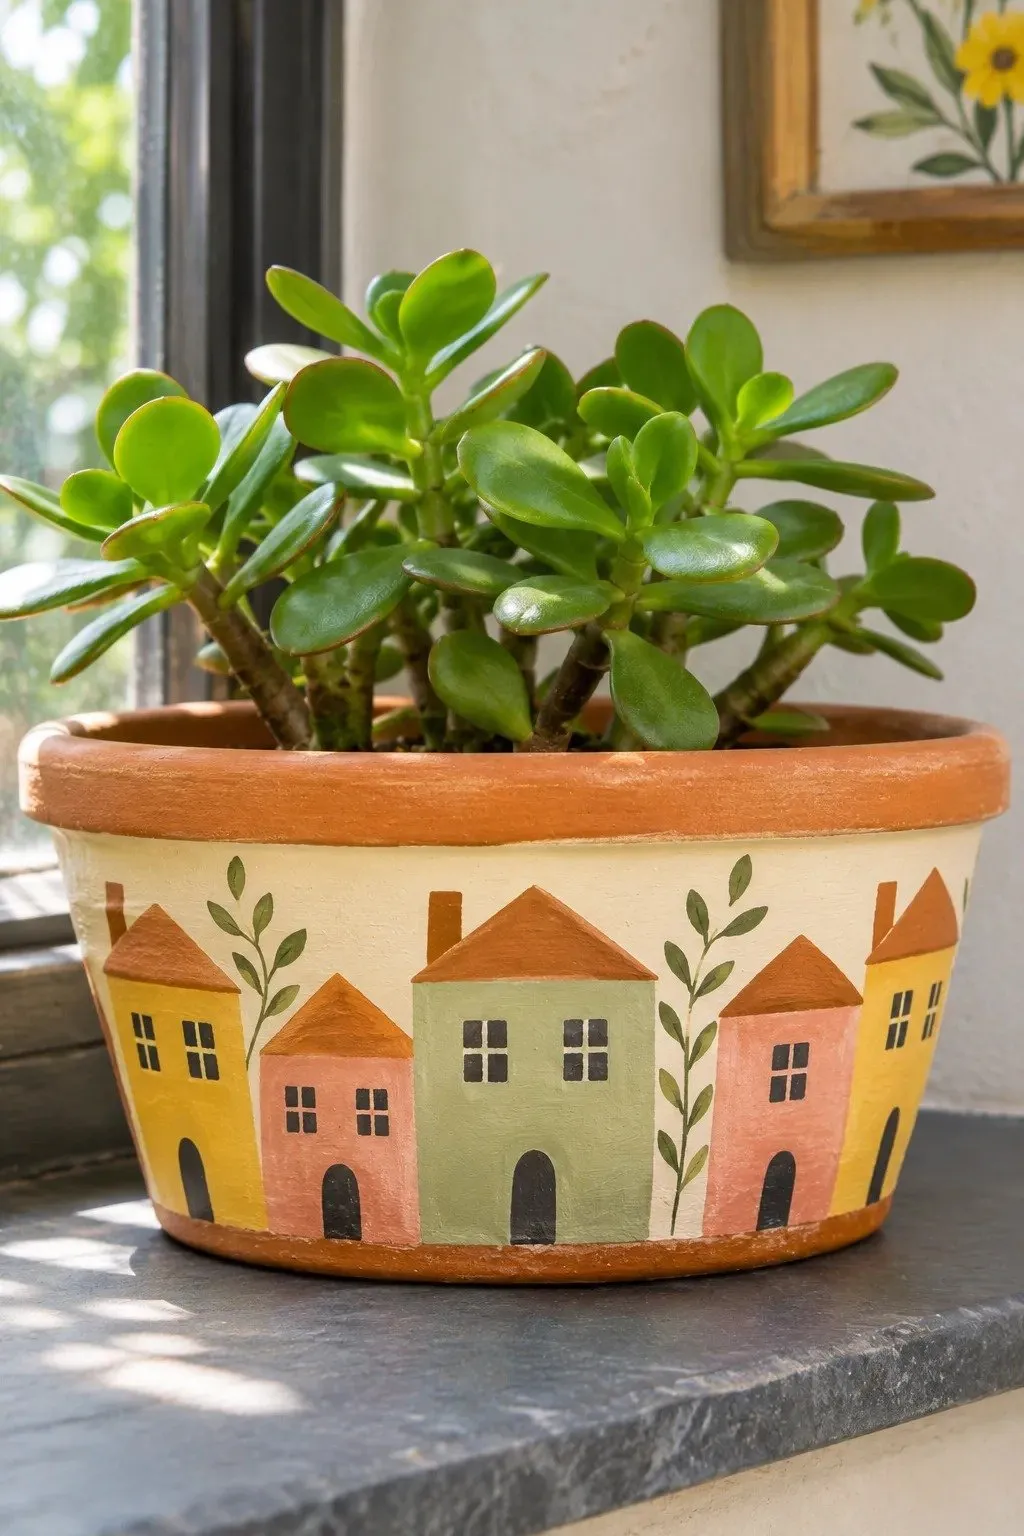
BEFORE
A few painted rectangles can look like color swatches, especially on a wide pot. Even with a different color for each block, there is little to suggest a street.
AFTER
A charcoal roofline turns the bare clay above each block into a gable. A tall doorway on one house and two upstairs windows on the next give each address its own character.
Start with the house you want facing the room. Paint its rectangular facade, then add a neighbor on either side, varying their heights by a brush width. Once dry, use a fine paint pen to draw the roof peaks and windows. Rest your drawing hand on a folded towel for steadier lines.
Retro Sunburst

- Give the sun room to shine. Trace a bottle cap onto the front of the pot, leaving at least one cap’s width of bare clay around the circle.
- Fill the circle with golden ochre acrylic. Once dry, mark eight ray tips in pencil, starting at the top, bottom, left, and right.
- Paint an ivory triangle at each mark, with its point facing outward. Leave a slim ring of bare clay between the rays and the disk.
- Tuck a shorter ray between each pair of long ones. Turn the pot so you can pull the brush toward each point.
For a sunburst that reads clearly from across the room, check the spacing from a few steps away while the rays are still pencil marks. The pot curves away on both sides, so the outer rays may look crowded from the front. Shift their tips outward before filling them in.
Linen Ticking Stripes

| Design detail | Narrow stripe pairs | Classic triple stripes |
|---|---|---|
| Brush choice | Fine liner for both strokes | Small flat brush for the center, liner for the sides |
| Stripe grouping | Two thin blue lines close together | One broad blue line between two fine lines |
| Space between groups | About the width of the pair | About the width of the full trio |
| Best fit | Small windowsill pot | Larger planter with room for wider repeats |
The ivory gaps give ticking stripes their familiar shirting pattern. To keep the lines upright on a tapered pot, mark each group at the rim and base first. Rest the pot on its side in a folded towel, then rotate it toward you as you finish each group.
Tuxedo Cat Face
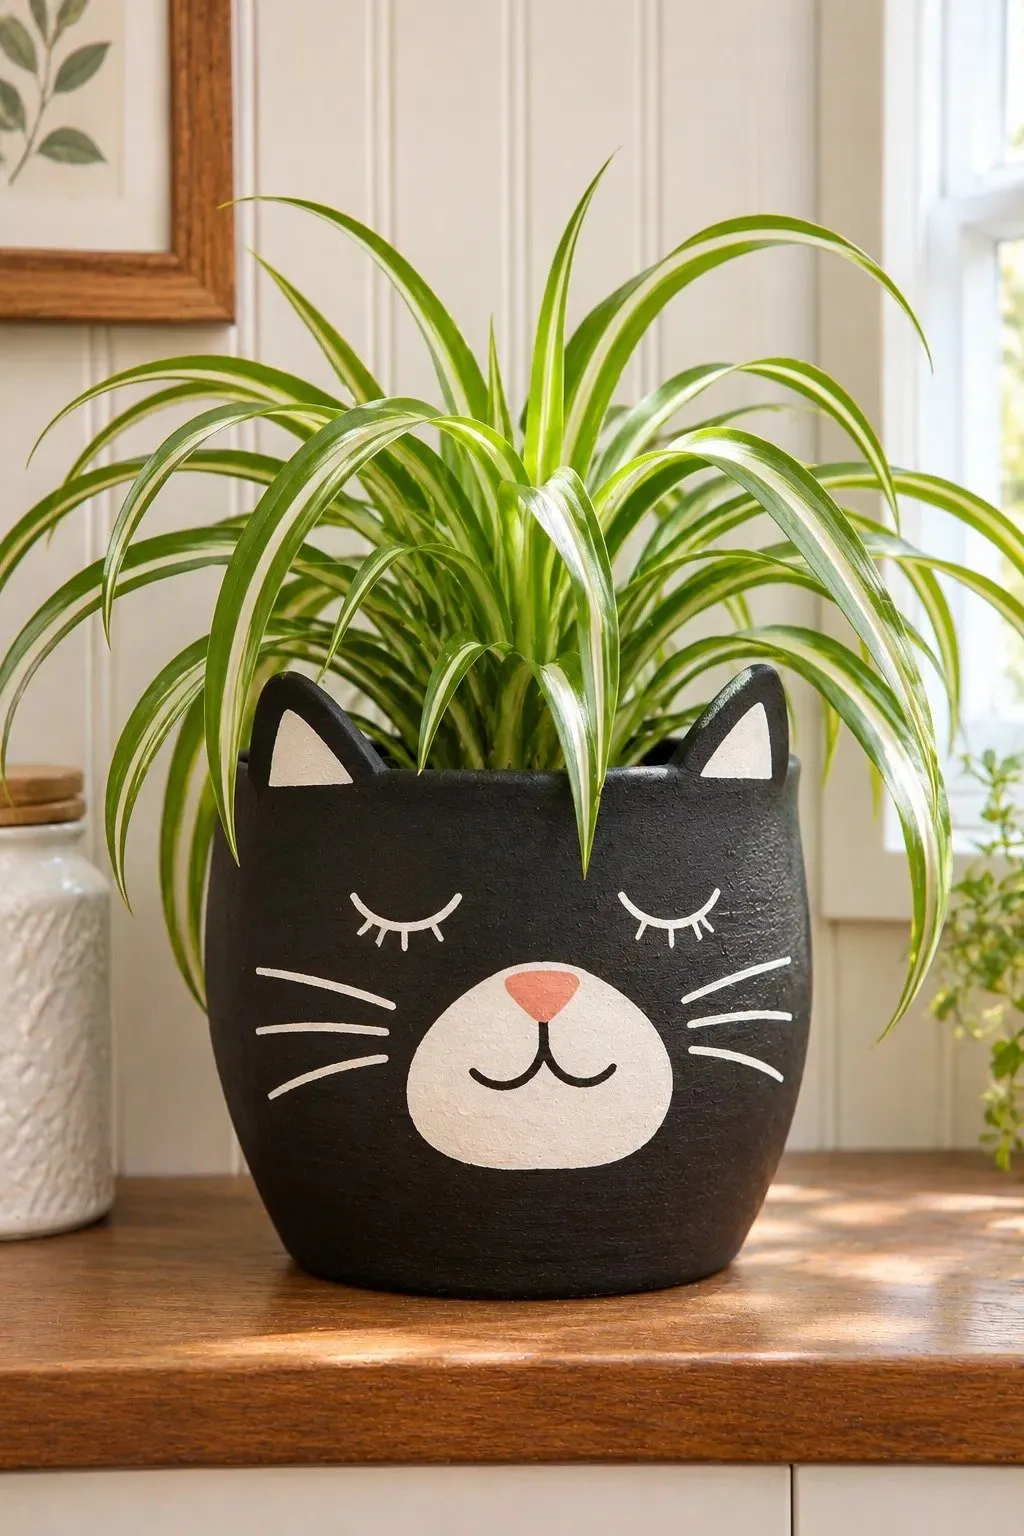
DO
- Build the face around two touching white thumbprints for the cat’s muzzle.
- Let the muzzle dry, then paint a small pink triangle at the upper seam where the prints meet.
- Draw two shallow ivory arcs for sleepy eyes, leaving a finger’s width between them and the muzzle.
DON’T
- Don’t start the eyes near the pot’s side edges, where the curve can hide them.
- Don’t crowd the muzzle with thick whiskers that merge into the white paint.
- Don’t add the nose while the thumbprints are wet, since the pink can pick up white.
Before committing to paint, cut the eyes and muzzle from scrap paper and tape them onto the black base. Set the pot on its intended shelf and check the expression from your usual viewing height. Moving one eye just a little can turn a sleepy cat into a skeptical one.
Painted Denim Pocket
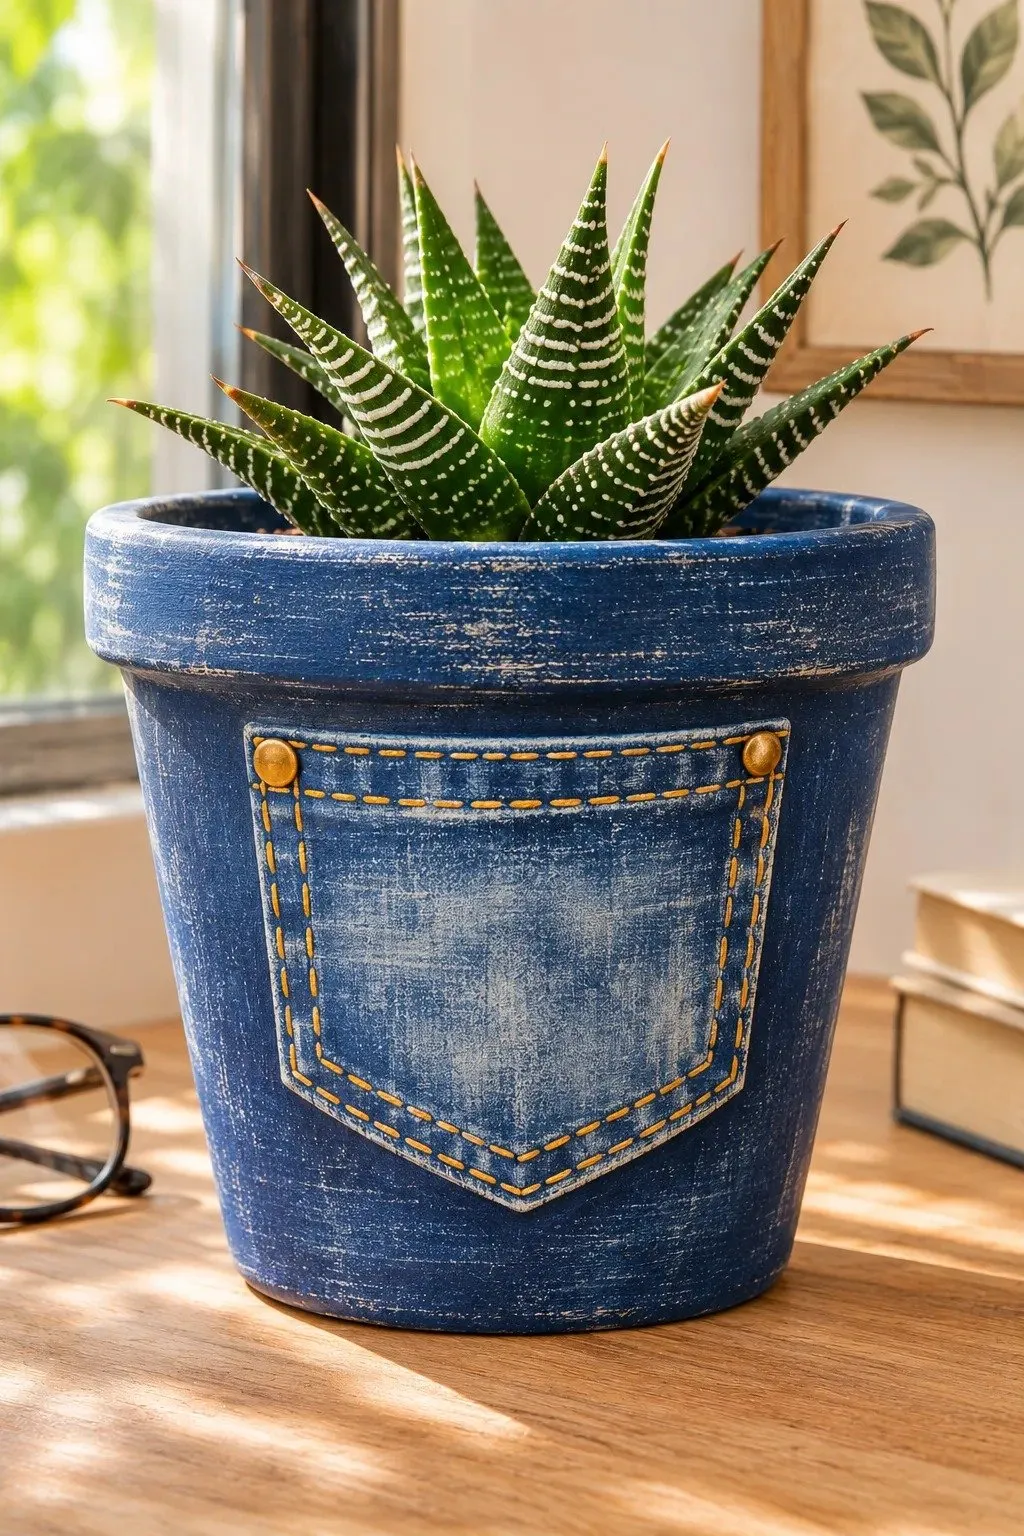
Signature detail: Two rows of golden stitches make the pocket recognizable from across a desk.
Palette: Indigo for the pot, faded blue for the pocket, and ochre for the thread.
Brushes: A flat brush for the denim texture and a fine liner for the stitches.
Cut a pocket template from folded paper so both sides match. Trace it onto the dry indigo base and fill it with faded blue. Skim a nearly dry brush across the pocket for a worn denim texture. Once dry, add short ochre dashes, leaving a little blue between stitches.
Dragonfly Wings
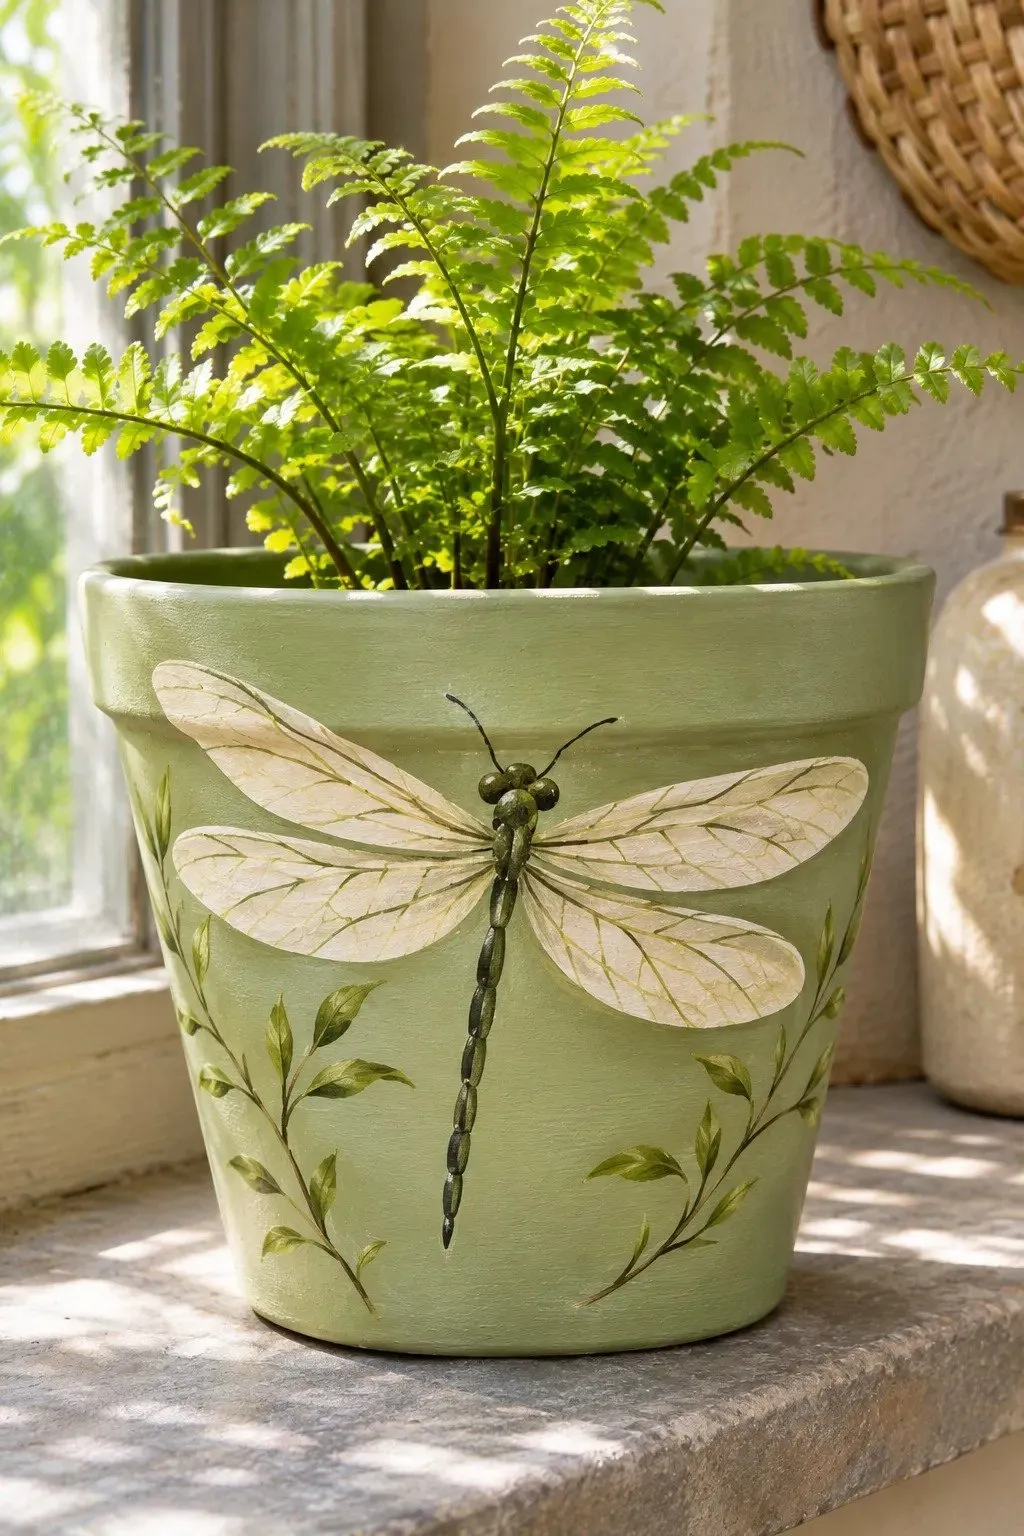
A dragonfly’s wings do most of the drawing for you. On a dry celery-green base, sketch a slim body on a slight diagonal. From a point just behind the head, draw four long, narrow loops. Angle the upper pair toward the rim and the lower pair outward.
Fill the wings with a thin coat of ivory, letting a hint of green show through. Once dry, add just two branching veins per wing with a fine brush. Save the charcoal body for last so its clean edge covers the spot where all four wings meet.
Lace Print Band
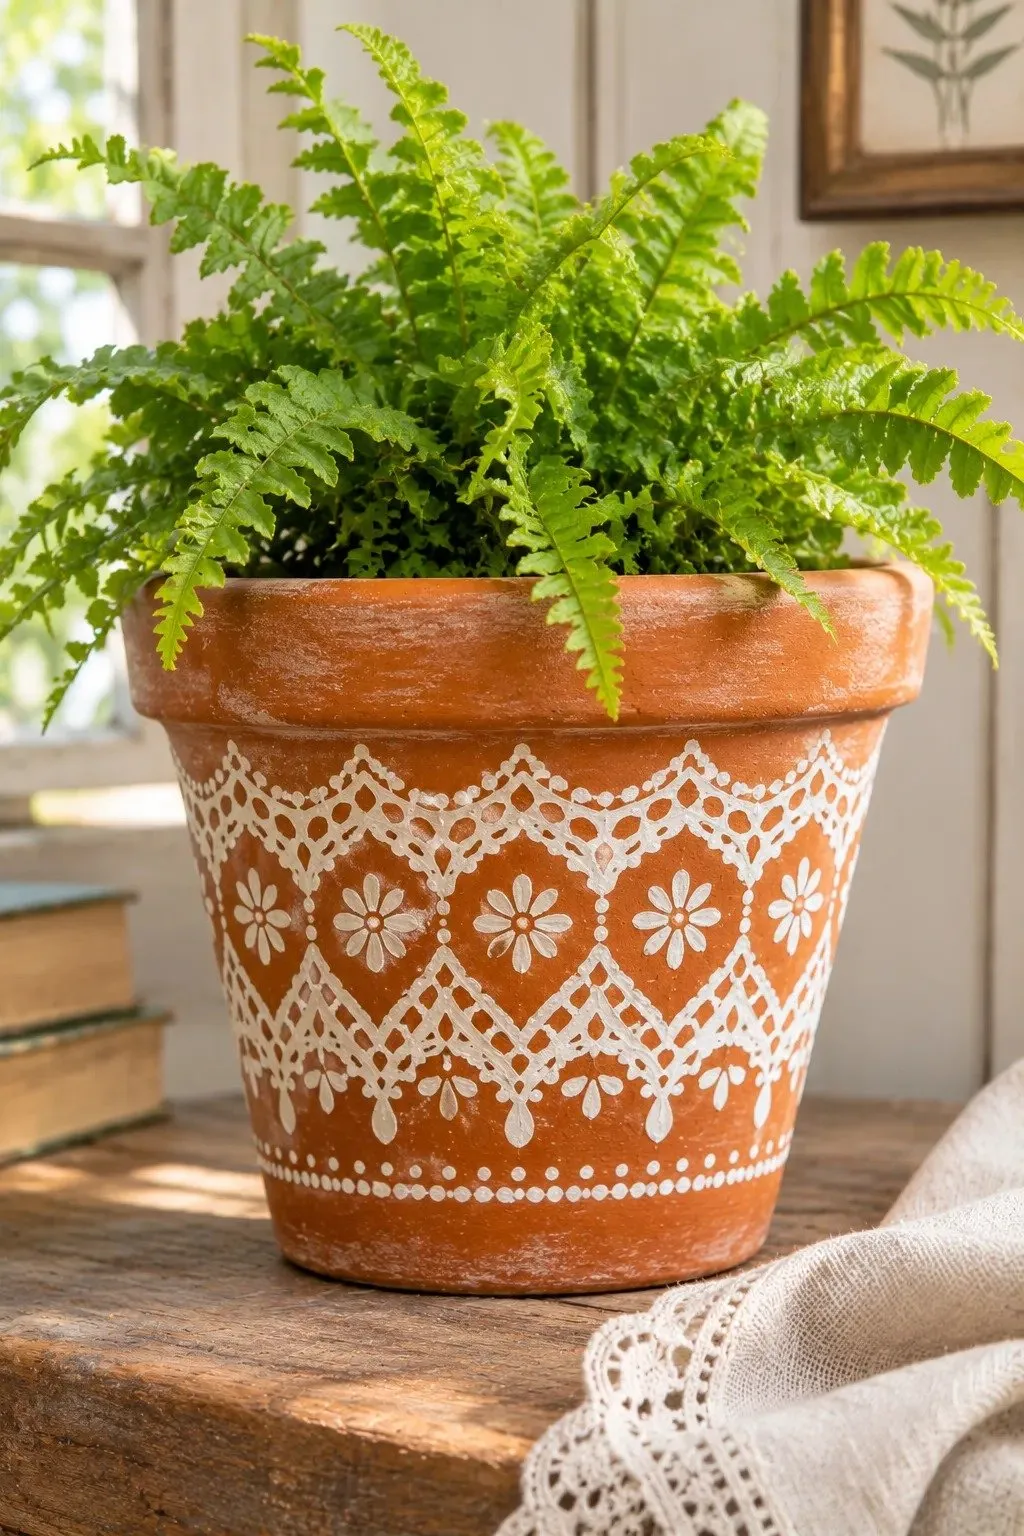
- An open lace pattern leaves the clearest print. Choose a scrap with holes wide enough for a small sponge to reach the clay.
- Wrap the lace snugly around the middle of the pot. Tape its ends together at the back and smooth any folds with your fingertips.
- Dip a sponge into white acrylic, blot most of it onto paper, and dab straight through the openings.
- Undo the tape and peel the lace away while the paint is damp. Lift outward as you go so the fabric clears the fresh pattern.
Test the lace on brown paper first. Paint passes through the holes, so the openings become white shapes while the threads leave fine clay-colored lines. That reversal is easy to miss when choosing fabric. Hold the sample at arm’s length to see which details will stand out on your shelf.
Malachite Rings
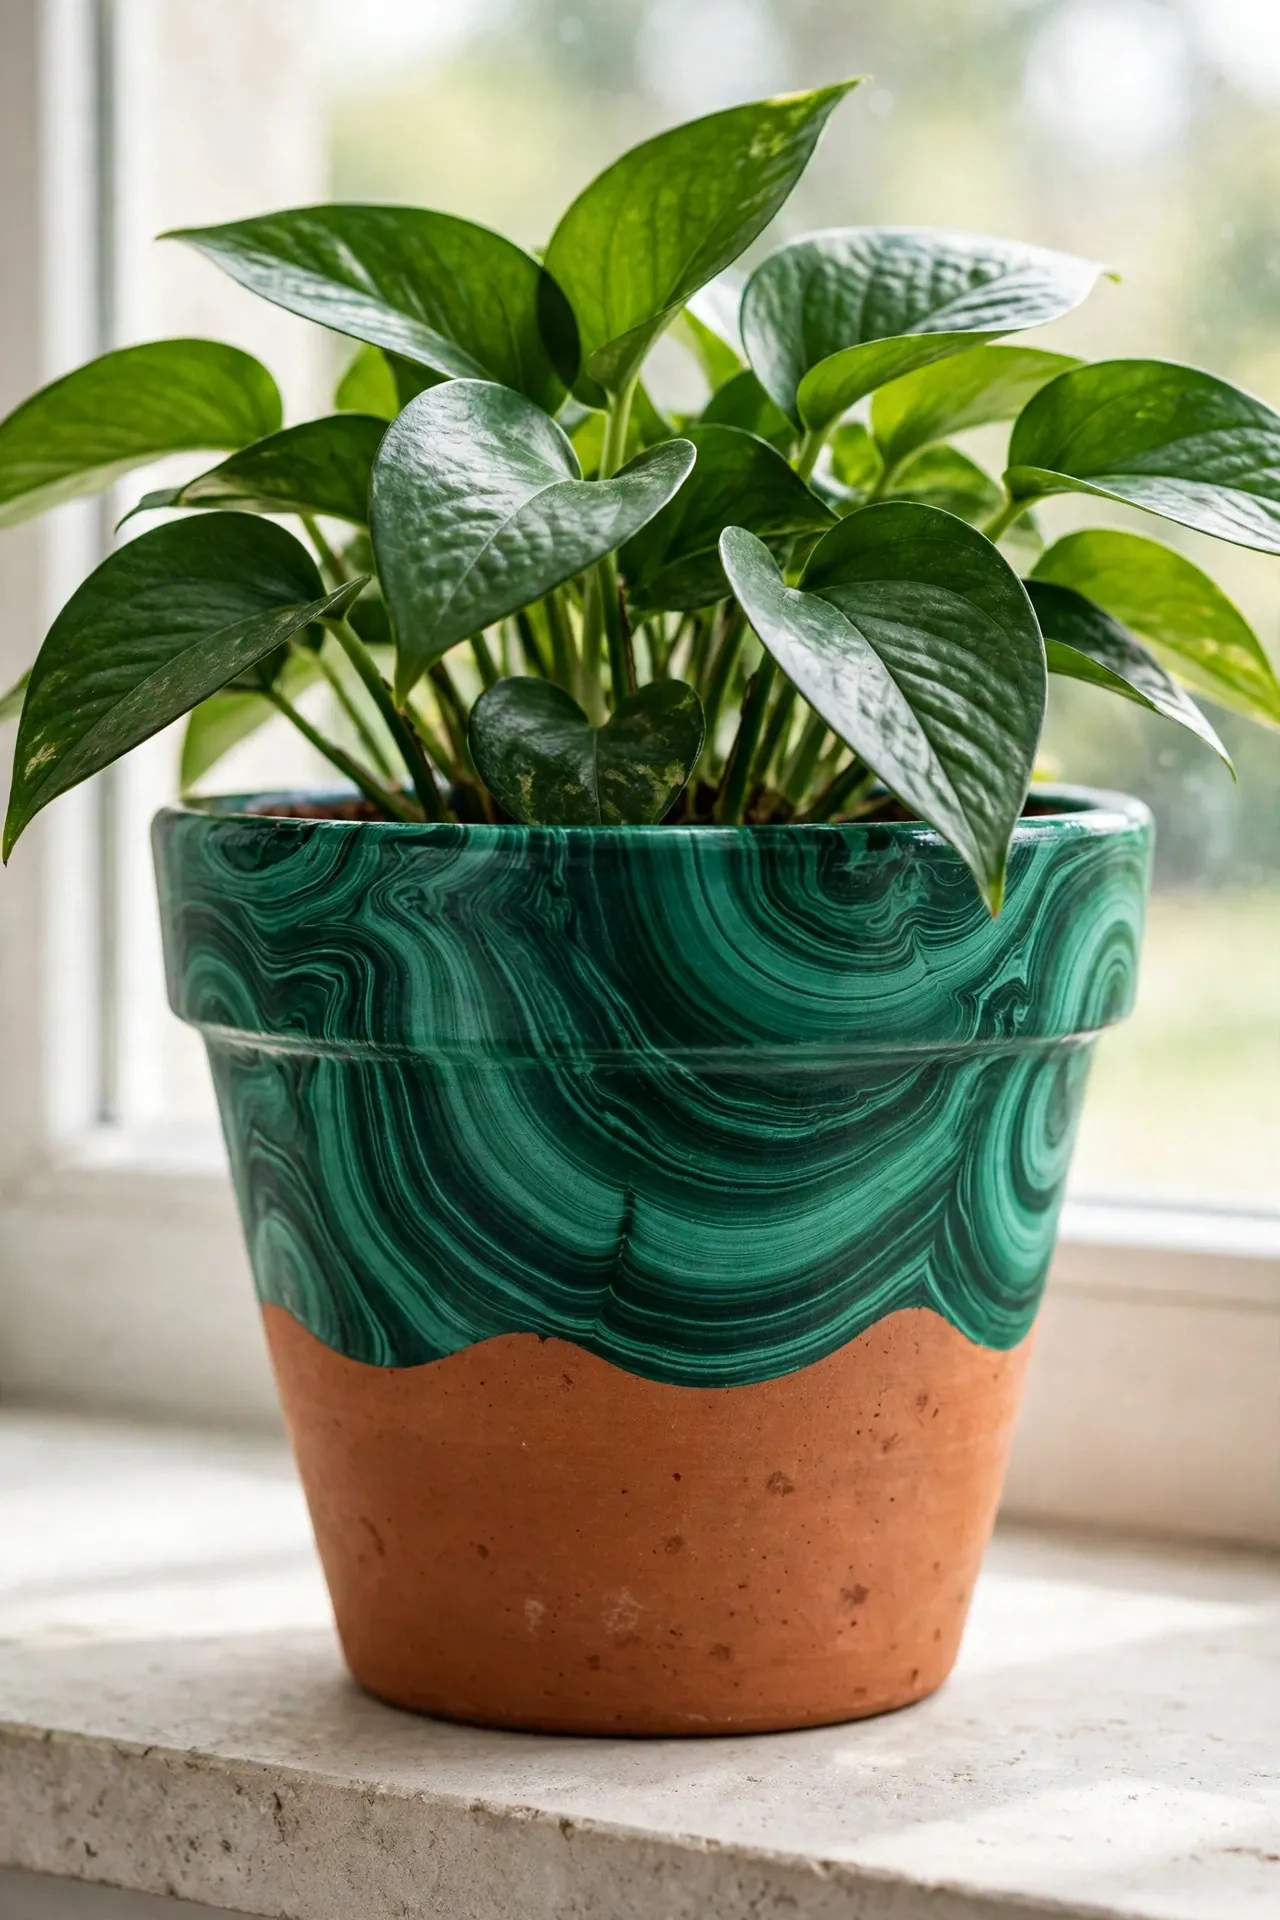
Quick Tip:
Put the center of one ring cluster just below the rim and another halfway down the pot. Let some rings disappear over the edge so the pattern looks like a section cut from a larger stone.
Paint the pot emerald, then sketch two small, lopsided ovals in pine green. Build outward from each oval with loose bands of jade and dark green. Where two clusters meet, bend the next band around both. A fine liner brush makes the narrow seams that give malachite its layered look.
Vintage Book Spines

BEFORE
From a reading chair, tiny painted titles disappear into the background. A row of equal-width rectangles can look more like stripes than books.
AFTER
A broad oxblood volume beside two slim navy ones gives the shelf a recognizable rhythm. Paired gold lines near the top and bottom suggest old bindings, even from across the room.
Sketch the divisions in pencil, placing the widest spine where it will face the chair. Fill each panel with a muted color and let it dry. Use a gold paint pen for the binding lines. Save the widest panel for a short title you love, lettered in ivory down the center.
Paper Airplane Trail

- Fly the plane slightly uphill. Cut a slim paper triangle, tilt its nose toward the rim, and trace it onto a dry sky-blue base.
- Fill the triangle with white acrylic. When it dries, draw a fine navy line from the nose to a point halfway along the back edge to suggest the center fold.
- Lightly pencil a flight path curling away from the tail. Carry it around the side of the pot and include one loose loop.
- Follow the path with short navy dashes. Leave a small gap where the loop crosses itself so the turn stays easy to follow.
Set the planter on your desk before deciding where the trail ends. From your seat, the entire plane and most of the loop should be visible in one glance. On a narrow pot, a single generous curve reads more clearly than a tight loop squeezed beneath the wing.
Quilt Star Medallion
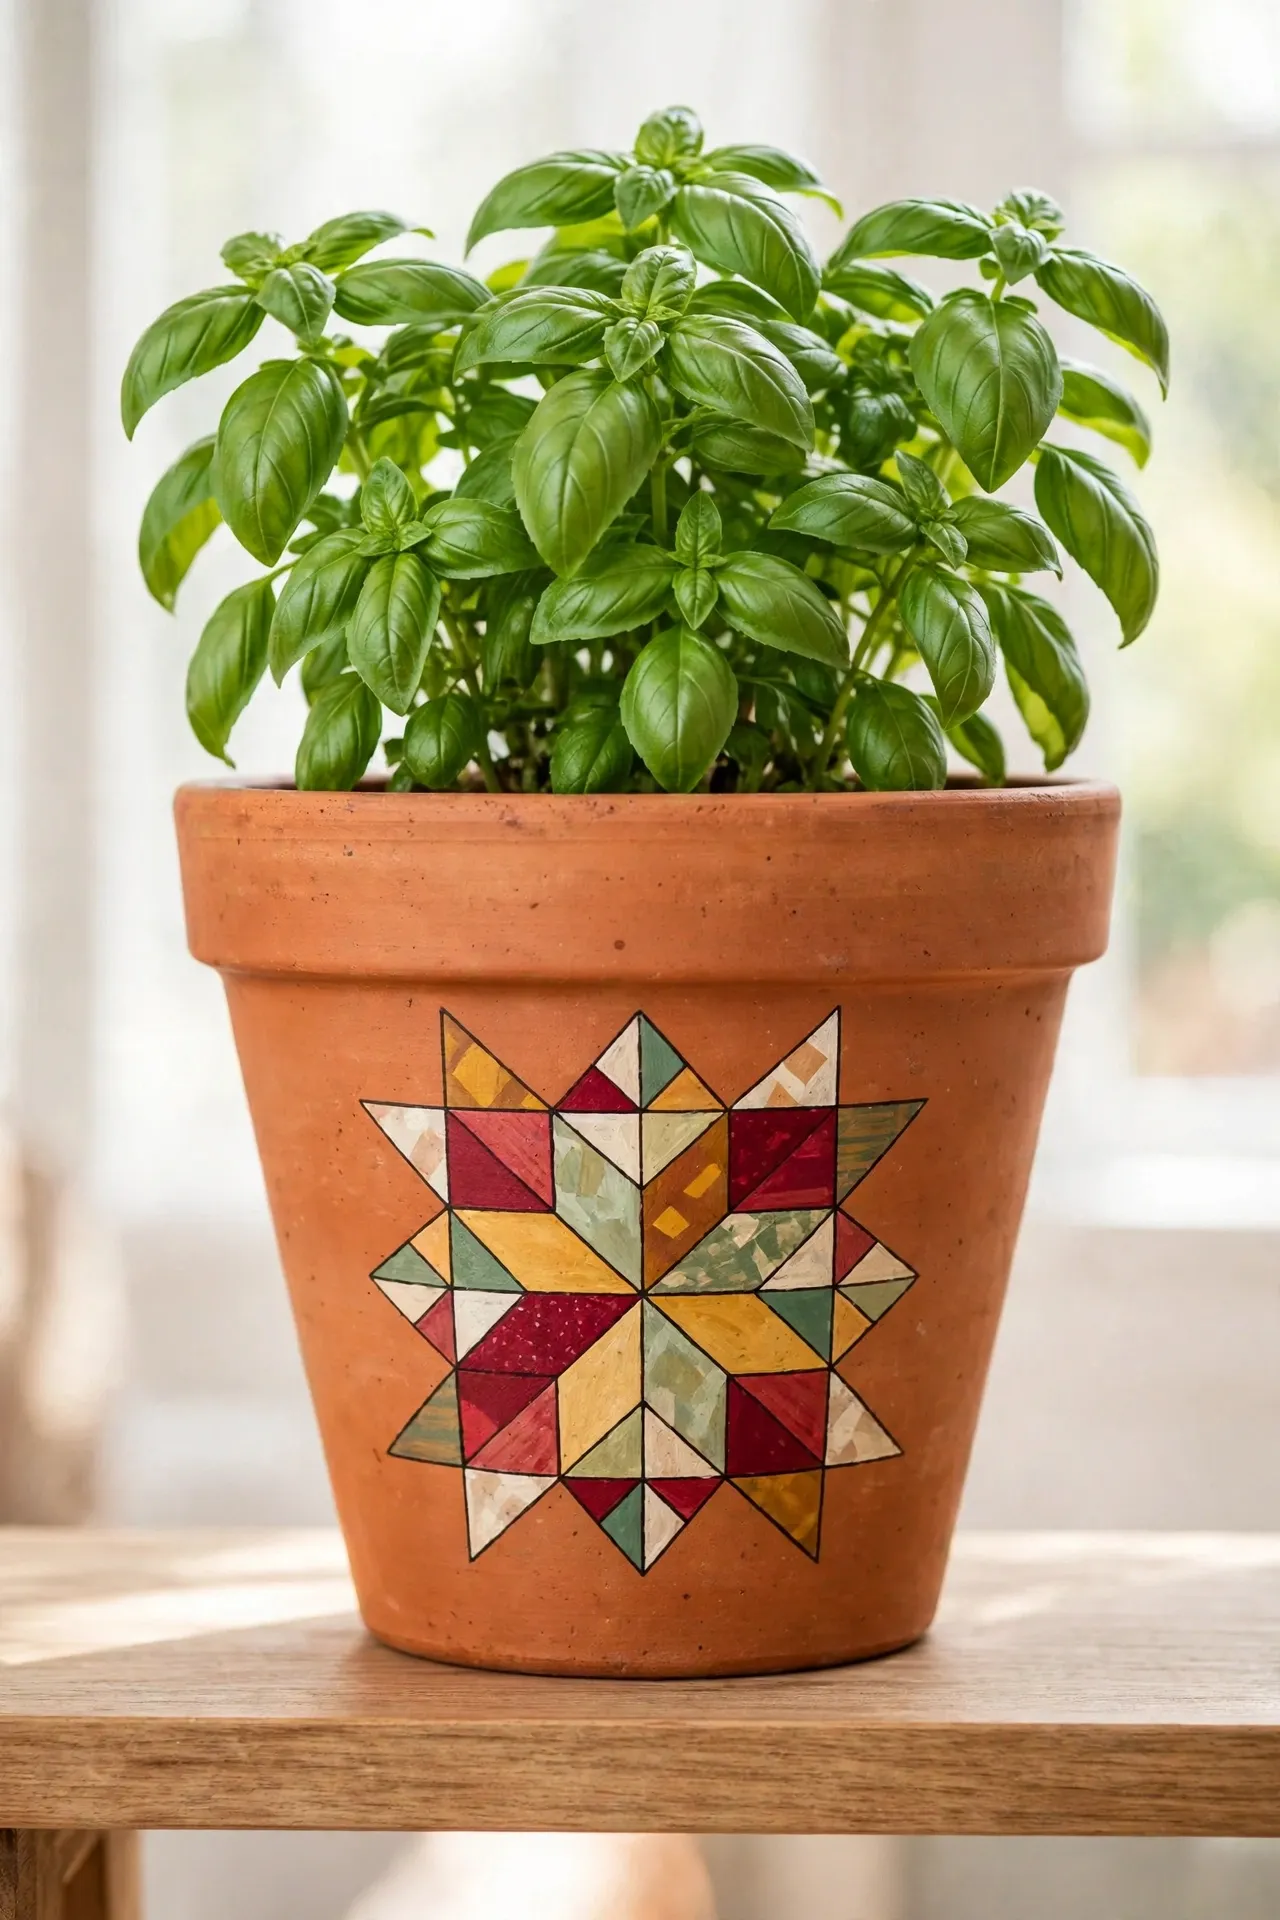
| Design detail | Indigo patchwork | Rose patchwork |
|---|---|---|
| Base coat | Warm ivory | Dusty rose |
| Star points | Alternate indigo and faded blue | Alternate brick red and pale blush |
| Center square | Faded blue | Brick red |
| Rim detail | One narrow indigo line | A thin blush edge |
A quilt star starts with a square small enough to sit flat against the front of your pot. Trace it, then mark the midpoint of each side. Sketch two outward-facing triangles along each edge to make eight points. Alternate the two paint colors so each triangle reads as a separate fabric patch.
Dandelion Seed Drift
DO
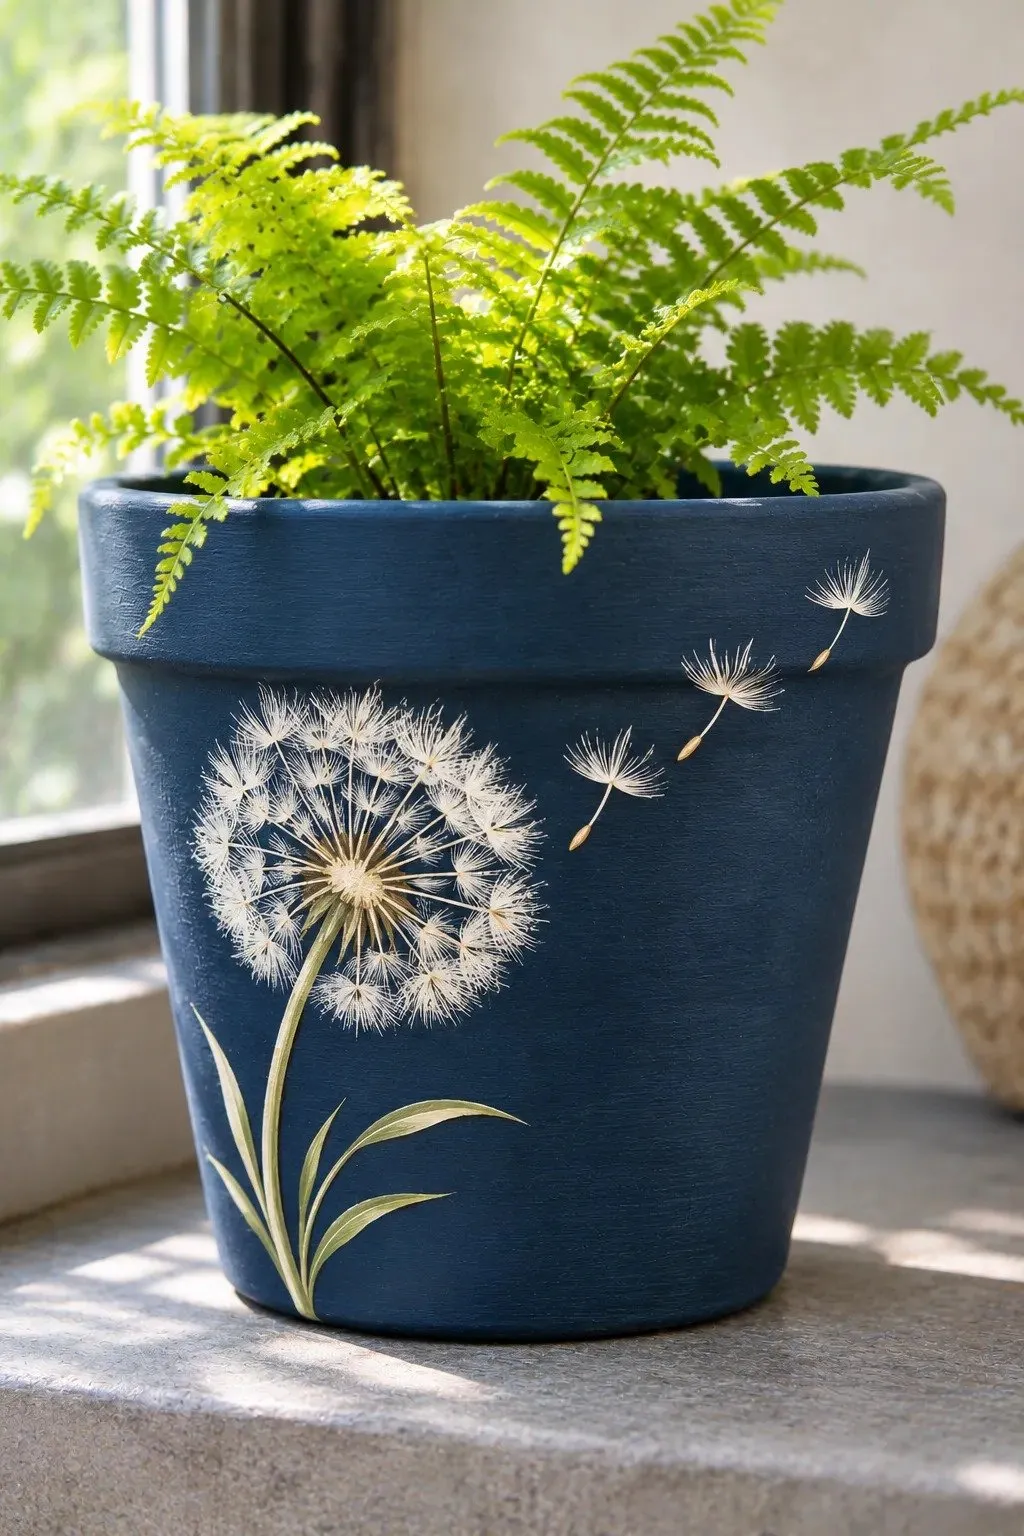
- Give the breeze a direction. Tilt a slender stem to the right, then place three drifting seeds a little higher on that side.
- Paint a small tan center and draw fine ivory spokes outward, leaving a few gaps on the side the seeds drift from.
- Finish each loose seed with a tiny brown grain at one end and a fan of short ivory strokes at the other.
DON’T
- Don’t fill every gap in the seed head. The blue showing through keeps it airy.
- Don’t put the loose seeds in a straight row.
- Don’t use the same thick brush for the stem and the fine seed hairs.
Practice the seed head on dark scrap paper to see how much ivory your brush carries. Start each spoke at the center and ease up on the pressure as you pull outward. A nearly dry tip leaves a faint, wispy end that suits the dandelion better than a blunt white dot.
Ribbon Bow Motif

Best placement: Just below the rim, with room for one tail to curl lower than the other.
Brush: A small flat brush whose width matches the ribbon you want to paint.
Palette: Pale pink for the pot, cherry red for the ribbon, and burgundy for the folds.
Sketch the knot first so both loops meet in the same place. With the flat brush, sweep each loop outward and back, leaving pink visible inside. Pull the tails down from the knot. Once dry, tuck a short burgundy stroke inside each loop where the ribbon appears to fold under.
Amber Tortoiseshell
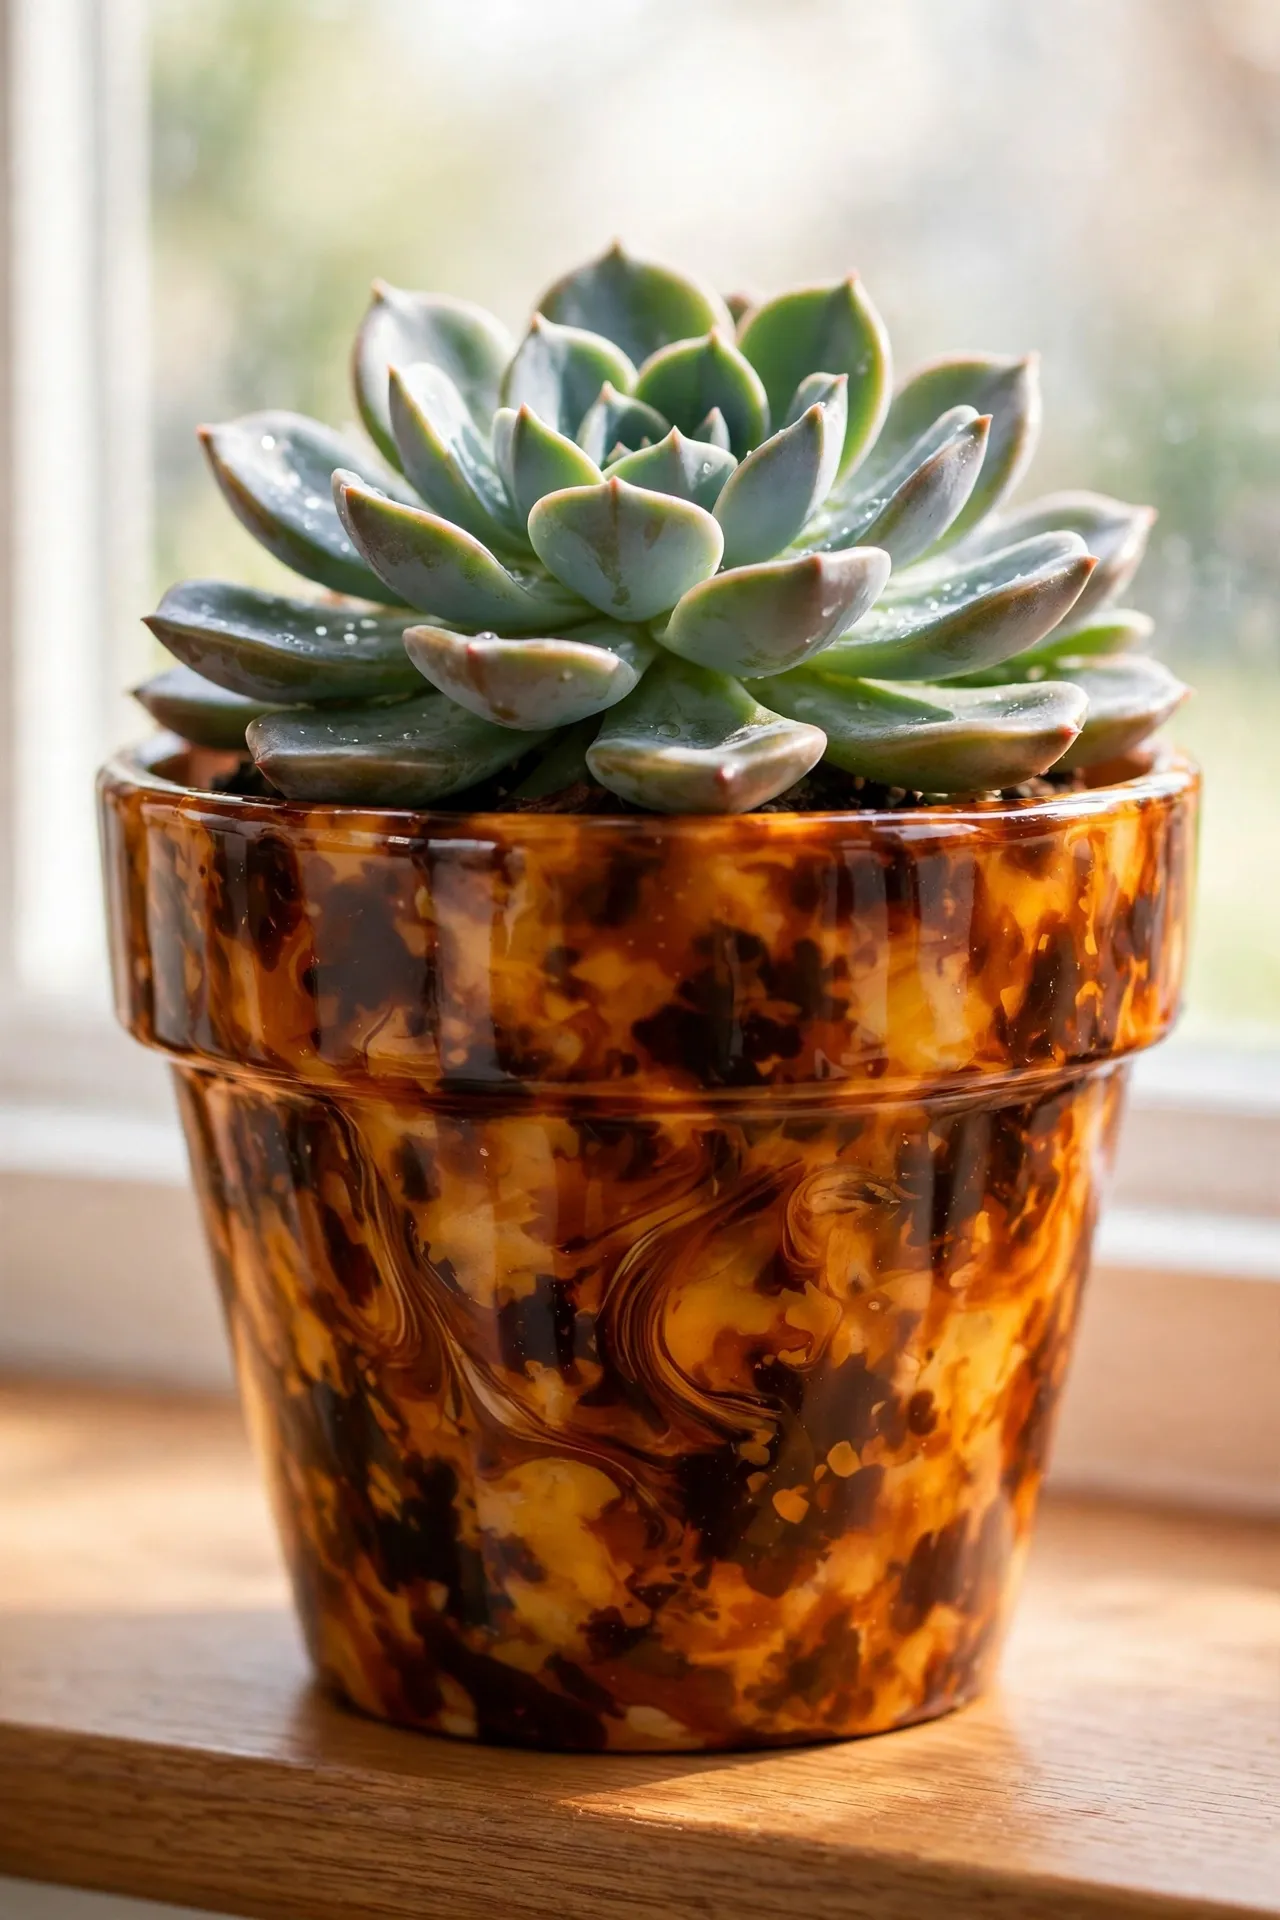
The secret to a convincing tortoiseshell pattern is the amber you leave showing. Cover the clay with golden ochre acrylic and let it dry. Tear a small piece from a sponge, dip the ragged edge in caramel paint, and dab uneven clusters across the surface.
While the caramel is still damp, add a touch of espresso brown inside a few clusters. Tap one edge of each dark mark with a clean sponge corner, leaving the opposite edge sharp. Turn the pot after every few dabs so the patches vary in shape and spacing.
Garden Radish Bunches

- Hang each painted bunch from its leaves. Mark the meeting point of three stems, then sketch the radishes below it at slightly different heights.
- Paint each bulb crimson, leaving a small crescent of the cream base visible at its lower tip.
- Pull a thin pink root from each pale tip. Give one root a bend and another a tiny fork.
- Join the bulbs to the meeting point with olive stems, then use short, angled strokes to build a loose spray of leaves above it.
For a kitchen windowsill, paint one generous bunch on the front and a smaller one on the back. That gives you a second view when you turn the chives toward the light. Keep the roots above the saucer line so their little forks stay visible once the pot is in place.
Vintage Enamelware Rim

Quick Tip:
For a fine enamel-style edge, turn the pot under the brush. Rest your painting hand on the table and slowly rotate the empty pot with your free hand, keeping the brush tip against the outer lip.
Choose warm ivory for the body and deep navy for the lip, a color pairing familiar from old enamel pitchers. Once the navy dries, use a nearly dry brush to tap two tiny charcoal flecks along the edge. Check them from arm’s length before deciding whether the rim needs another mark.
Big Dipper Constellation
BEFORE
From across the room, a spray of white dots on a dark planter can look like falling snow. Even a carefully placed constellation gets lost when every dot is equally bright.
AFTER
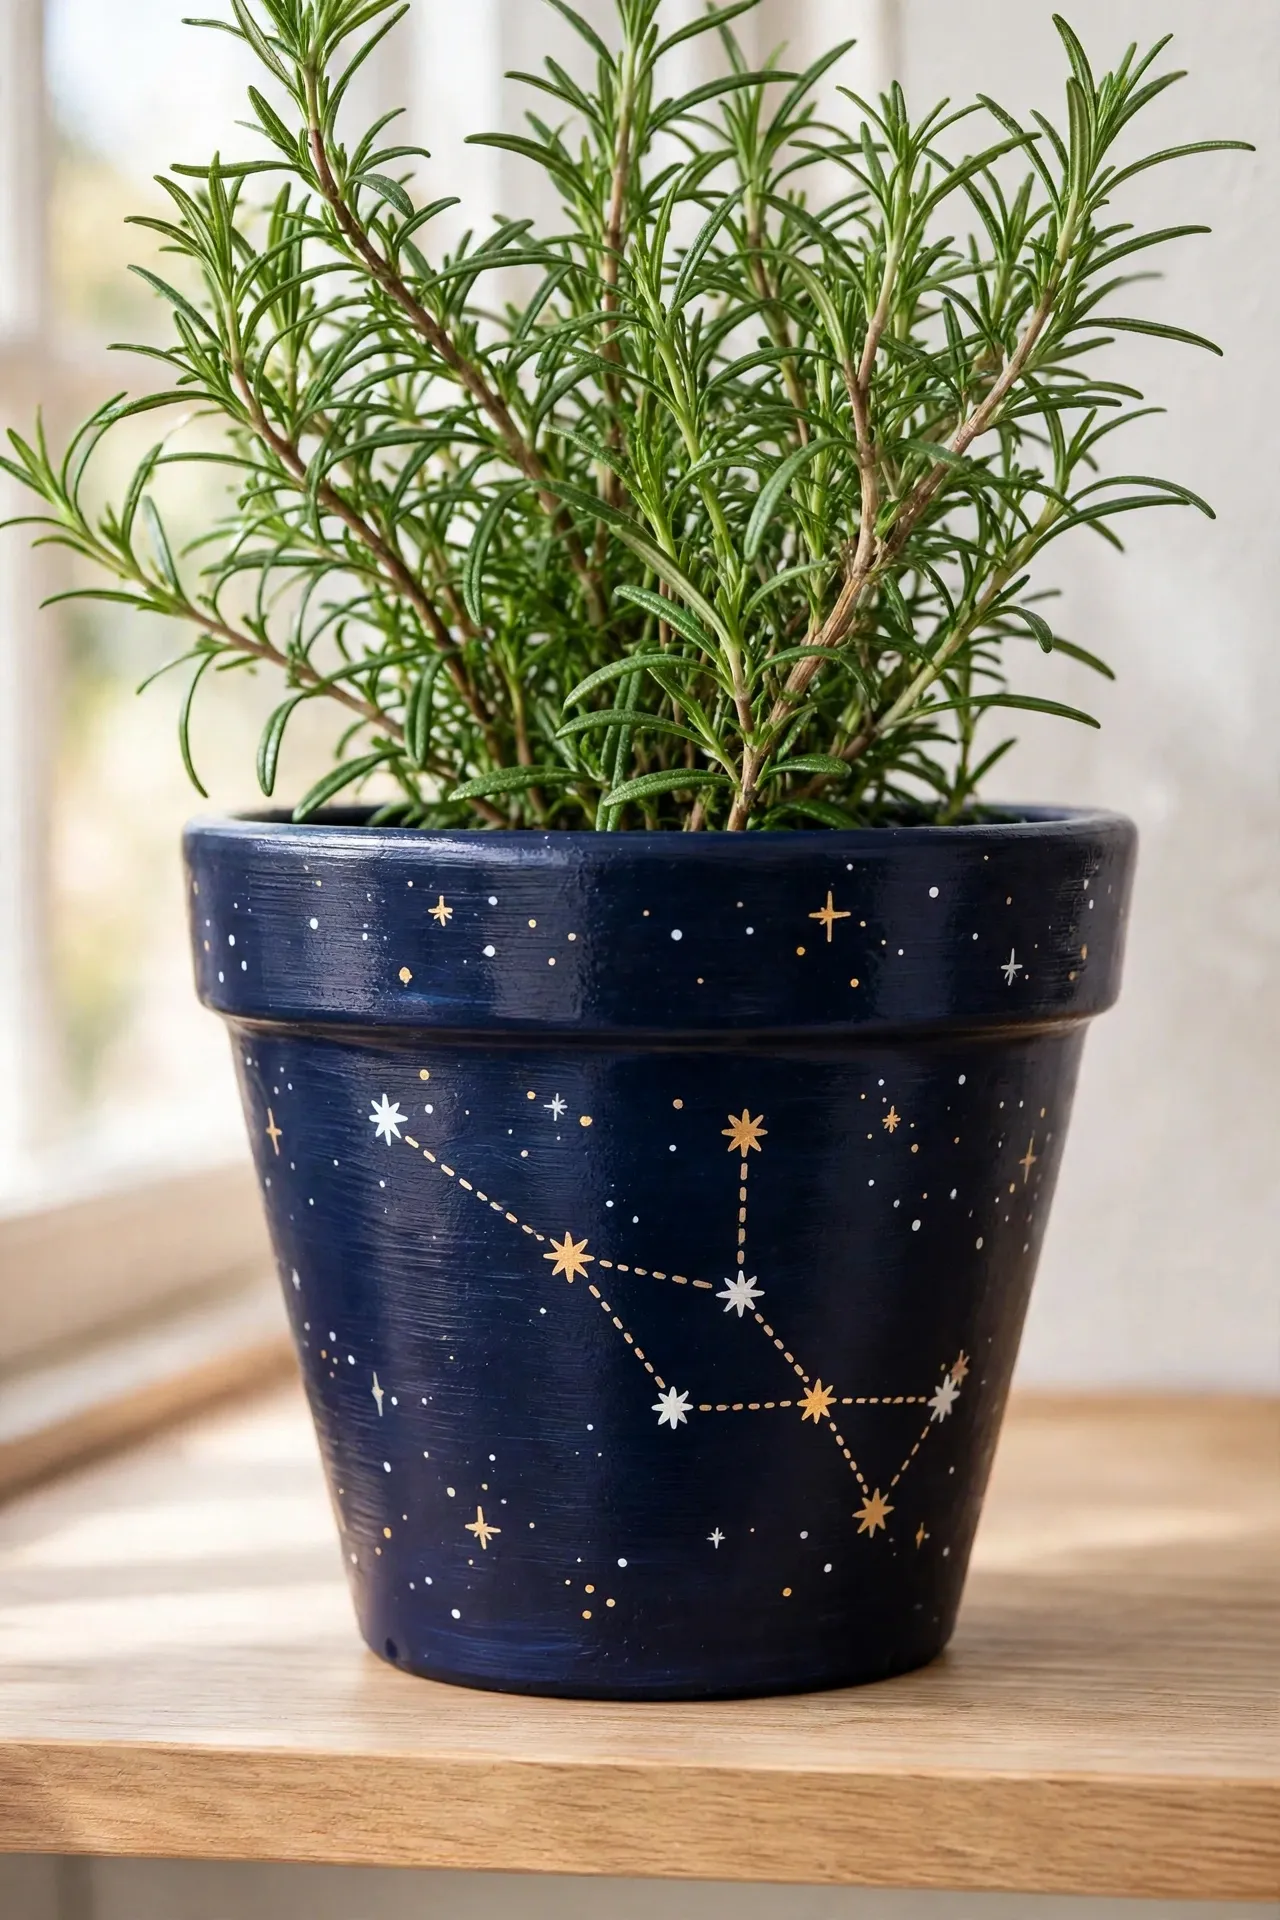
Seven larger ivory dots bring the Big Dipper into focus. Four outline its bowl, and three more extend from one corner to form the bent handle.
Cut a paper strip the width of the pot’s visible face and pencil the seven points onto it. Check the shape from your shelf before transferring the dots to the clay. Connect them with fine gray lines, then add a few smaller stars around the sides, well clear of the handle.
Woodland Mushroom Cluster

- Let the tallest mushroom lean over the smallest one. Sketch three stems at different heights, keeping their bases just above the saucer.
- Fill the stems with warm cream, widening each one slightly where it meets the ground.
- Paint a shallow russet dome across the tallest stem and rounder cinnamon caps on the other two. Give one cap a tilted lower edge so a sliver of ivory underside shows.
- Add three fine tan gill lines to the exposed underside. Finish with a few ochre grass blades around the stems.
Leave a patch of plain green under the leaning cap so its silhouette stays readable. For a little depth, let one grass blade cross in front of a cream stem and tuck two shorter blades behind its neighbor. That overlap helps all three mushrooms look rooted in the same patch of ground.
Basketweave Brushstrokes

| Design choice | Fine wicker | Broad basket strips |
|---|---|---|
| Brush | Fine round liner | Small flat brush |
| Each bundle | Four thin parallel lines | Two broad parallel strokes |
| Base showing through | Hairline gaps between strands | A narrow brown channel between strips |
| Best placement | A band beneath the rim | Across the body of a larger pot |
The woven effect comes from changing direction. Mark a faint row of squares on the dry brown base, then fill one square with horizontal strokes and the next with vertical strokes. Reverse that order in the row below. Leave a sliver of brown between bundles to suggest shadows where the strands cross.
Art Deco Fans
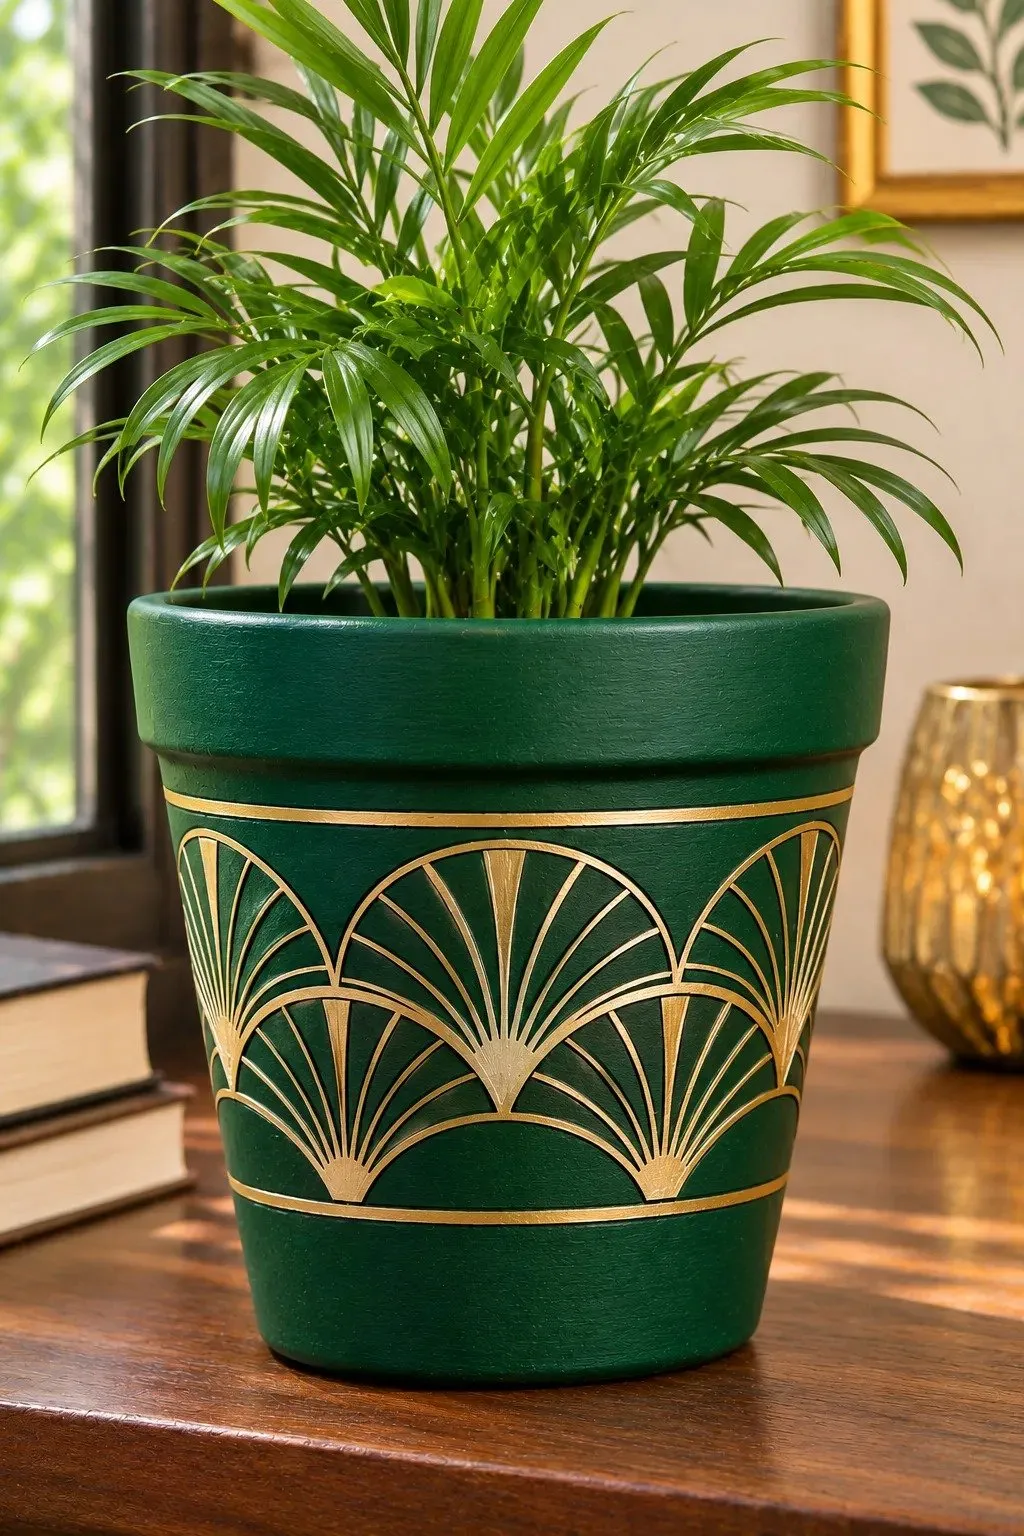
DO
- Start each fan with its center ray. That upright line gives you a guide for spacing the diagonal rays on either side.
- Trace around a semicircular paper template to keep the fan outlines the same height.
- Use a fine gold paint pen over a dry emerald base so the thin lines stand out.
DON’T
- Don’t crowd the spokes. Five rays are enough for a fan the width of your thumb.
- Don’t start every stroke at the center, where overlapping paint can leave a gold blob.
- Don’t press the pen tip down on the pot to restart the flow. Prime it on scrap paper.
For fine detail in pot painting, the direction of your stroke matters. Draw each ray from the curved outer edge toward the bottom center, lifting the pen just before the lines meet. The tiny gap keeps the base of each fan crisp, even on a small planter.
House Number Planters
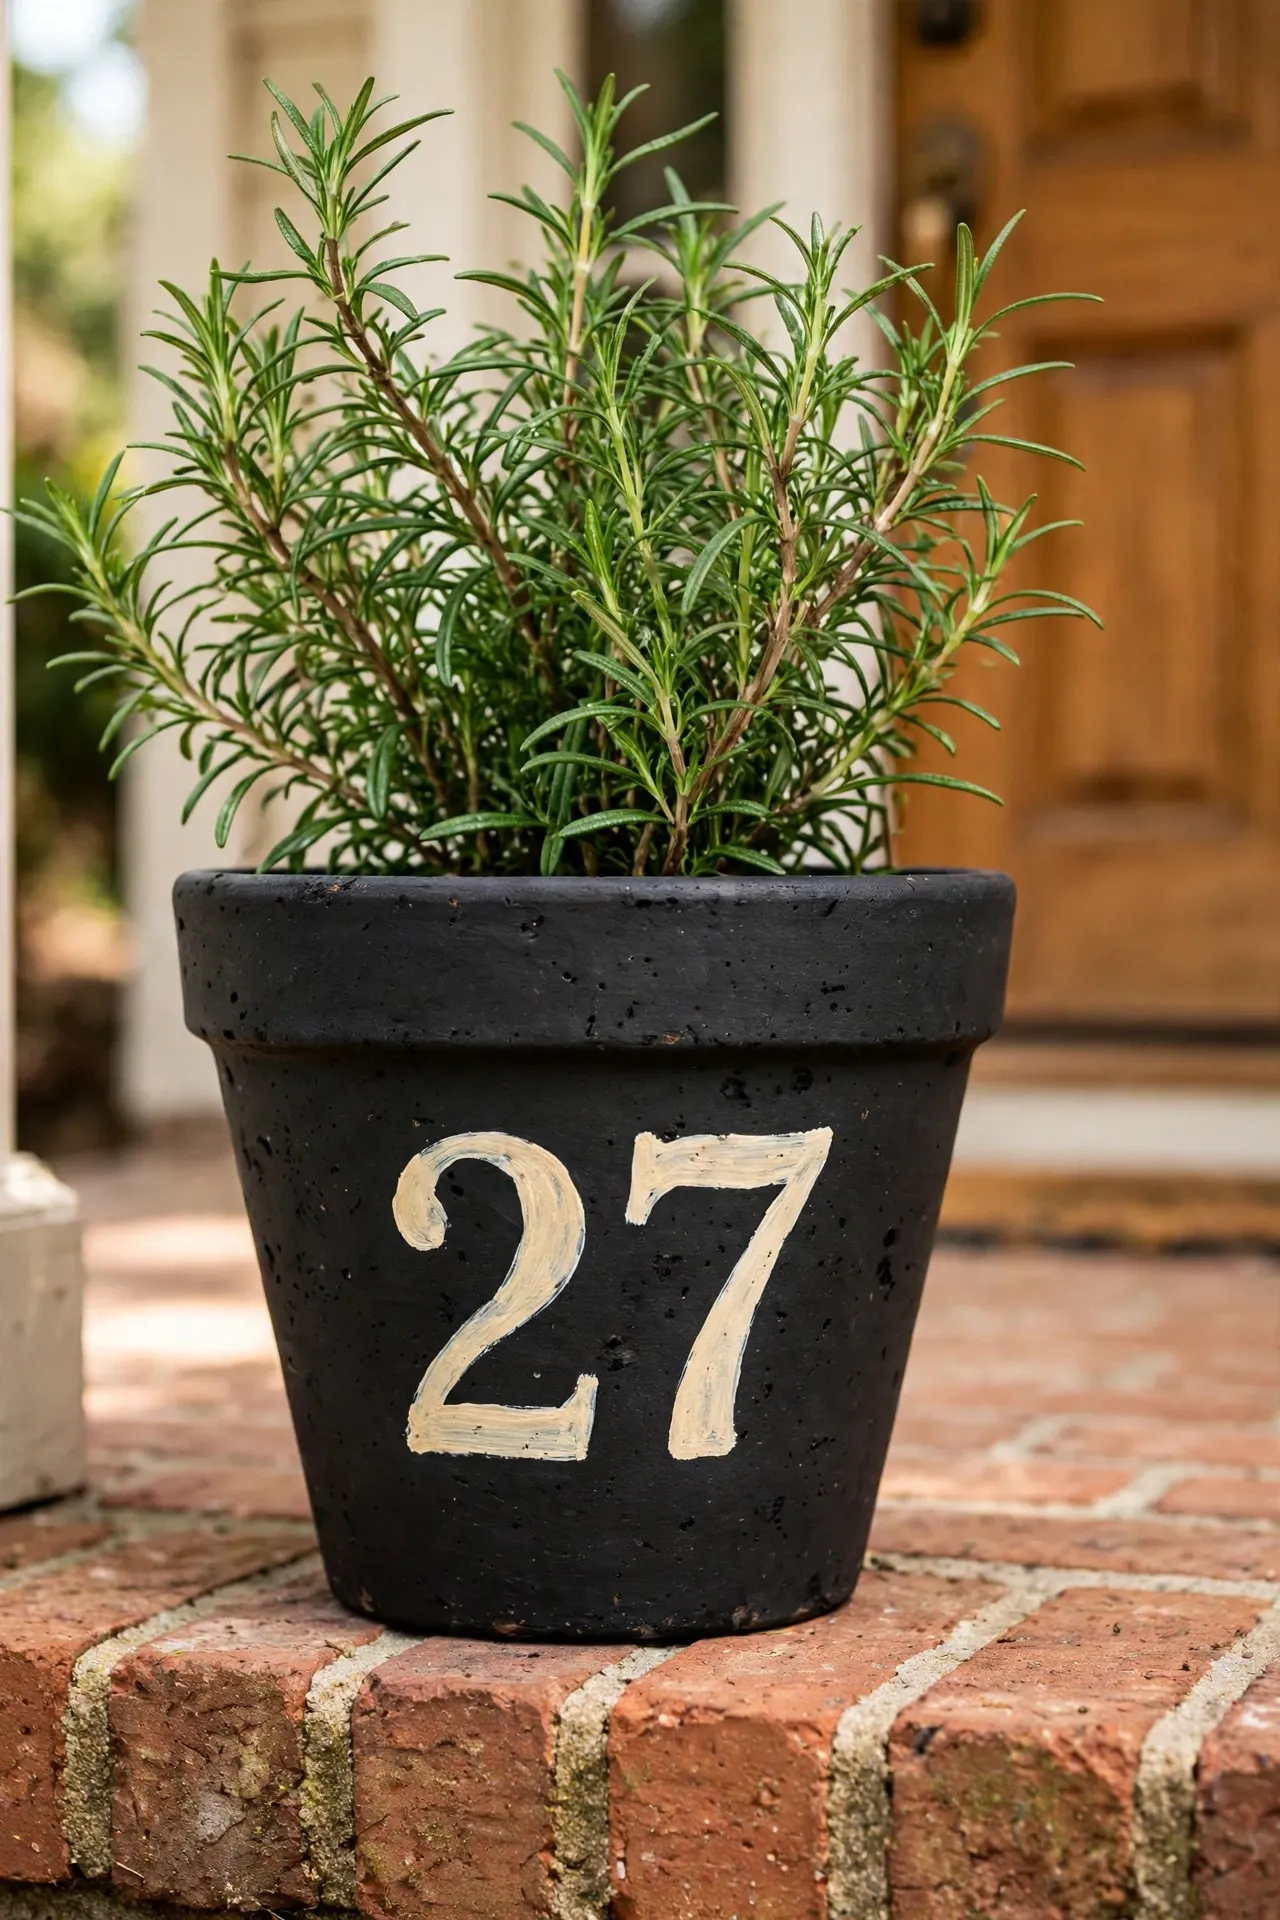
Best placement: A porch ledge where the whole house number is visible from the walkway.
Layout: One large numeral per pot, centered on the side facing visitors.
Lettering guide: Paper stencils with bold strokes and open centers for digits such as 6 and 8.
Paint choice: Exterior paint labeled for terracotta, in a color that contrasts with the clay.
Set the empty pots in place and tape a paper numeral to each one. Walk back to the gate and check whether you can read the address at a glance. Adjust the spacing before stenciling, then choose upright herbs that will leave the digits visible as they grow.
Conclusion
Before you open the paint, set a plain pot where you plan to display it. That glance can help you choose between fine gold fans you’ll enjoy up close and bold porch numbers you can read from the gate. Save 32 Expressive Pot Painting Ideas for Plain Clay Pots on Pinterest so you can find your favorite when you have a brush handy. Try it on one pot, then share the article with a friend who has a windowsill full of cuttings. Pick two colors you love and give that first pot a place in your home.